- Visit your workflow
- Click on Workflow Settings on the top left:

You can also open the workflow settings using
CMD + , on Mac, or Ctrl + , on Windows.Enable Workflow
If you’d like to pause your workflow from executing completely, you can disable it or re-enable it here.Error Handling
By default, you’ll receive notifications when your workflow throws an unhandled error. See the error docs for more detail on these notifications. You can disable these notifications for your workflow by disabling the Notify me on errors toggle: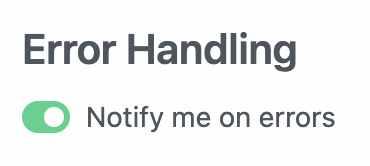
Auto-retry Errors
Out of Memory and Timeout ErrorsPipedream will not automatically retry if an execution fails due to an Out of Memory (OOM) error or a timeout. If you encounter these errors frequently, consider increasing the configuration settings for your workflow.
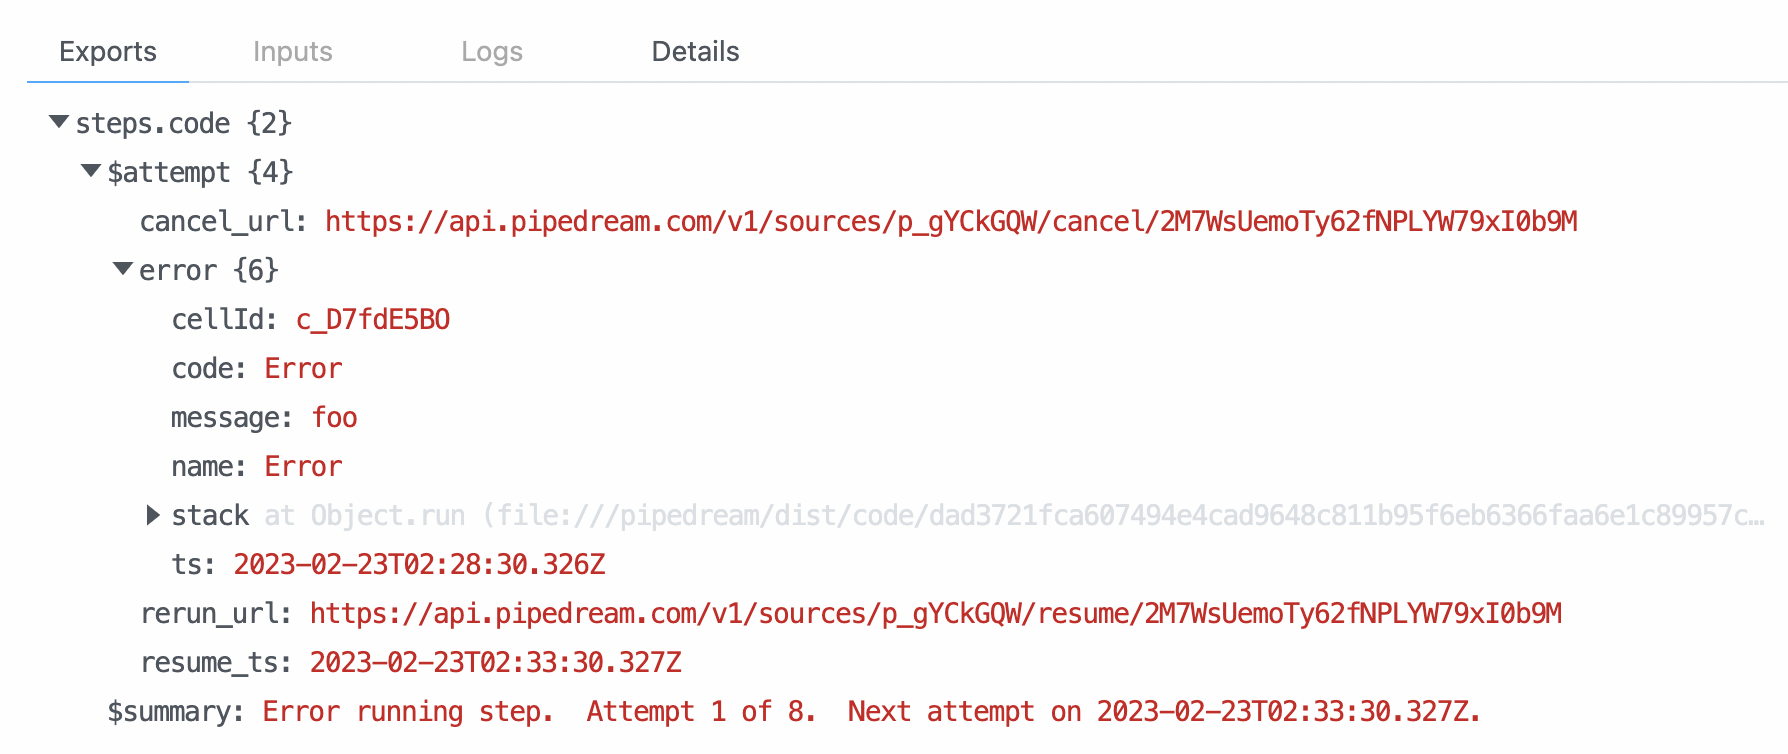
$summary property that tells you how many times the step has been retried, and an $attempt object with the following properties:
error— All the details of the error the step threw — the error, the stack, etc.cancel_url— You can call this URL to cancel the retryrerun_url— You can call this URL to proceed with the execution immediatelyresume_ts— An ISO 8601 timestamp that tells you the timestamp of the next retry
Send error notifications on the first error
By default, if a step fails on all 8 retries, and throws a final error, you’ll receive an error notification through your standard notification channel. But sometimes you need to investigate errors as soon as they happen. If you’re connecting to your database, and receive an error that the DB is down, you may want to investigate that immediately. On any workflow with auto-retry enabled, you can optionally choose to Send notification on first error. This is disabled by default so you don’t get emails for transient errors, but you can enable for critical workflows where you want visibility into all errors. For custom control over error handling, you can implement error logic in code steps (e.g.try / catch statements in Node.js code), or create your own custom error workflow.
Data Retention Controls
By default, Pipedream stores exports, logs, and other data tied to workflow executions. You can view these logs in two places: But if you’re processing sensitive data, you may not want to store those logs. You can Disable data retention in your workflow settings to disable all logging. Since Pipedream stores no workflow logs with this setting enabled, you’ll see no logs in the inspector or event history UI.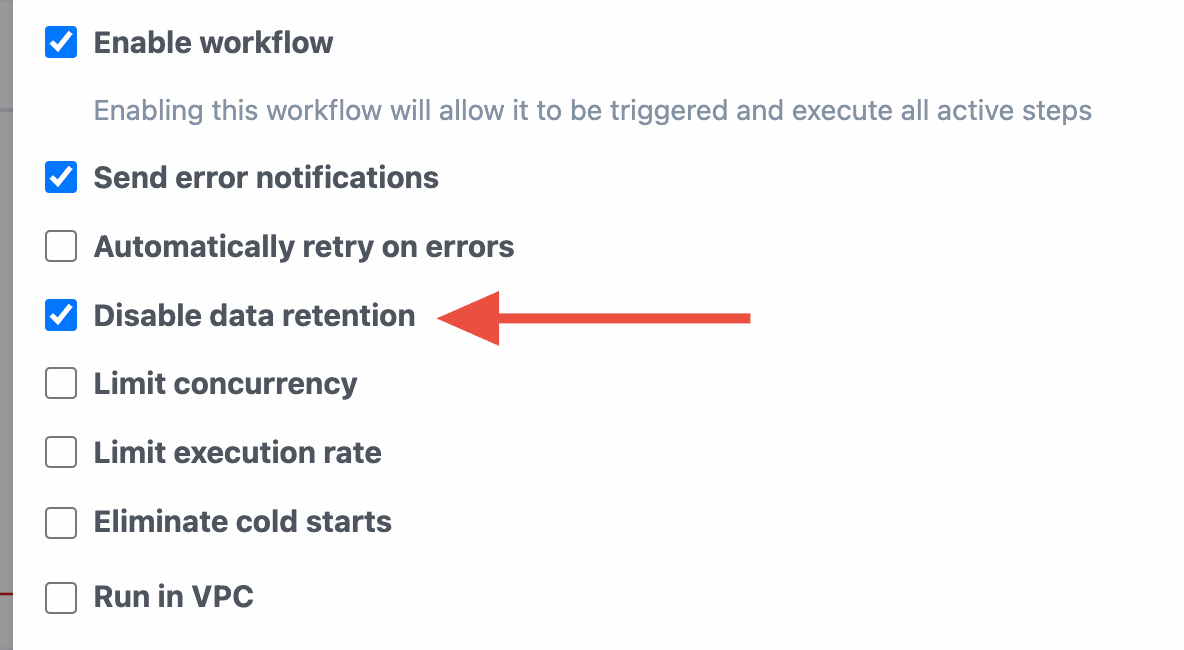
Constraints
- Data Retention Controls do not apply to sources: Even with data retention disabled on your workflow, Pipedream will still log inbound events for the source.
- No events will be shown in the UI: When data retention is disabled for your workflow, the Pipedream UI will not show any new events in the inspector or Event History for that workflow.
Avoid surfacing events in the builderEven with data retention disabled on your workflow, the builder will still surface inbound events when in build mode. To avoid surfacing potentially sensitive data here as well, refer to these docs.
Execution Controls
Execution Timeout Limit
Workflows have a default execution limit, which defines the time the workflow can run for a single execution until it’s timed out. If your workflow times out, and needs to run for longer than the default limit, you can change that limit here.Memory
By default, workflows run with of memory. If you’re processing a lot of data in memory, you might need to raise that limit. Here, you can increase the memory of your workflow up to . Increasing your workflow’s memory gives you a proportional increase in CPU, so increasing your workflow’s memory can reduce its overall runtime and make it more performant.How can my workflow run faster?See our guide on running workflows faster.
Concurrency and Throttling
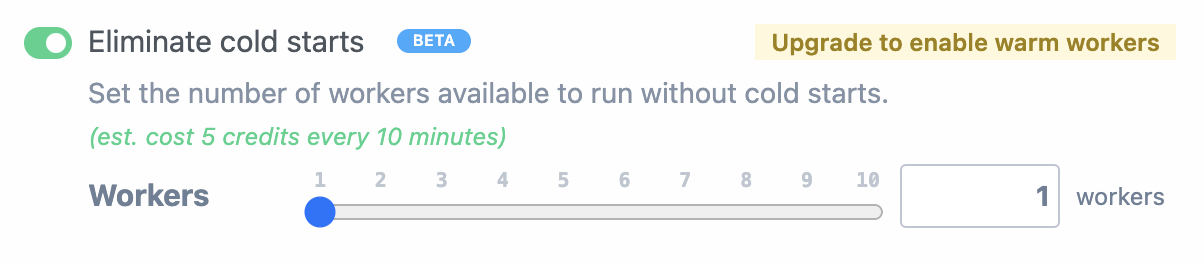
Manage the concurrency and rate at which events from a source trigger your workflow code.Eliminate cold starts
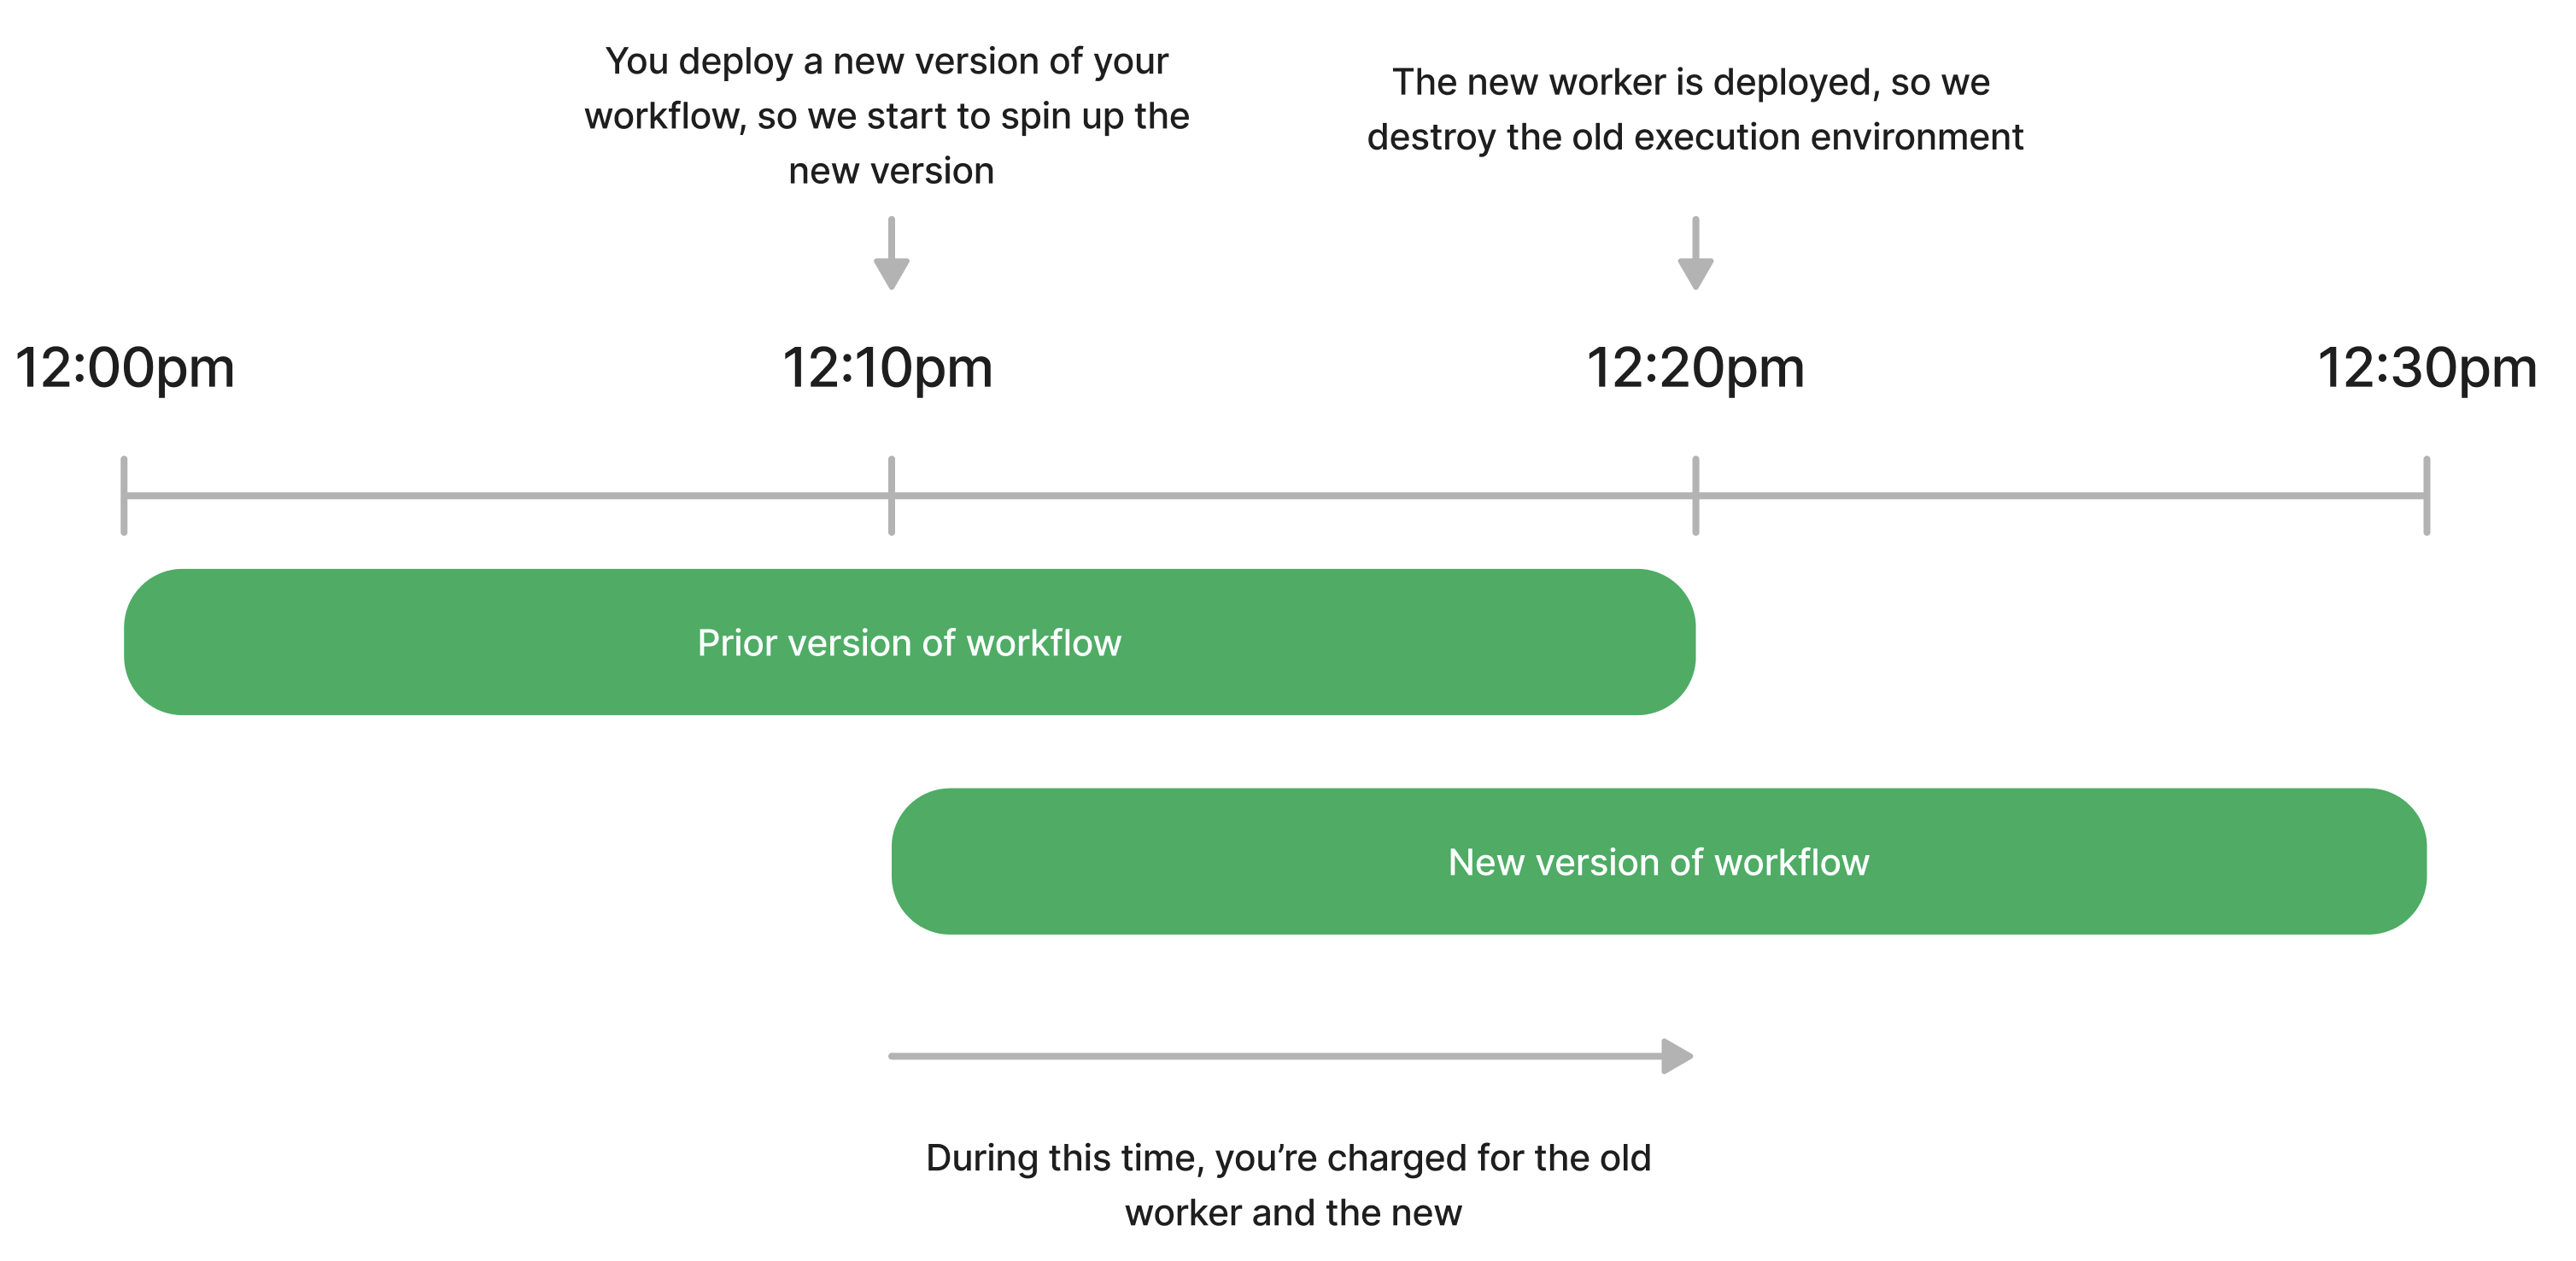
A cold start refers to the delay between the invocation of workflow and the execution of the workflow code. Cold starts happen when Pipedream spins up a new execution environment to handle incoming events. Specifically, cold starts occur on the first request to your workflow after a period of inactivity (roughly 5 minutes), or if your initial worker is already busy and a new worker needs to be initialized. In these cases, Pipedream creates a new execution environment to process your event. Initializing this environment takes a few seconds, which delays the execution of this first event. You can reduce cold starts by configuring a number of dedicated workers:- Visit your workflow’s Settings
- Under Execution Controls, select the toggle to Eliminate cold starts
- Configure the appropriate number of workers for your use case
When should I configure dedicated workers?
You should configure dedicated workers when you need to process requests as soon as possible, with no latency. For example, you may build an HTTP-triggered workflow that returns a synchronous HTTP response to a user, without delay. Or you may be building a Slack bot and need to respond to Slack’s webhook within a few seconds. Since these workflows need to respond quickly, they’re good cases to use dedicated workers.How many workers should I configure?
Incoming requests are handled by a single worker, one at a time. If you only receive one request a minute, and the workflow finishes execution in a few seconds, you may only need one worker. But you might have a higher-volume app that receives two concurrent requests. In that case, Pipedream spins up two workers to handle each request. For many user-facing (even internal) applications, the number of requests over time can be modeled with a Poisson distrubution. You can use that distribution to estimate the number of workers you need at an average time, or set it higher if you want to ensure a specific percentage of requests hit a dedicated worker. You can also save a record of all workflow runs to your own database, with the timestamp they ran (seesteps.trigger.context.ts), and look at your own pattern of requests, to compute the optimal number of workers.
Do compute budgets apply to dedicated workers?
No, compute budgets do not apply to dedicated workers, they only apply to credits incurred by compute from running workflows, sources, etc.How long does it take to spin up a dedicated worker?
It can take 5-10 minutes for Pipedream to fully configure a new dedicated worker. Before that time, you may still observe cold starts with new incoming requests.Pricing for dedicated workers
You’re charged credits for every a dedicated worker is live, per worker, per memory. You can view the credits used by dedicated workers in your billing settings: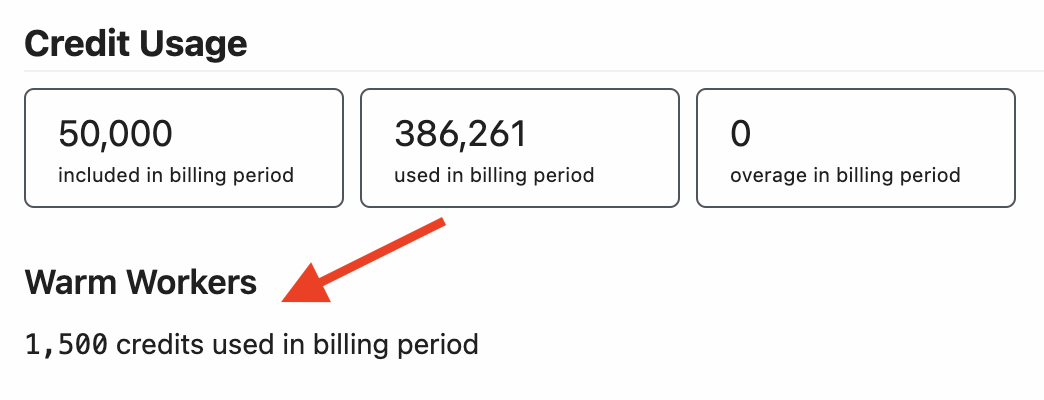
Limits
Each attachment is limited to25MB in size. The total size of all attachments within a single workflow cannot exceed 200MB.