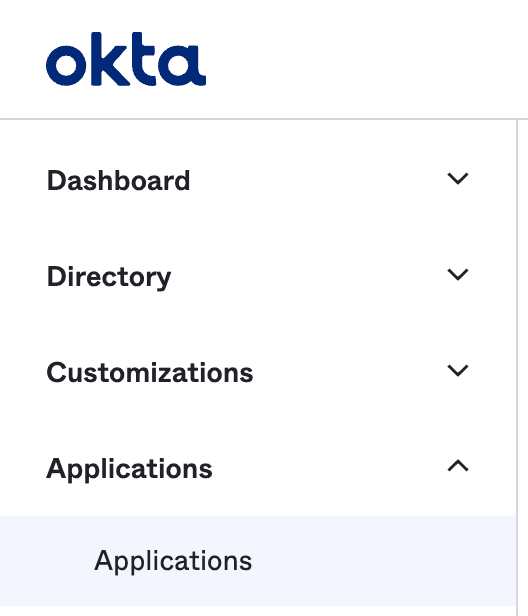
In your Okta Admin dashboard, select the Applications section and click Applications below that:
2
Browse App Catalog
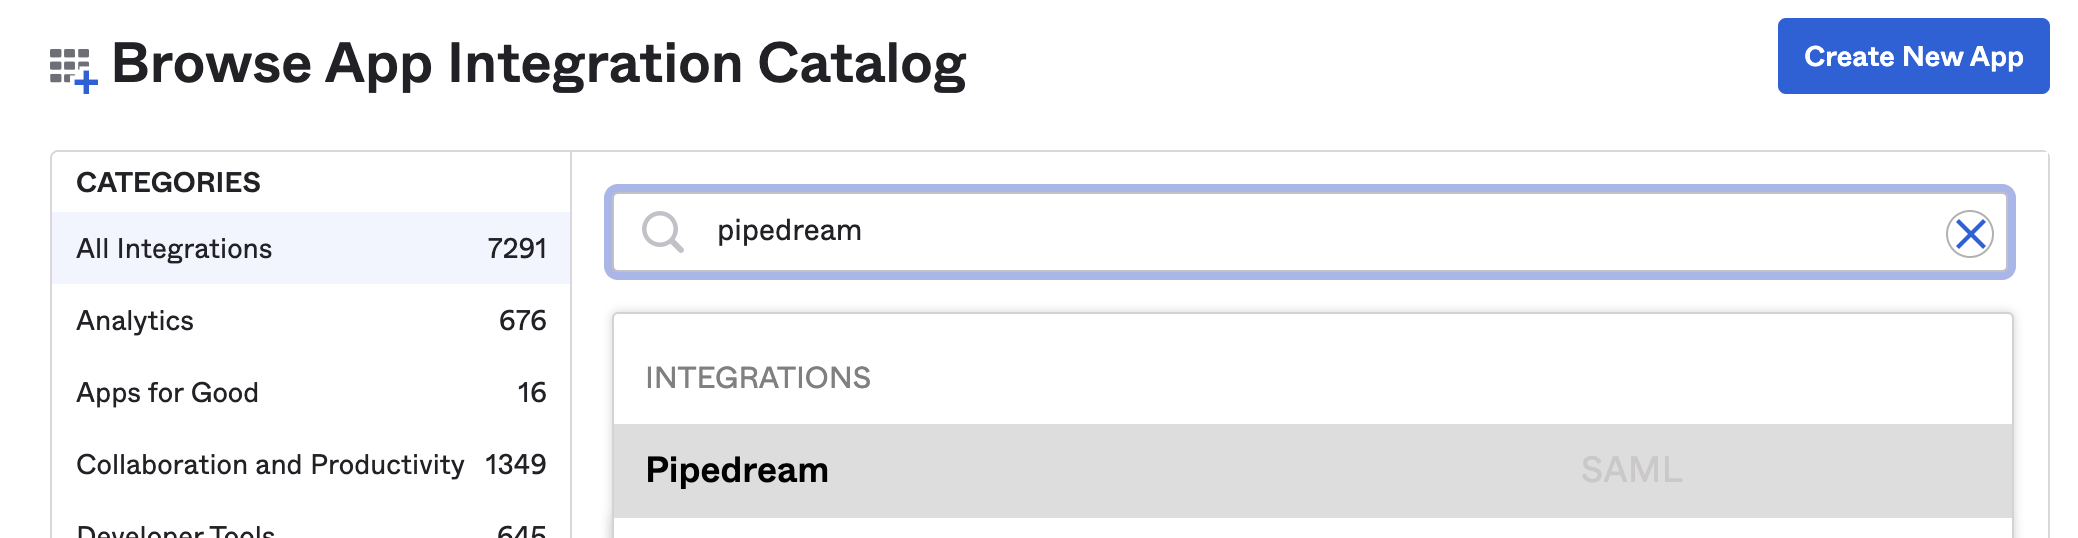
Click Browse App Catalog:
3
Search for Pipedream
Search for “Pipedream” and select the Pipedream app:
4
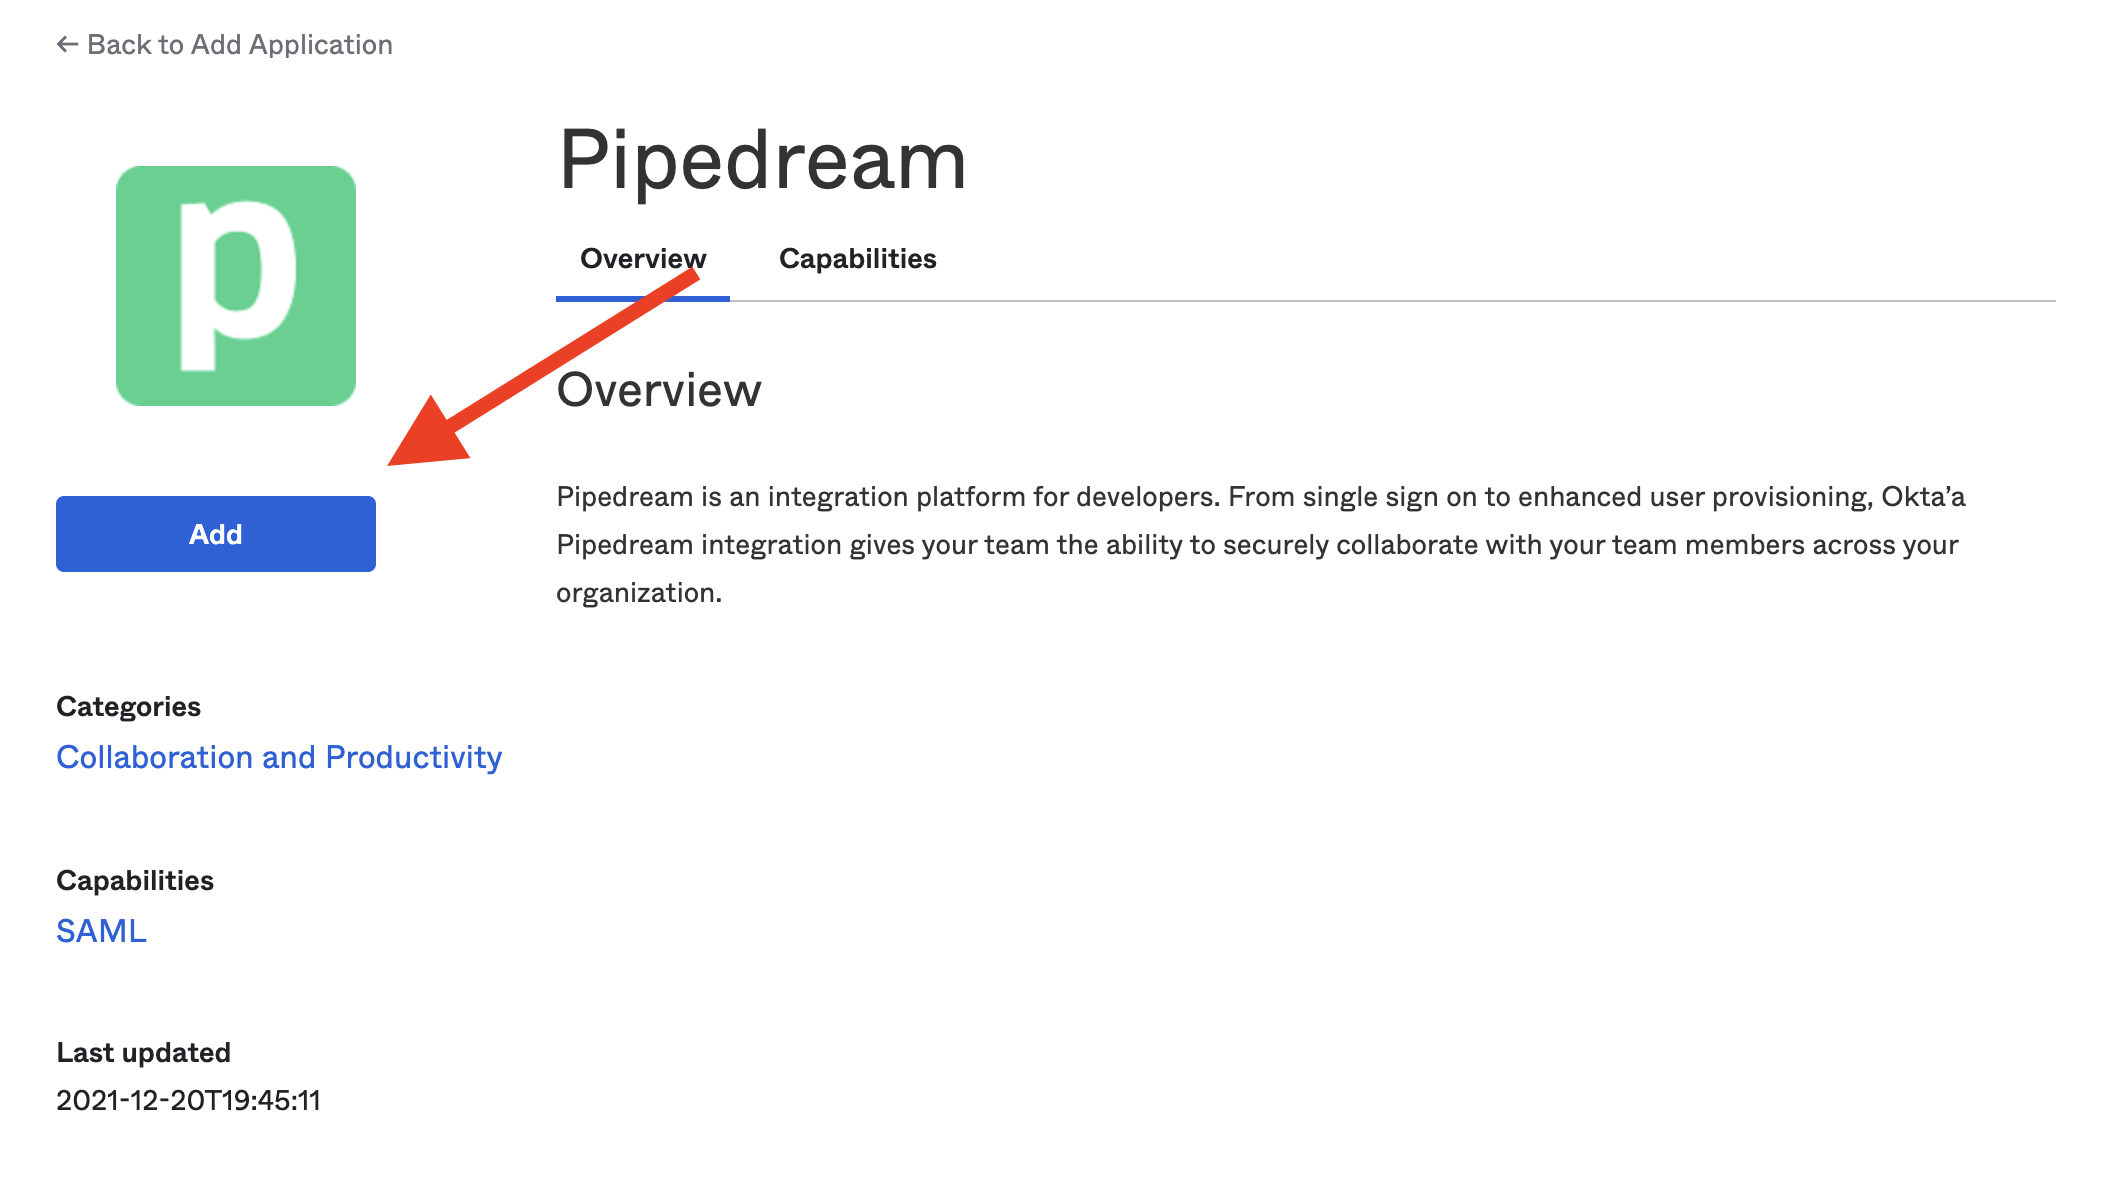
Click Add
5
Configure General Settings
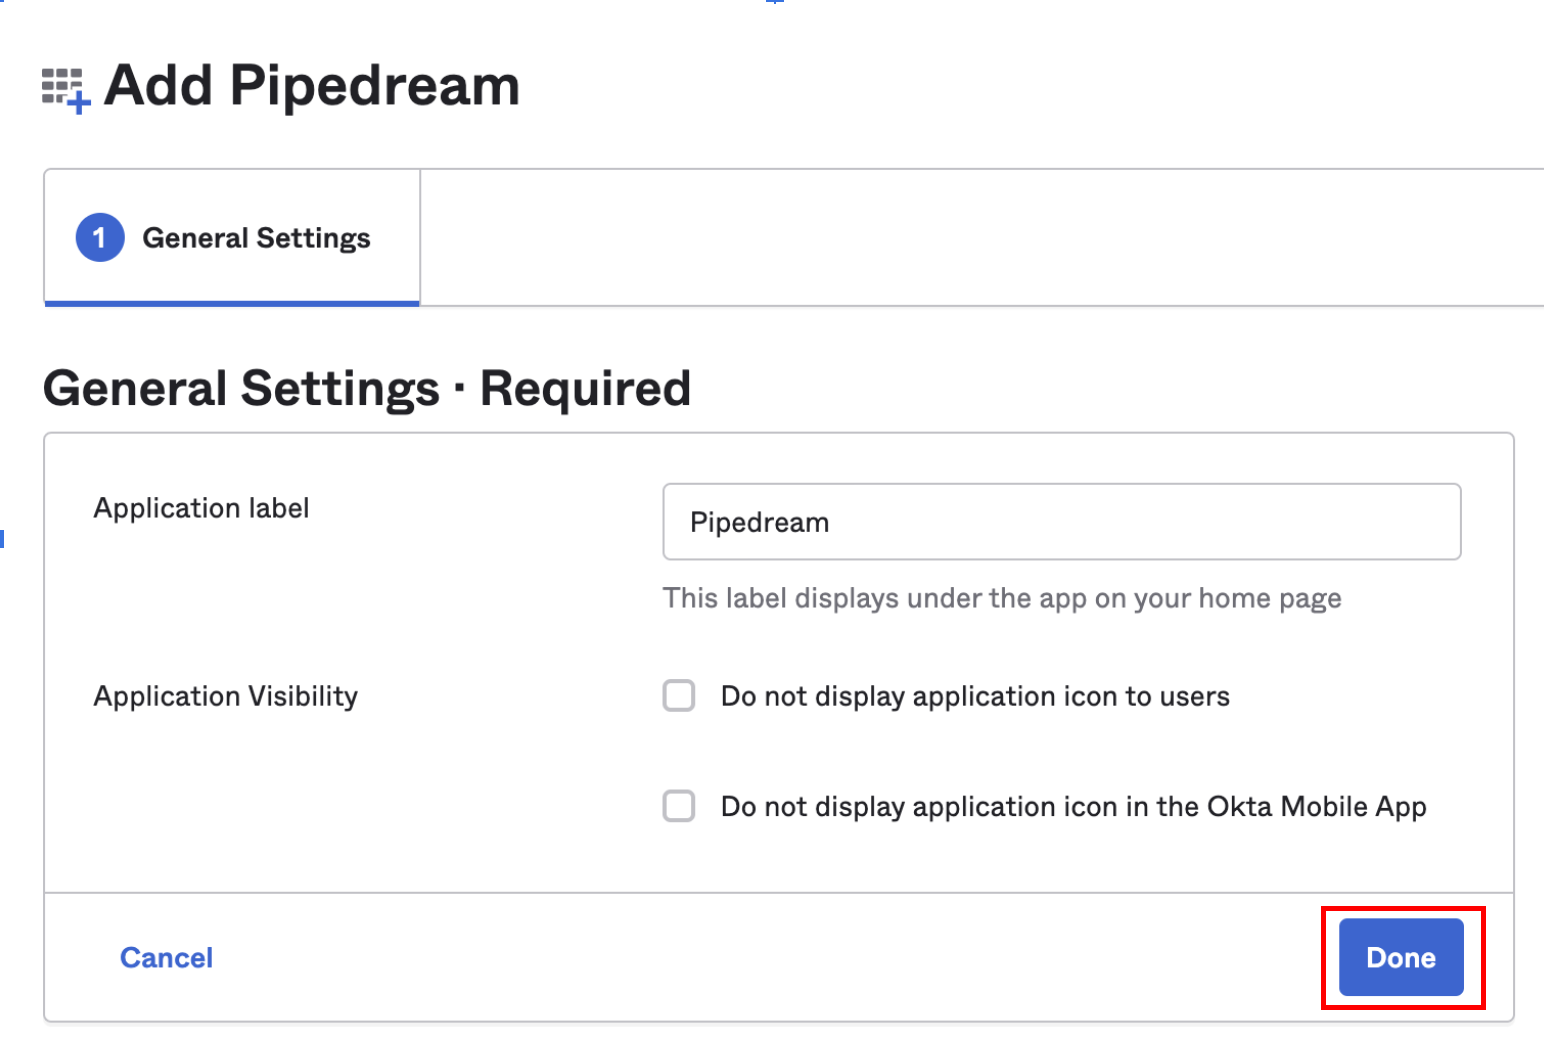
Fill out the General Settings that Okta presents, and click Done:
6
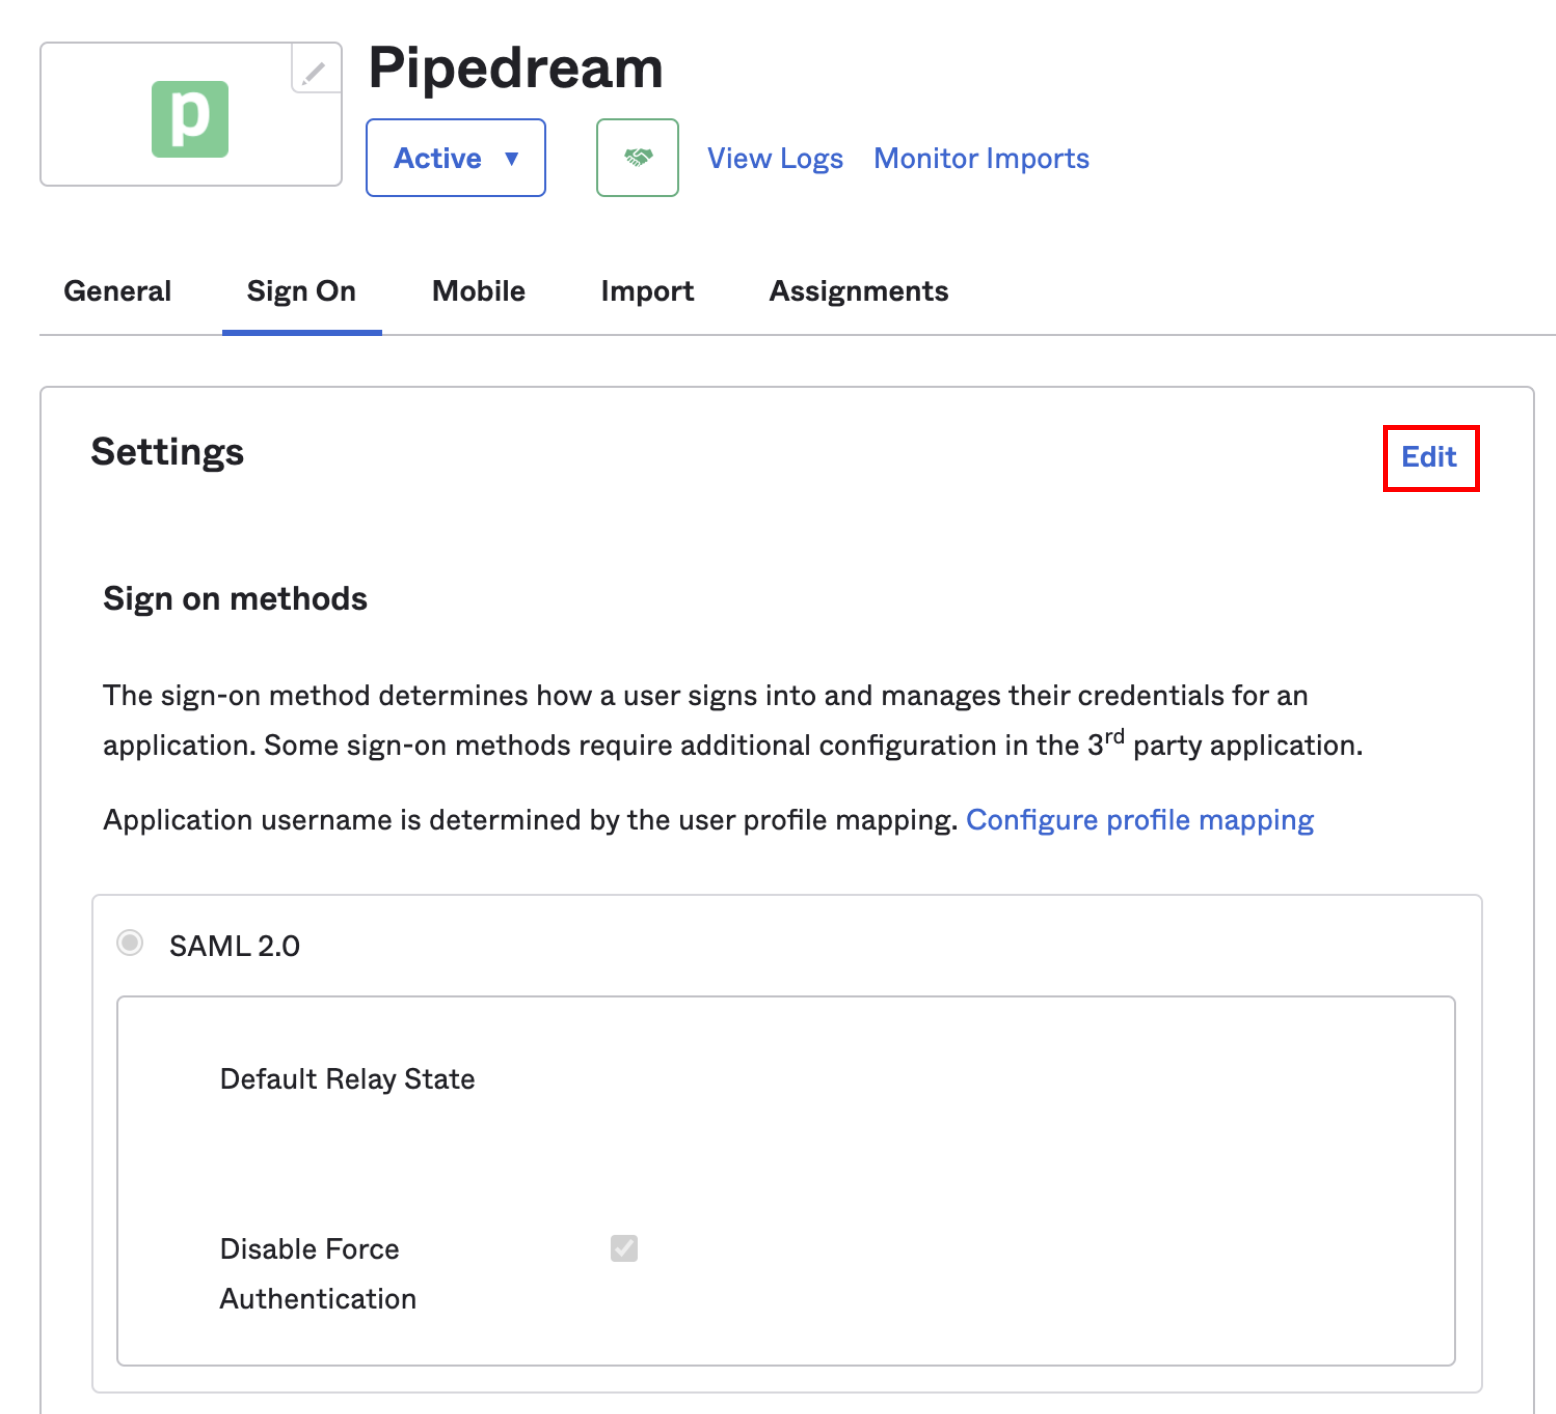
Edit Sign On
Select the Sign On tab, and click Edit at the top right:
7
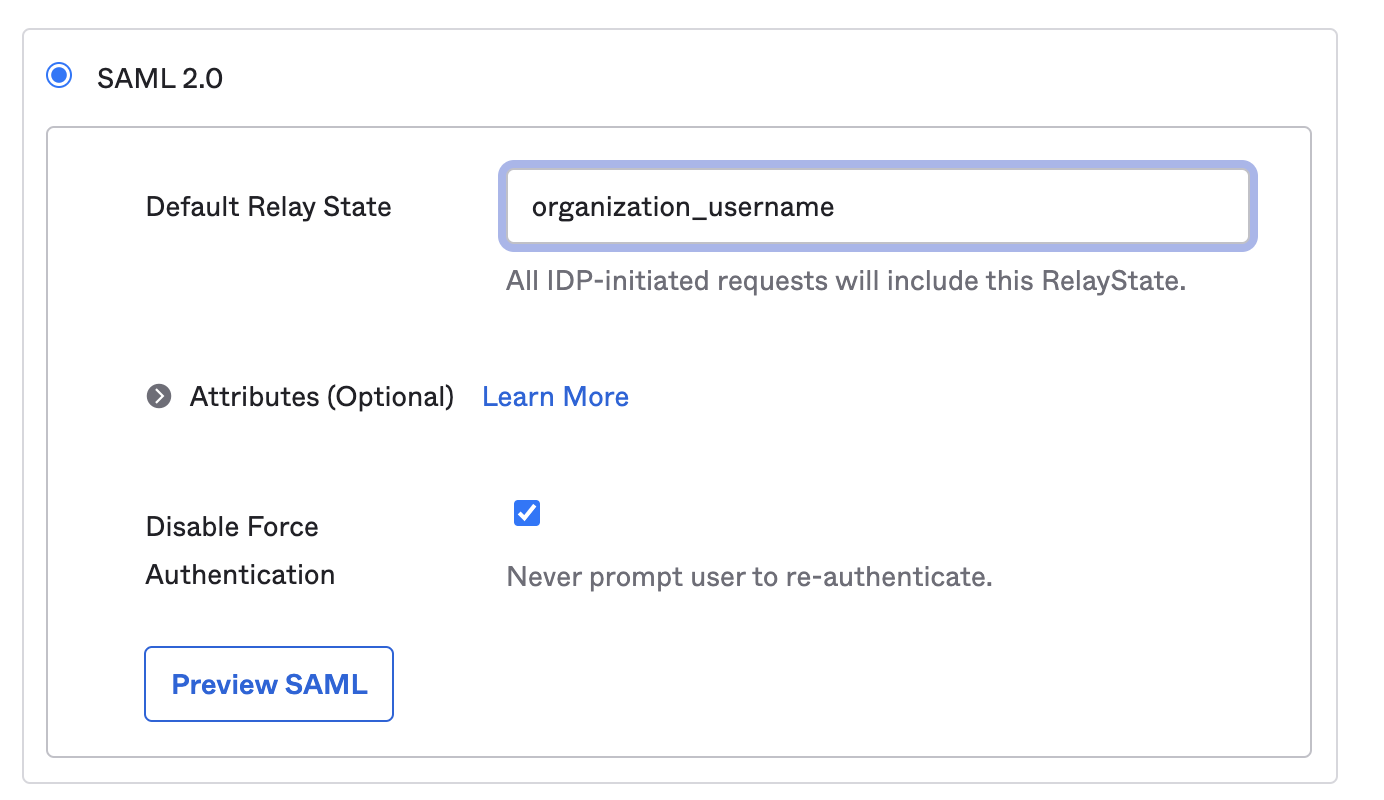
Configure Default Relay State
Scroll down to the SAML 2.0 settings. In the Default Relay State section, enter organization_username:
8
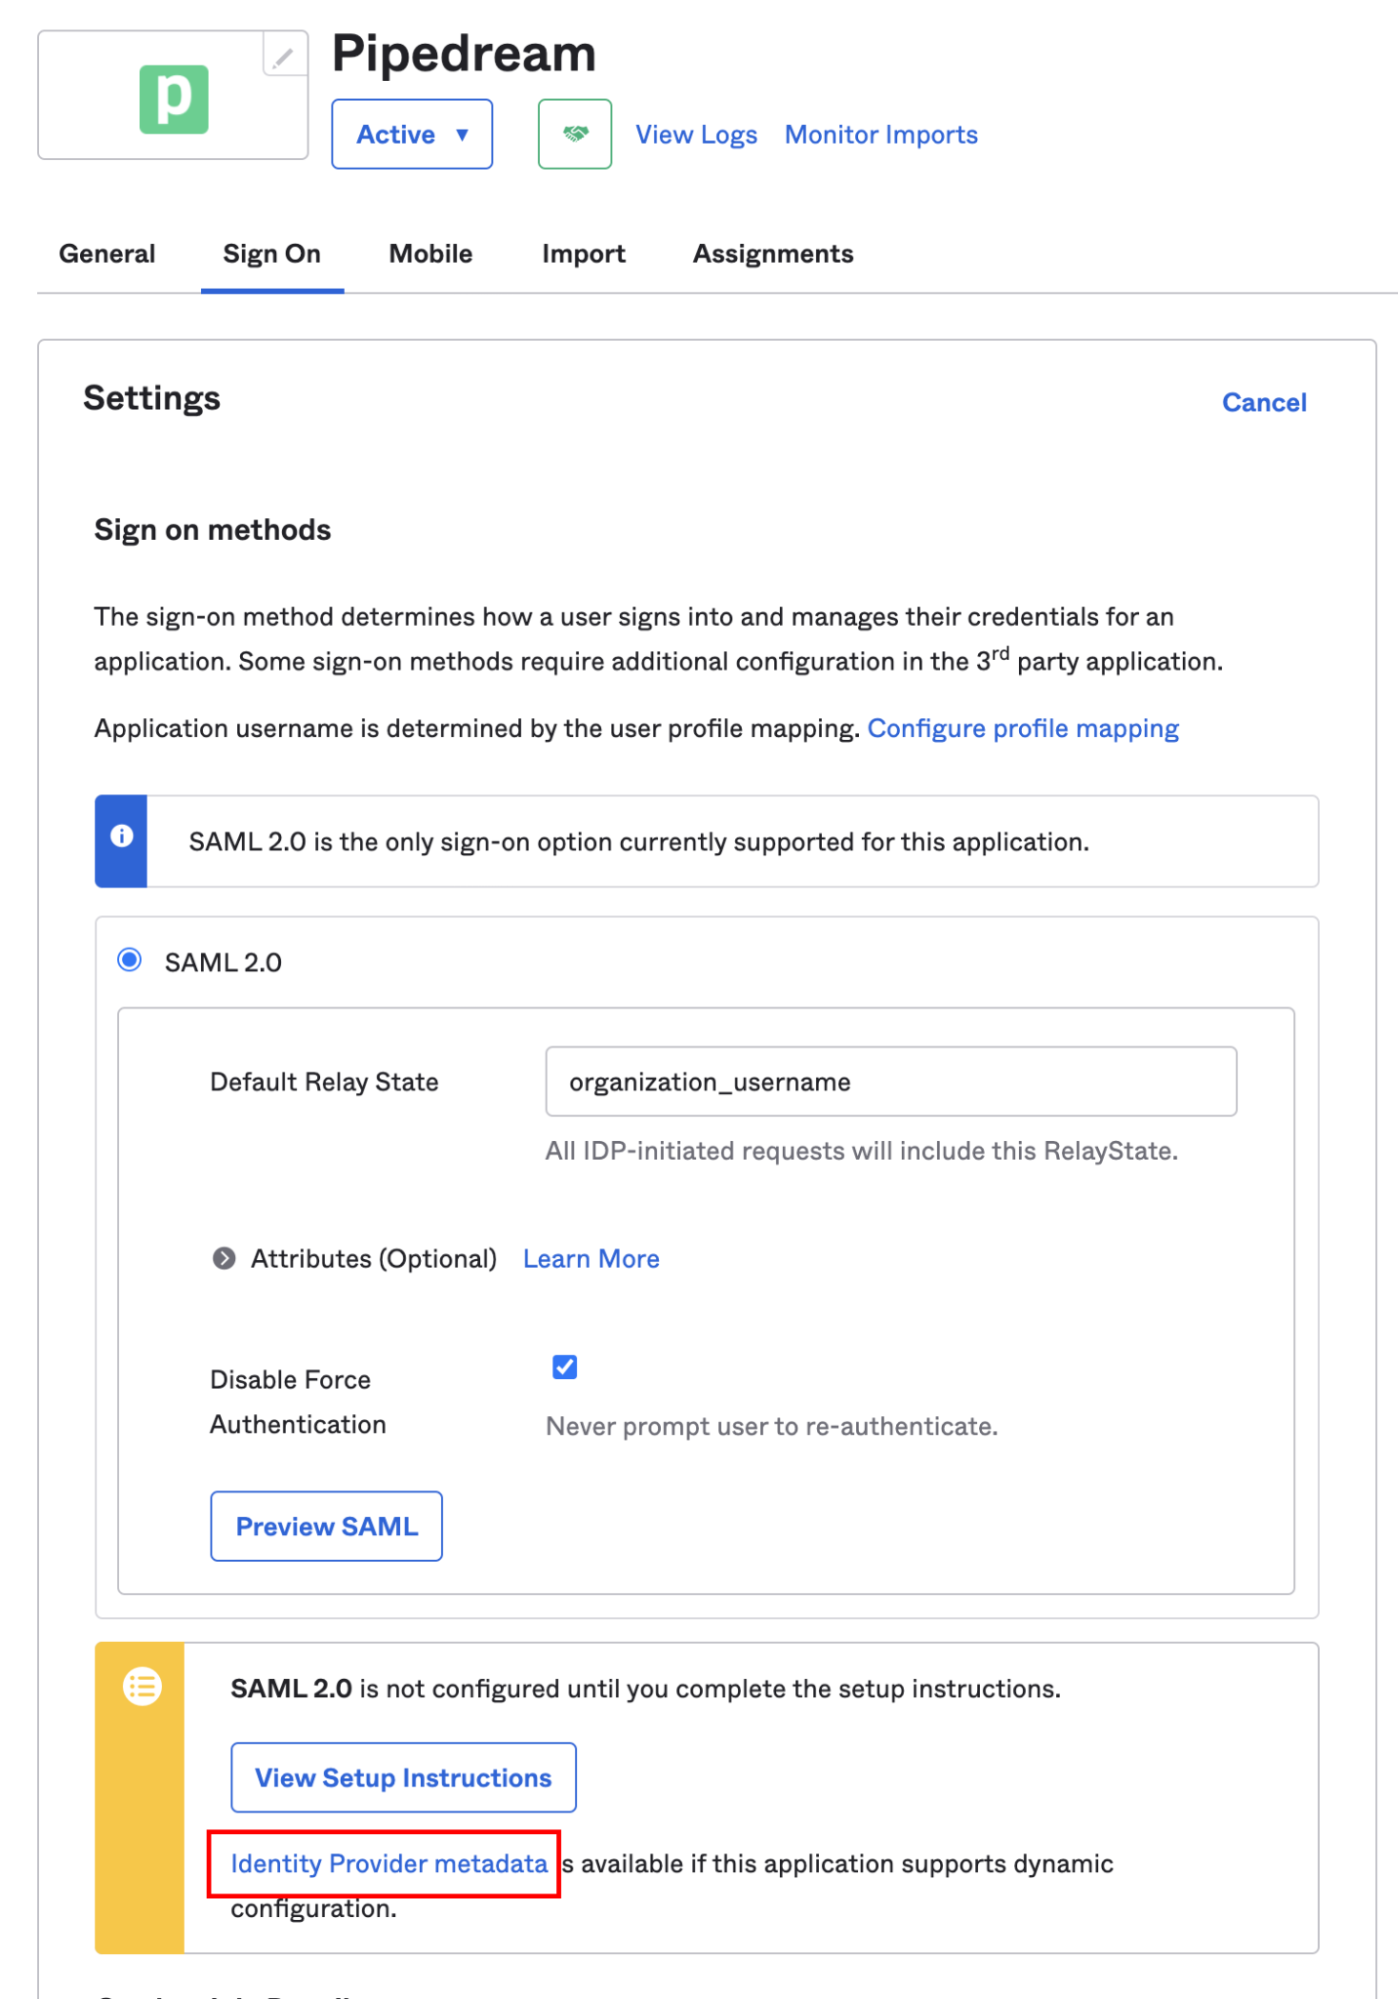
Save your configuration
Set any other configuration options you need in that section or in the Credentials Details section, and click Save.
9
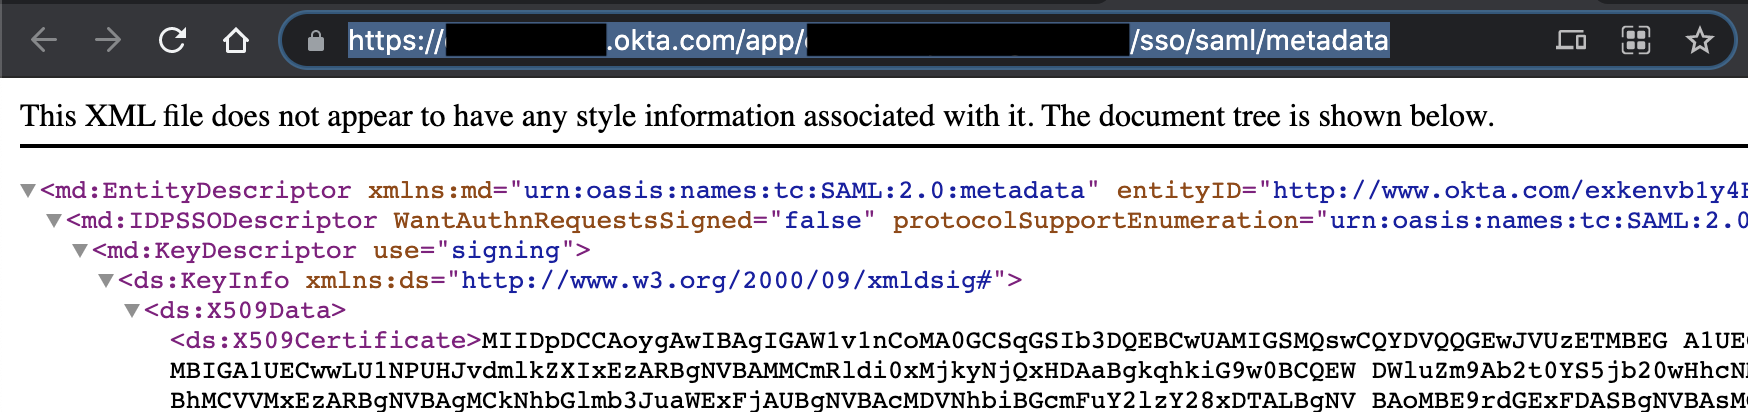
Copy the Identity Provider metadata URL
In the Sign On section, you’ll see a section that includes the setup instructions for SAML:
Okta - SAML
Click the Identity Provider metadata link and copy the URL from your browser’s address bar:
10
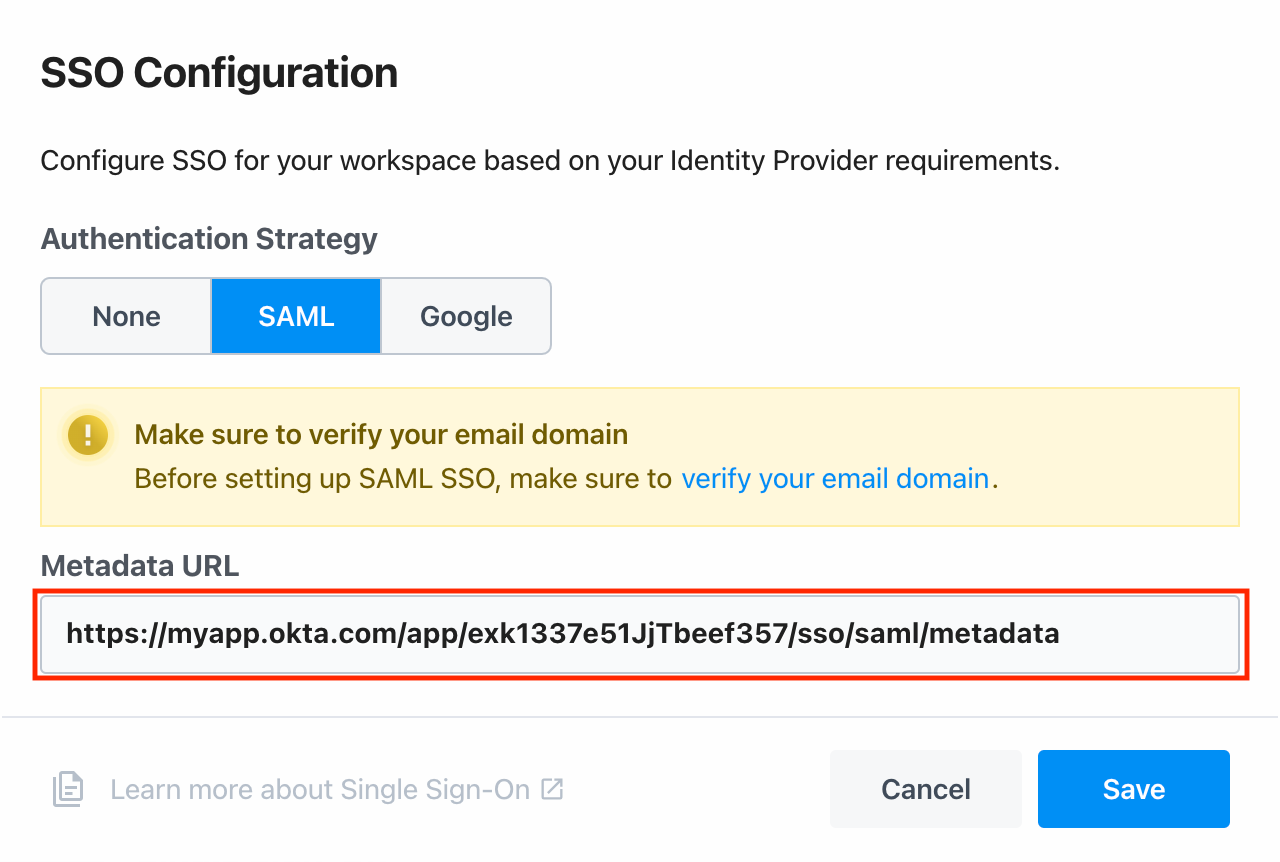
Enable SSO in Pipedream
Visit your Pipedream workspace authentication settings. Click the toggle to Enable SSO, then click Edit SSO Configuration, and add the metadata URL in the SAML section and click Save:
11
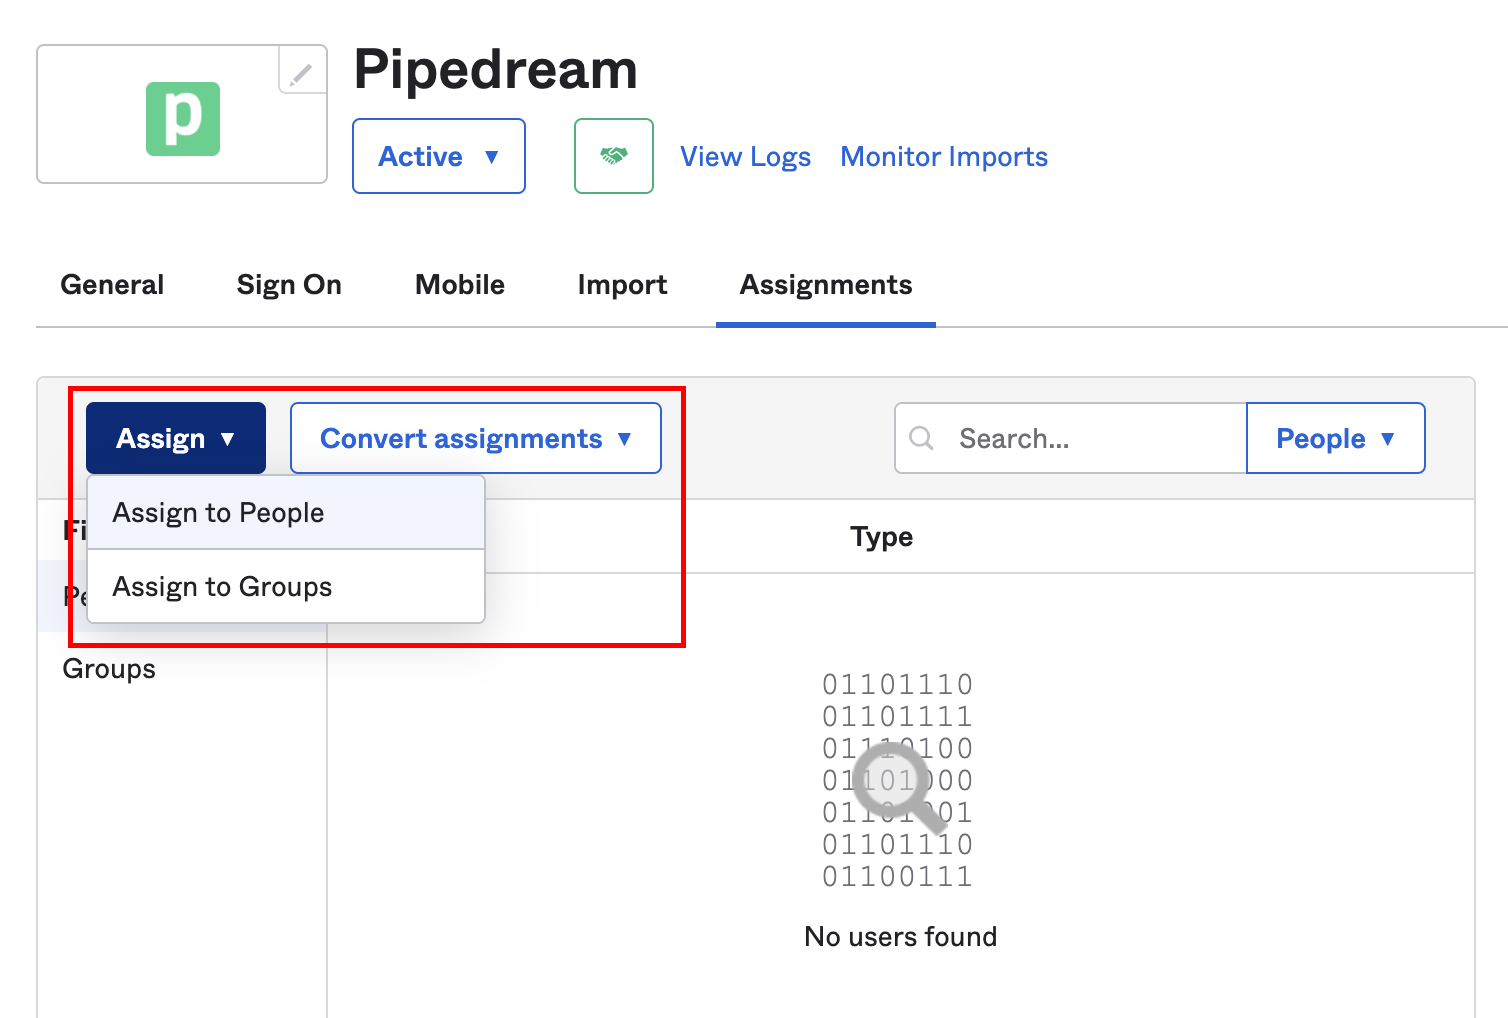
Assign the application to users
Back in Okta, click on the Assignments tab of the Pipedream application. Click on the Assign dropdown and select Assign to People:
Assign the application to the relevant users in Okta, and Pipedream will configure the associated accounts on our end.
Before you configure the application in Okta, make sure all your users have matching email addresses for their Pipedream user profile and their Okta profile. Once SSO is enabled, they will not be able to change their Pipedream email address.If a user’s Pipedream email does not match the email in their IDP profile, they will not be able to log in.If existing users signed up for Pipedream using an email and password, they will no longer be able to do so. They will only be able to sign in using SSO.