
# Triggers
Triggers define the type of event that runs your workflow. For example, HTTP triggers expose a URL where you can send any HTTP requests. Pipedream will run your workflow on each request. The Cron Scheduler trigger runs your workflow on a schedule.
Today, we support the following triggers:
If there's a specific trigger you'd like supported, please let us know (opens new window).
# App-based Triggers
You can trigger a workflow on events from apps like Twitter, Google Calendar, and more using event sources. Event sources run as separate resources from your workflow, which allows you to trigger multiple workflows using the same source. Here, we'll refer to event sources and workflow triggers interchangeably.
When you create a workflow, you'll see your available triggers:
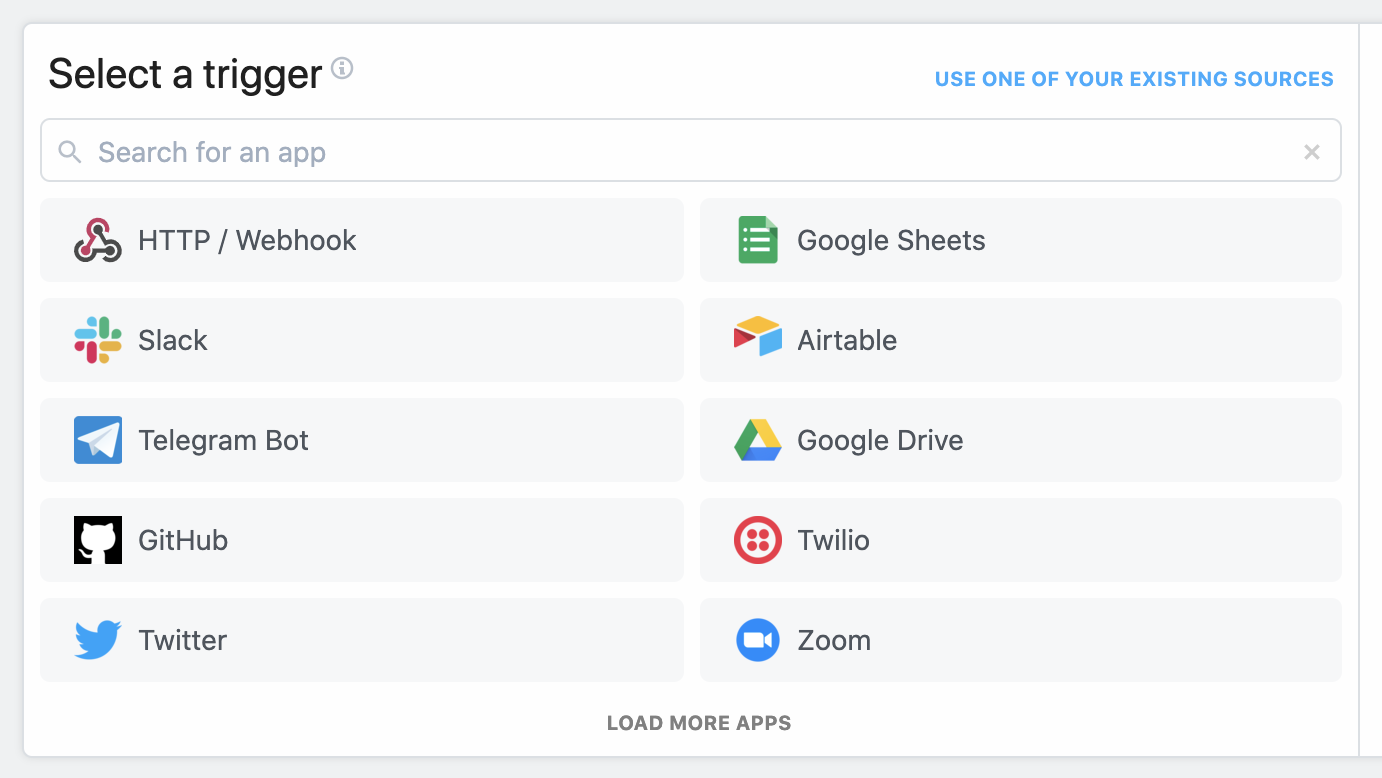
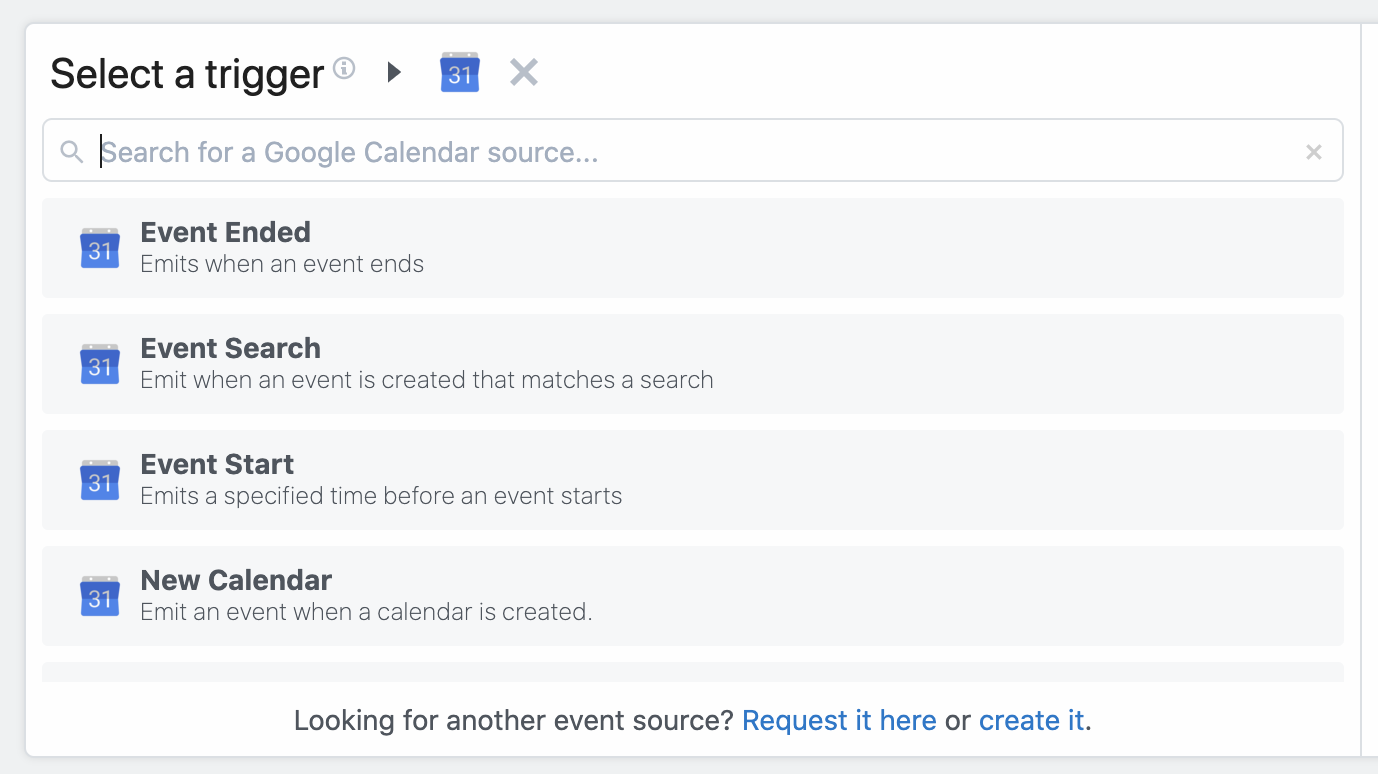
Search by app name to find triggers associated with your app. For Google Calendar, for example, you can run your workflow every time a new event is added to your calendar, each time an event starts, ends, and more:
Once you select your trigger, you'll be asked to connect any necessary accounts (for example, Google Calendar sources require you authorize Pipedream access to your Google account), and enter the values for any configuration settings.
Some sources are configured to retrieve an initial set of events when they're created. Others require you to generate events in the app to trigger your workflow. If your source generates an initial set of events, you'll see them appear in the test menu in the trigger step:
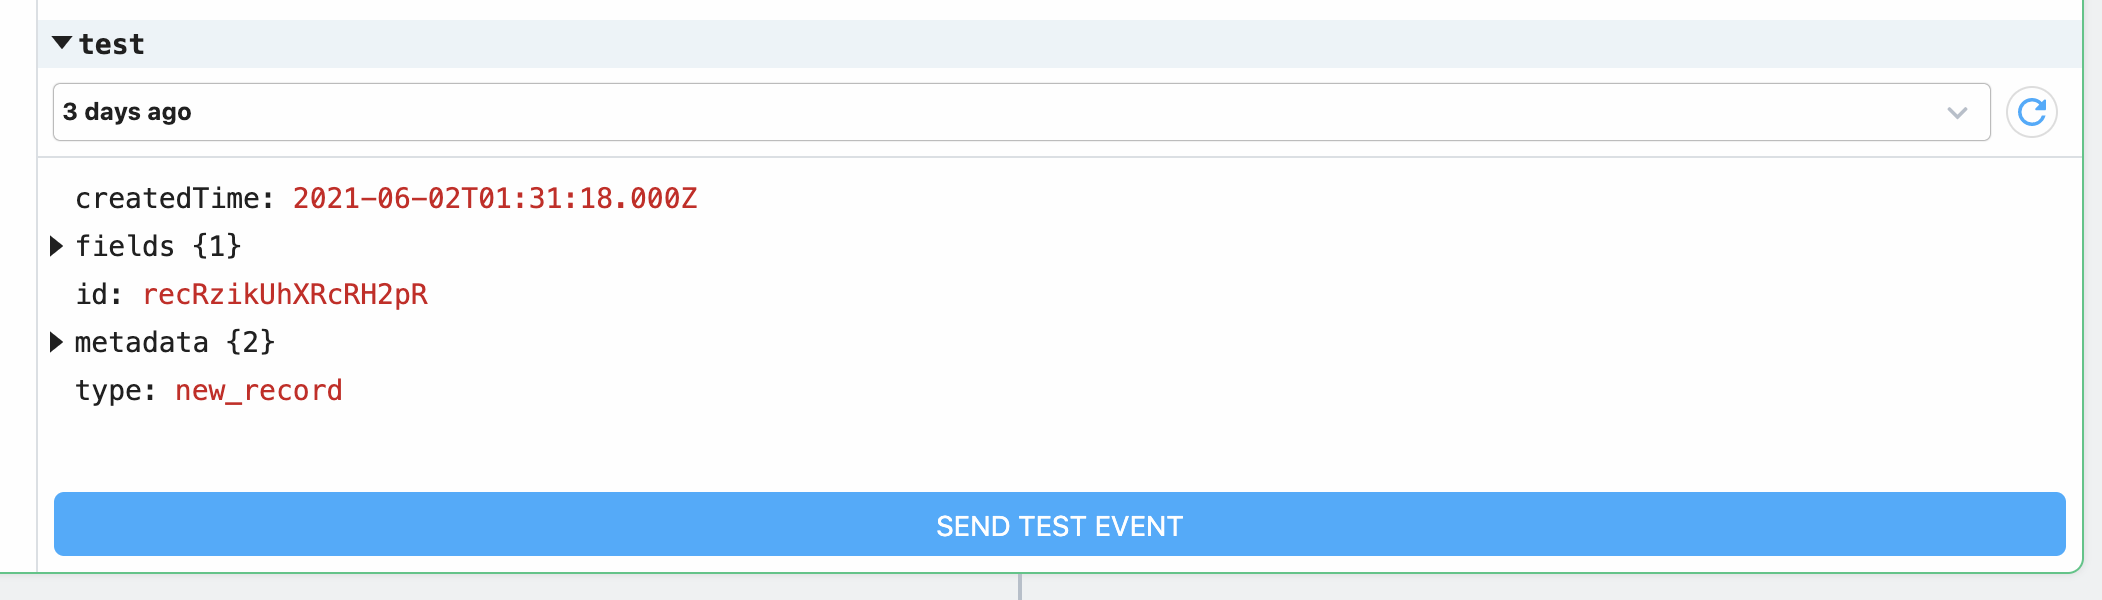
Then you can select a specific test event and manually trigger your workflow with that event data by clicking Send Test Event.
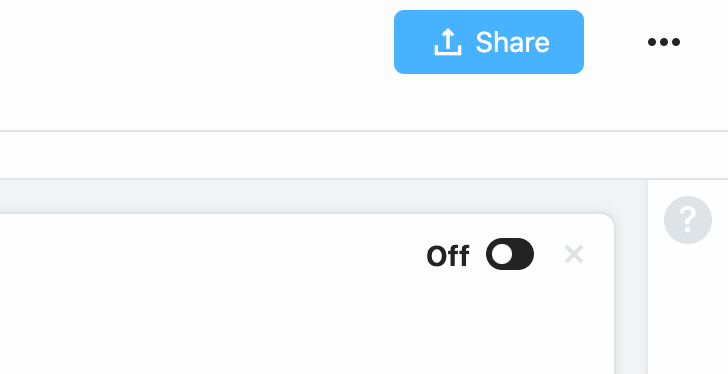
Moreover, since event sources can produce a large stream of events, the workflow is configured to pause the stream of events from source to workflow when you first create your workflow. This way, you can author your workflow without it being triggered automatically by your source, sending test events manually during development, instead. Once you're done, you can toggle the source on in the top-right of the trigger step:
# What's the difference between an event source and a trigger?
You'll notice the docs use the terms event source and trigger interchangeably above. It's useful to clarify the distinction in the context of workflows.
Event sources run code that collects events from some app or service and emits events as the source produces them. An event source can be used to trigger any number of workflows.
For example, you might create a single source to listen for new Twitter mentions for a keyword, then trigger multiple workflows each time a new tweet is found: one to send new tweets to Slack (opens new window), another to save those tweets to an Amazon S3 bucket (opens new window), etc.
This model allows you to separate the data produced by a service (the event source) from the logic to process those events in different contexts (the workflow).
Moreover, you can access events emitted by sources using Pipedream's SSE and REST APIs. This allows you to access these events in your own app, outside Pipedream's platform.
# Dependent and Independent Sources
In order to reduce unintentional workflow invocations, certain sources are classified as "dependent" and will mirror the state of their parent workflow. For example,
- When adding a source to a new workflow, that source will initially be set as dependent. If you pause or delete the workflow, that source will also be paused or deleted. If you re-enable the workflow after pausing it, the source will be re-enabled as well.
- If you add that same source to another workflow, or create a workflow then later remove and add a different source, the source will be independent from the workflow, which means pausing, re-enabling, or deleting the workflow will not impact the source.
There is not currently any user-facing indication for dependent vs. independent sources at this time.
# Shape of the steps.trigger.event object
In all workflows, you have access to event data using one the variable steps.trigger.event.
The shape of the event is specific to the source. For example, RSS sources produce events with a url and title property representing the data provided by new items from a feed. Google Calendar sources produce events with a meeting title, start date, etc.
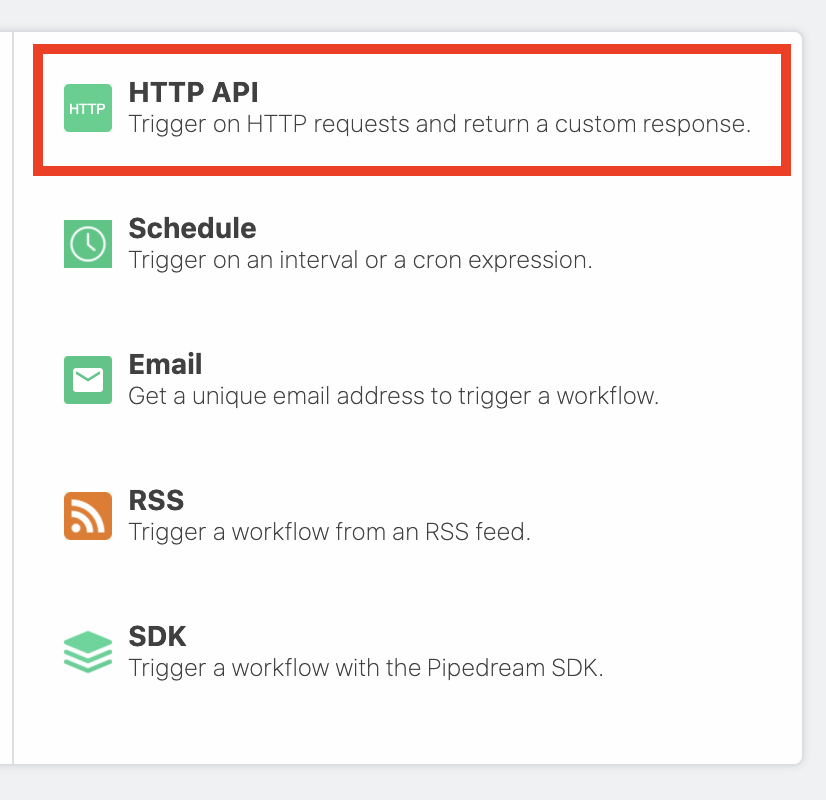
# HTTP
When you select the HTTP API trigger:
Pipedream creates a URL endpoint specific to your workflow:

You can send any HTTP requests to this endpoint, from anywhere on the web. You can configure the endpoint as the destination URL for a webhook or send HTTP traffic from your application - we'll accept any valid HTTP request.
# Accessing HTTP request data
You can access properties of the HTTP request, like the method, payload, headers, and more, in the event object, accessible in any code or action step.
# Valid Requests
You can send a request to your endpoint using any valid HTTP method: GET, POST, HEAD, and more.
We default to generating HTTPS URLs in the UI, but will accept HTTP requests against the same endpoint URL.
You can send data to any path on this host, with any query string parameters. You can access the full URL in the event object if you'd like to write code that interprets requests with different URLs differently.
You can send data of any Media Type (opens new window) in the body of your request.
The primary limit we impose is on the size of the request body: we'll issue a 413 Payload Too Large status when the body exceeds our specified limit.
# How Pipedream handles JSON payloads
JSON is the main data exchange format on the web today. Pipedream optimizes for the case where you've sent JSON as the source event to a workflow.
When you send JSON in the HTTP payload, or when JSON data is sent in the payload from a webhook provider, Pipedream converts that JSON to its equivalent JavaScript object. The trigger data can be referenced using either event or the steps object.
You can confirm this JSON to JavaScript object conversion occurred by examining the event.inferred_body_type property. If this is JSON, we correctly recognized the payload as such, and converted event.body to an object accordingly.
In the Inspector, we present event.body cleanly, indenting nested properties, to make the payload easy to read. Since event.body is a JavaScript object, it's easy to reference and manipulate properties of the payload using dot-notation.
# How Pipedream handles multipart/form-data
When you send form data (opens new window) to Pipedream using a Content-Type of multipart/form-data, Pipedream parses the payload and converts it to a JavaScript object with a property per form field. For example, if you send a request with two fields:
curl -F 'name=Leia' -F 'title=General' https://myendpoint.m.pipedream.net
Pipedream will convert that to a JavaScript object, event.body, with the following shape:
{
  name: "Leia",
  title: "General",
}
In this case, the inferred_body_type property of the event object will be set to MULTIPART_FORM to signal that we inferred form data and applied the conversion.
# Limits
You can send any content, up to the HTTP payload size limit, as a part of the form request. The content of uploaded images or other binary files does not contribute to this limit — the contents of the file will be uploaded at a Pipedream URL you have access to within your source or workflow. See the section on Large File Support for more detail.
# Sending large payloads
If you're uploading files, like images or videos, you should use the large file upload interface, instead.
By default, the body of HTTP requests sent to a source or workflow is limited to 512KB. But you can send an HTTP payload of any size to a workflow or an event source by including the pipedream_upload_body=1 query string or an x-pd-upload-body: 1 HTTP header in your request.
curl -d '{ "name": "Yoda" }' \
  https://endpoint.m.pipedream.net\?pipedream_upload_body\=1

curl -d '{ "name": "Yoda" }' \
  -H "x-pd-upload-body: 1" \
  https://endpoint.m.pipedream.net
In workflows, Pipedream saves the raw payload data in a file whose URL you can reference in the variable steps.trigger.event.body.raw_body_url.

Within your workflow, you can download the contents of this data using the Send HTTP Request action, or by saving the data as a file to the /tmp directory.
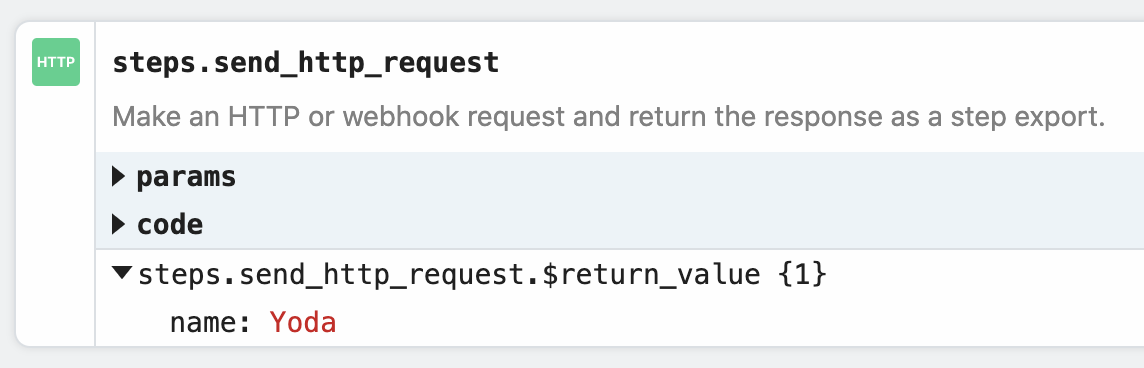
# Example: Download the HTTP payload using the Send HTTP Request action
Note: you can only download payloads at most 6MB in size using this method. Otherwise, you may encounter a Function Payload Limit Exceeded error.
You can download the HTTP payload using the Send HTTP Request action. Copy this workflow to see how this works (opens new window).
This will return the data in the variable steps.send_http_request.$return_value:
# Example: Download the HTTP payload to the /tmp directory
This workflow (opens new window) downloads the HTTP payload, saving it as a file to the /tmp directory.
import stream from "stream";
import { promisify } from "util";
import fs from "fs";
import got from "got";

const pipeline = promisify(stream.pipeline);
await pipeline(
  got.stream(steps.trigger.event.body.raw_body_url),
  fs.createWriteStream(`/tmp/raw_body`)
);
You can read this file in subsequent steps of your workflow.
# How the payload data is saved
Your raw payload is saved to a Pipedream-owned Amazon S3 bucket (opens new window). Pipedream generates a signed URL (opens new window) that allows you to access to that file for up to 30 minutes. After 30 minutes, the signed URL will be invalidated, and the file will be deleted.
# Limits
You can upload payloads up to 5TB in size. However, payloads that large may trigger other Pipedream limits. Please reach out (opens new window) with any specific questions or issues.
# Large File Support
This interface is best used for uploading large files, like images or videos. If you're sending JSON or other data directly in the HTTP payload, and encountering a Request Entity Too Large error, review the section above for sending large payloads.
You can upload any file to a workflow or an event source by making a multipart/form-data HTTP request with the file as one of the form parts. Pipedream saves that file to a Pipedream-owned Amazon S3 bucket (opens new window), generating a signed URL (opens new window) that allows you to access to that file for up to 30 minutes. After 30 minutes, the signed URL will be invalidated, and the file will be deleted.
In workflows, these file URLs are provided in the steps.trigger.event.body variable, so you can download the file using the URL within your workflow, or pass the URL on to another third-party system for it to process.
Within your workflow, you can download the contents of this data using the Send HTTP Request action, or by saving the data as a file to the /tmp directory.
# Example: upload a file using cURL
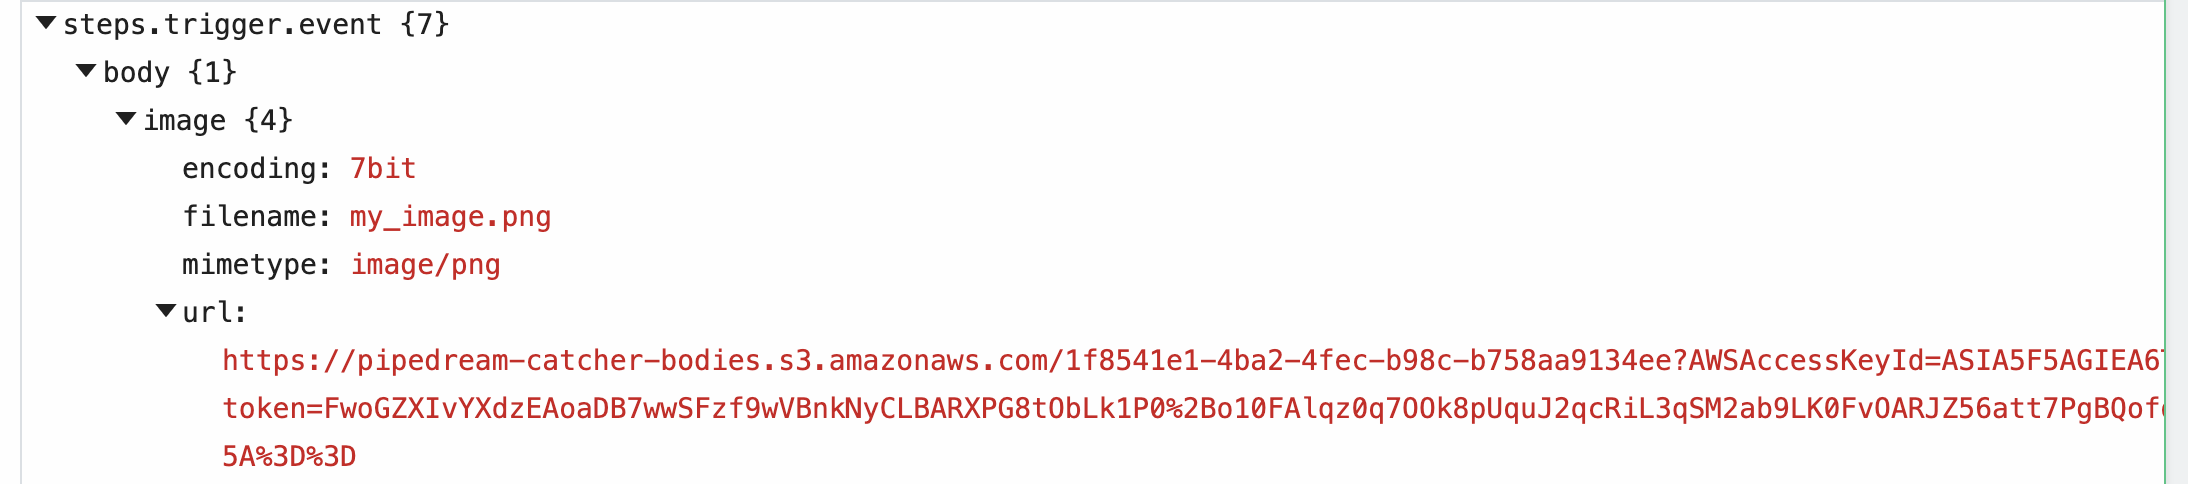
For example, you can upload an image to a workflow using cURL:
curl -F 'image=@my_image.png' https://myendpoint.m.pipedream.net
The -F tells cURL we're sending form data, with a single "part": a field named image, with the content of the image as the value (the @ allows cURL to reference a local file).
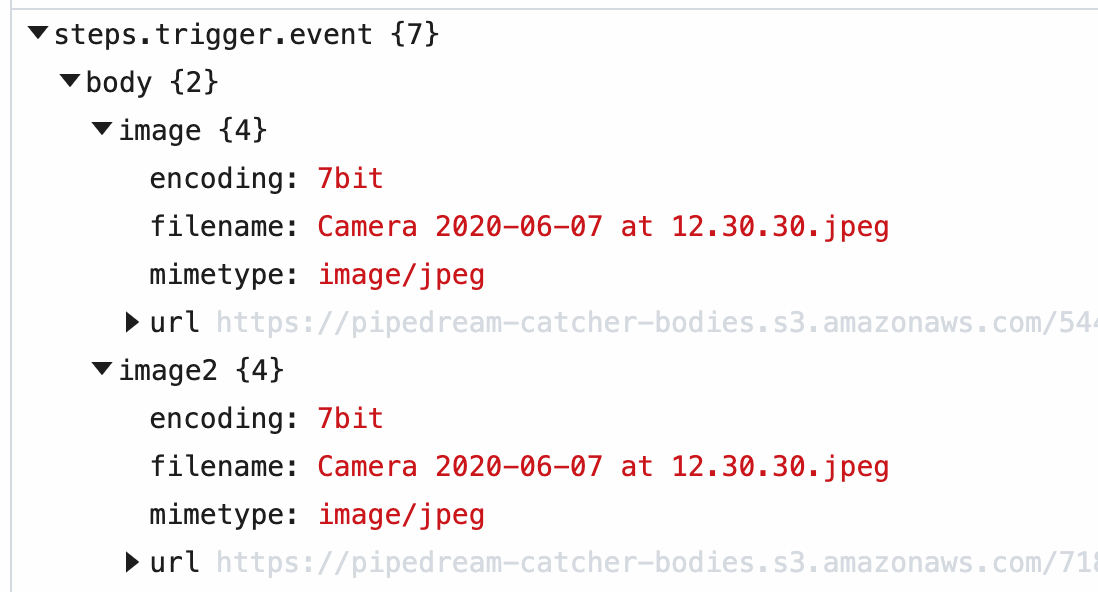
When you send this image to a workflow, Pipedream parses the form data and converts it to a JavaScript object, event.body. Select the event from the inspector, and you'll see the image property under event.body:
When you upload a file as a part of the form request, Pipedream saves it to a Pipedream-owned Amazon S3 bucket (opens new window), generating a signed URL (opens new window) that allows you to access to that file for up to 30 minutes. After 30 minutes, the signed URL will be invalidated, and the file will be deleted.
Within the image property of event.body, you'll see the value of this URL in the url property, along with the filename and mimetype of the file. Within your workflow, you can download the file, or pass the URL to a third party system to handle, and more.
# Example: Download this file to the /tmp directory
This workflow (opens new window) downloads an image passed in the image field in the form request, saving it to the /tmp directory.
import stream from "stream";
import { promisify } from "util";
import fs from "fs";
import got from "got";

const pipeline = promisify(stream.pipeline);
await pipeline(
  got.stream(steps.trigger.event.body.image.url),
  fs.createWriteStream(`/tmp/${steps.trigger.event.body.image.filename}`)
);
# Example: Upload image to your own Amazon S3 bucket
This workflow (opens new window) streams the uploaded file to an Amazon S3 bucket you specify, allowing you to save the file to long-term storage.
# Limits
Since large files are uploaded using a Content-Type of multipart/form-data, the limits that apply to form data also apply here.
The content of the file itself does not contribute to the HTTP payload limit imposed for forms. You can upload files up to 5TB in size. However, files that large may trigger other Pipedream limits. Please reach out (opens new window) with any specific questions or issues.
# Cross-Origin HTTP Requests
We return the following headers on HTTP OPTIONS requests:
Access-Control-Allow-Origin: *
Access-Control-Allow-Methods: GET,HEAD,PUT,PATCH,POST,DELETE
Thus, your endpoint will accept cross-origin HTTP requests (opens new window) from any domain, using any standard HTTP method.
# HTTP Responses
# Default HTTP response
By default, when you send a valid HTTP request to your endpoint URL, you should expect to receive a 200 OK status code with the following payload:
<p><b>Success!</b></p>
<p>To customize this response, check out our docs <a href="https://docs.pipedream.com/workflows/steps/triggers/#http-responses">here</a></p>
When you're processing HTTP requests, you often don't need to issue any special response to the client. We issue this default response so you don't have to write any code to do it yourself.
# Customizing the HTTP response
If you need to issue a custom HTTP response from a workflow, you can use the $.respond() function in a Code or Action step.
$.respond() takes a single argument: an object with properties that specify the body, headers, and HTTP status code you'd like to respond with:
defineComponent({
  async run({ steps, $ }) {
    await $.respond({
      status: 200,
      headers: { "my-custom-header": "value" },
      body: { message: "My custom response" }, // This can be any string, object, Buffer, or Readable stream
    });
  })
});
WARNING
The $.respond function is currently only available in Node.js (Javascript) workflow steps.
The value of the body property can be either a string, object, a Buffer (opens new window) (binary data), or a Readable stream (opens new window). Attempting to return any other data may yield an error.
In the case where you return a Readable stream:
- You must
awaitthe$.respondfunction (await $.respond({ ... }) - The stream must close and be finished reading within your workflow execution timeout.
- You cannot return a Readable and use the
immediate: trueproperty of$.respond.
You can Copy this example workflow (opens new window) and make an HTTP request to its endpoint URL to experiment with this.
# Timing of $.respond() execution
You may notice some response latency calling workflows that use $.respond() from your HTTP client. By default, $.respond() is called at the end of your workflow, after all other code is done executing, so it may take some time to issue the response back.
If you need to issue an HTTP response in the middle of a workflow, see the section on returning a response immediately.
# Returning a response immediately
You can issue an HTTP response within a workflow, and continue the rest of the workflow execution, by setting the immediate property to true:
defineComponent({
  async run({ steps, $ }) {
    await $.respond({
      immediate: true,
      status: 200,
      headers: { "my-custom-header": "value" },
      body: { message: "My custom response" },
    });
  })
});
Passing immediate: true tells $.respond() to issue a response back to the client at this point in the workflow. After the HTTP response has been issued, the remaining code in your workflow runs.
This can be helpful, for example, when you're building a Slack bot. When you send a message to a bot, Slack requires a 200 OK response be issued immediately, to confirm receipt:
defineComponent({
  async run({ steps, $ }) {
    await $.respond({
      immediate: true,
      status: 200,
      body: "",
    });
  })
});
Once you issue the response, you'll probably want to process the message from the user and respond back with another message or data requested by the user.
Here's an example workflow (opens new window) that shows how to use immediate: true and run code after the HTTP response is issued.
# Errors with HTTP Responses
If you use $.respond() in a workflow, you must always make sure $.respond() is called in your code. If you make an HTTP request to a workflow, and run code where $.respond() is not called, your endpoint URL will issue a 400 Bad Request error with the following body:
No $.respond called in workflow
This might happen if:
- You call
$.respond()conditionally, where it does not run under certain conditions. - Your workflow throws an Error before you run
$.respond(). - You return data in the
bodyproperty that isn't a string, object, or Buffer.
If you can't handle the 400 Bad Request error in the application calling your workflow, you can implement try / finally logic to ensure $.respond() always gets called with some default message. For example:
defineComponent({
  async run({ steps, $ }) {
    try {
      // Your code here that might throw an exception or not run
      throw new Error('Whoops, something unexpected happened.');
    } finally {
      await $.respond({
        status: 200,
        body: {
          msg: "Default response",
        },
      });
    }
  })
});
# Errors
Occasionally, you may encounter errors when sending requests to your endpoint:
# Request Entity Too Large
The endpoint will issue a 413 Payload Too Large status code when the body of your request exceeds 512KB.
In this case, the request will still appear in the inspector, with information on the error.
# API key does not exist
Your API key is the host part of the endpoint, e.g. the eniqtww30717 in eniqtww30717.m.pipedream.net. If you attempt to send a request to an endpoint that does not exist, we'll return a 404 Not Found error.
We'll also issue a 404 response on workflows with an HTTP trigger that have been deactivated.
# Too Many Requests
If you send too many requests to your HTTP source within a small period of time, we may issue a 429 Too Many Requests response. Review our limits to understand the conditions where you might be throttled.
You can also reach out (opens new window) to inquire about raising this rate limit.
If you control the application sending requests, you should implement a backoff strategy (opens new window) to temporarily slow the rate of events.
# Validating requests
Since you have access to the entire request object, and can issue any HTTP response from a workflow, you can implement custom logic to validate requests using any Node code.
For example, you can require requests pass a specific secret in a header (opens new window). Just copy the workflow and add your secret as the value of the the Secret param. Add the rest of your code in steps below this initial one. Requests must contain the secret:
curl -H 'X-Pipedream-Secret: abc123' https://myendpoint.m.pipedream.net
Otherwise, the workflow will end early.
Since you can run any Node code in a workflow, you can implement more complex validation. For example, you could require JWT tokens and validate those tokens using the jsonwebtoken package (opens new window) at the start of your workflow.
# Schedule
Pipedream allows you to run hosted scheduled jobs — commonly-referred to as a "cron job" — for free.
We call these cron jobs "workflows". Workflows are just scripts that run on a schedule.
You can write a cron job to:
- Send an HTTP request to any URL on a schedule (opens new window)
- Send a scheduled message to email (opens new window), Slack, Discord, or any messaging app
- Pull data from an API, process it, and send the results to Slack, or even data stores like Amazon S3
- Run any Node.js (JavaScript) code, using almost any npm package (opens new window). This lets you do almost anything you want on a schedule.
Pipedream manages the servers where these cron jobs run, so you don't have to worry about setting up a server of your own or operating some service just to run code on a schedule. You write the workflow, we take care of the rest.
# Choosing a cron trigger
To create a cron job, create a new workflow and search for the Schedule trigger:
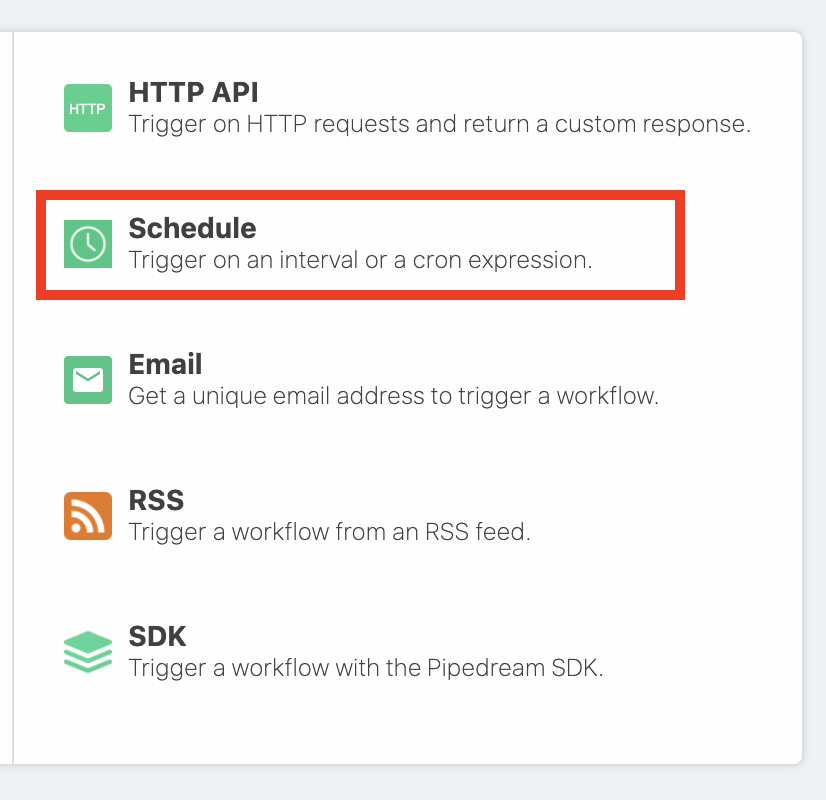
By default, your cron job will be turned Off. To enable it, select either of the scheduling options:
- Every : run the job every N days, hours, minutes (e.g. every 1 day, every 3 hours).
- Cron Expression : schedule your job using a cron expression. For example, the expression
0 0 * * *will run the job every day at midnight. Cron expressions can be tied to any timezone.
# Testing a cron job
If you're running a cron job once a day, you probably don't want to wait until the next day's run to test your new code. You can manually run the workflow associated with a cron job at any time by pressing the Run Now button.
# Future executions of your cron job
You'll see the time your job is scheduled to run next under the Next Job section of the Inspector.
# Job History
You'll see the history of job executions under the Job History section of the Inspector.
Clicking on a specific job shows the execution details for that job — all the logs and observability associated with that run of the workflow.
# Trigger a notification to an external service (email, Slack, etc.)
You can send yourself a notification — for example, an email or a Slack message — at any point in a workflow by using the relevant Action or Destination.
If you'd like to email yourself when a job finishes successfully, you can use the Email Destination. You can send yourself a Slack message using the Slack Action, or trigger an HTTP request to an external service.
You can also write code to trigger any complex notification logic you'd like.
# Rate Limit
When you're testing cron jobs, you may encounter Rate Limit Exceeded errors. Cron jobs can be tested no more than twice a minute. If you encounter this error, wait one minute and try again.
# Troubleshooting your scheduled jobs
When you run a cron job, you may need to troubleshoot errors or other execution issues. Pipedream offers built-in, step-level logs that show you detailed execution information that should aid troubleshooting.
Any time a cron job runs, you'll see a new execution appear in the Inspector. This shows you when the cron job ran, how long it took to run, and any errors that might have occurred. Click on any of these lines in the Inspector to view the details for a given run.
Code steps show Logs below the step itself. Any time you run console.log() or other functions that print output, you should see the logs appear directly below the step where the code ran.
Actions and Destinations also show execution details relevant to the specific Action or Destination. For example, when you use the HTTP Destination to make an HTTP request, you'll see the HTTP request and response details tied to that Destination step:
When you select the Email trigger:
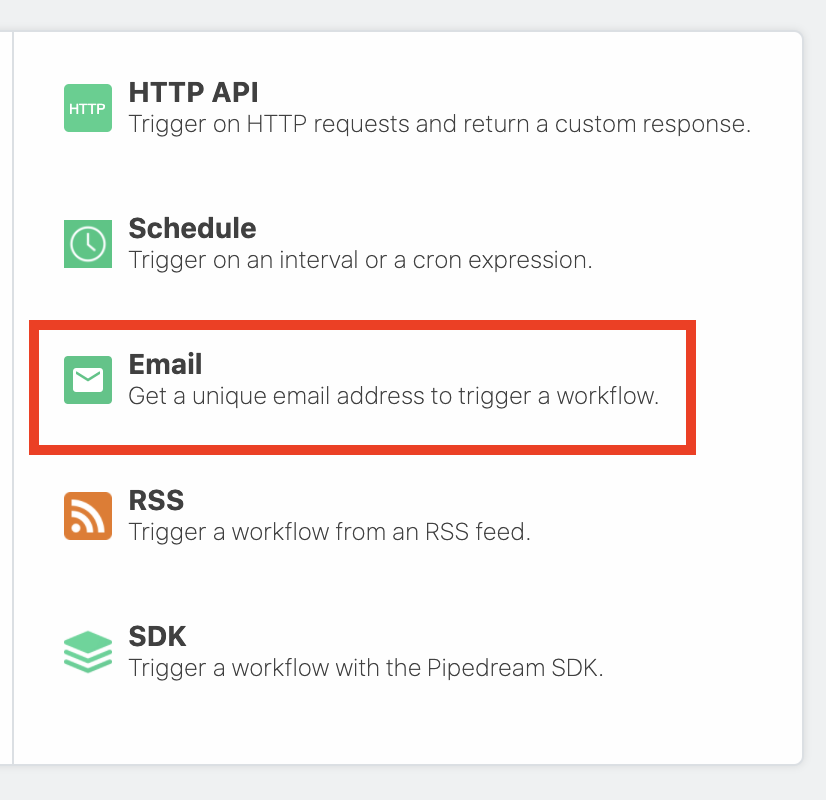
Pipedream creates an email address specific to your workflow. Any email sent to this address triggers your workflow:
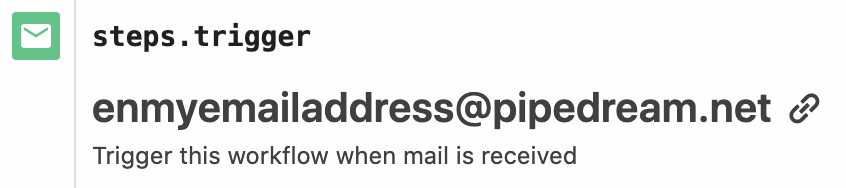
As soon as you send an email to the workflow-specific address, Pipedream parses its body, headers, and attachments into a JavaScript object it exposes in the steps.trigger.event variable that you can access within your workflow. This transformation can take a few seconds to perform. Once done, Pipedream will immediately trigger your workflow with the transformed payload.
Read more about the shape of the email trigger event.
# Sending large emails
By default, you can send emails up to 150KB in total size (content, headers, attachments). Emails over this size will be rejected, and you will not see them appear in your workflow.
You can send emails up to 30MB in size by sending emails to [YOUR EMAIL ENDPOINT]@upload.pipedream.net. If your workflow-specific email address is endpoint@pipedream.net, your "large email address" is endpoint@upload.pipedream.net.
Emails delivered to this address are uploaded to a private URL you have access to within your workflow, at the variable steps.trigger.event.mail.content_url. You can download and parse the email within your workflow using that URL. This content contains the raw email. Unlike the standard email interface, you must parse this email on your own - see the examples below.
# Example: Download the email using the Send HTTP Request action
Note: you can only download emails at most 6MB in size using this method. Otherwise, you may encounter a Function Payload Limit Exceeded error.
You can download the email using the Send HTTP Request action. Copy this workflow to see how this works (opens new window).
This workflow also parses the contents of the email and exposes it as a JavaScript object using the mailparser library (opens new window):
import { simpleParser } from "mailparser";
this.parsed = await simpleParser(steps.send_http_request.$return_value);
# Example: Download the email to the /tmp directory, read it and parse it
This workflow (opens new window) downloads the email, saving it as a file to the /tmp directory. Then it reads the same file (as an example), and parses it using the mailparser library (opens new window):
import stream from "stream";
import { promisify } from "util";
import fs from "fs";
import got from "got";
import { simpleParser } from "mailparser";

const pipeline = promisify(stream.pipeline);
await pipeline(
  got.stream(steps.trigger.event.mail.content_url),
  fs.createWriteStream(`/tmp/raw_email`)
);

// Now read the file and parse its contents into the `parsed` variable
// See https://nodemailer.com/extras/mailparser/ for parsing options
const f = fs.readFileSync(`/tmp/raw_email`);
this.parsed = await simpleParser(f);
# How the email is saved
Your email is saved to a Pipedream-owned Amazon S3 bucket (opens new window). Pipedream generates a signed URL (opens new window) that allows you to access to that file for up to 30 minutes. After 30 minutes, the signed URL will be invalidated, and the file will be deleted.
# Appending metadata to the incoming email address with +data
Pipedream provides a way to append metadata to incoming emails by adding a + sign to the incoming email key, followed by any arbitrary string:
myemailaddr+test@pipedream.net
Any emails sent to your workflow-specific email address will resolve to that address, triggering your workflow, no matter the data you add after the + sign. Sending an email to both of these addresses triggers the workflow with the address myemailaddr@pipedream.net:
myemailaddr+test@pipedream.net
myemailaddr+unsubscribe@pipedream.net
This allows you implement conditional logic in your workflow based on the data in that string.
# RSS
Choose the RSS trigger to watch an RSS feed for new items:
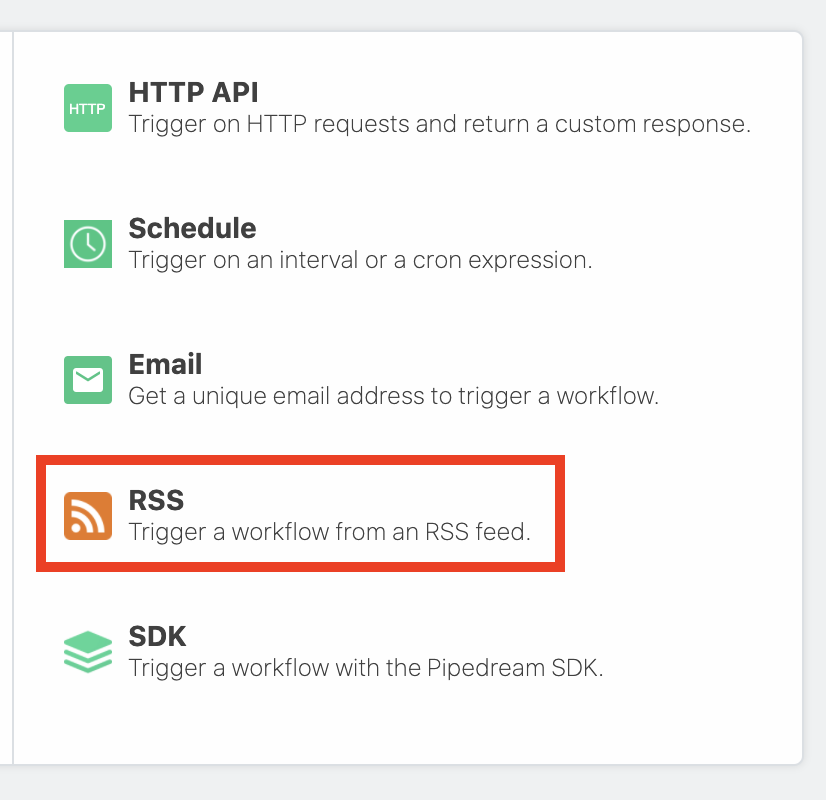
This will create an RSS event source that polls the feed for new items on the schedule you select. Every time a new item is found, your workflow will run.
# SDK
You can trigger workflows using the Pipedream JavaScript and Ruby SDKs, as well.
Select the SDK trigger to generate workflow-specific code samples for sending events to your workflow using each of the SDKs.
# Don't see a trigger you need?
If you don't see a trigger you'd like us to support, please let us know (opens new window).