
# hello world!
First, let's create an HTTP-triggered workflow and return a response of hello world!. This example will cover how to:
TIP
If you have any issues completing this example, you can view, copy and run a completed version (opens new window).
# Create a new workflow
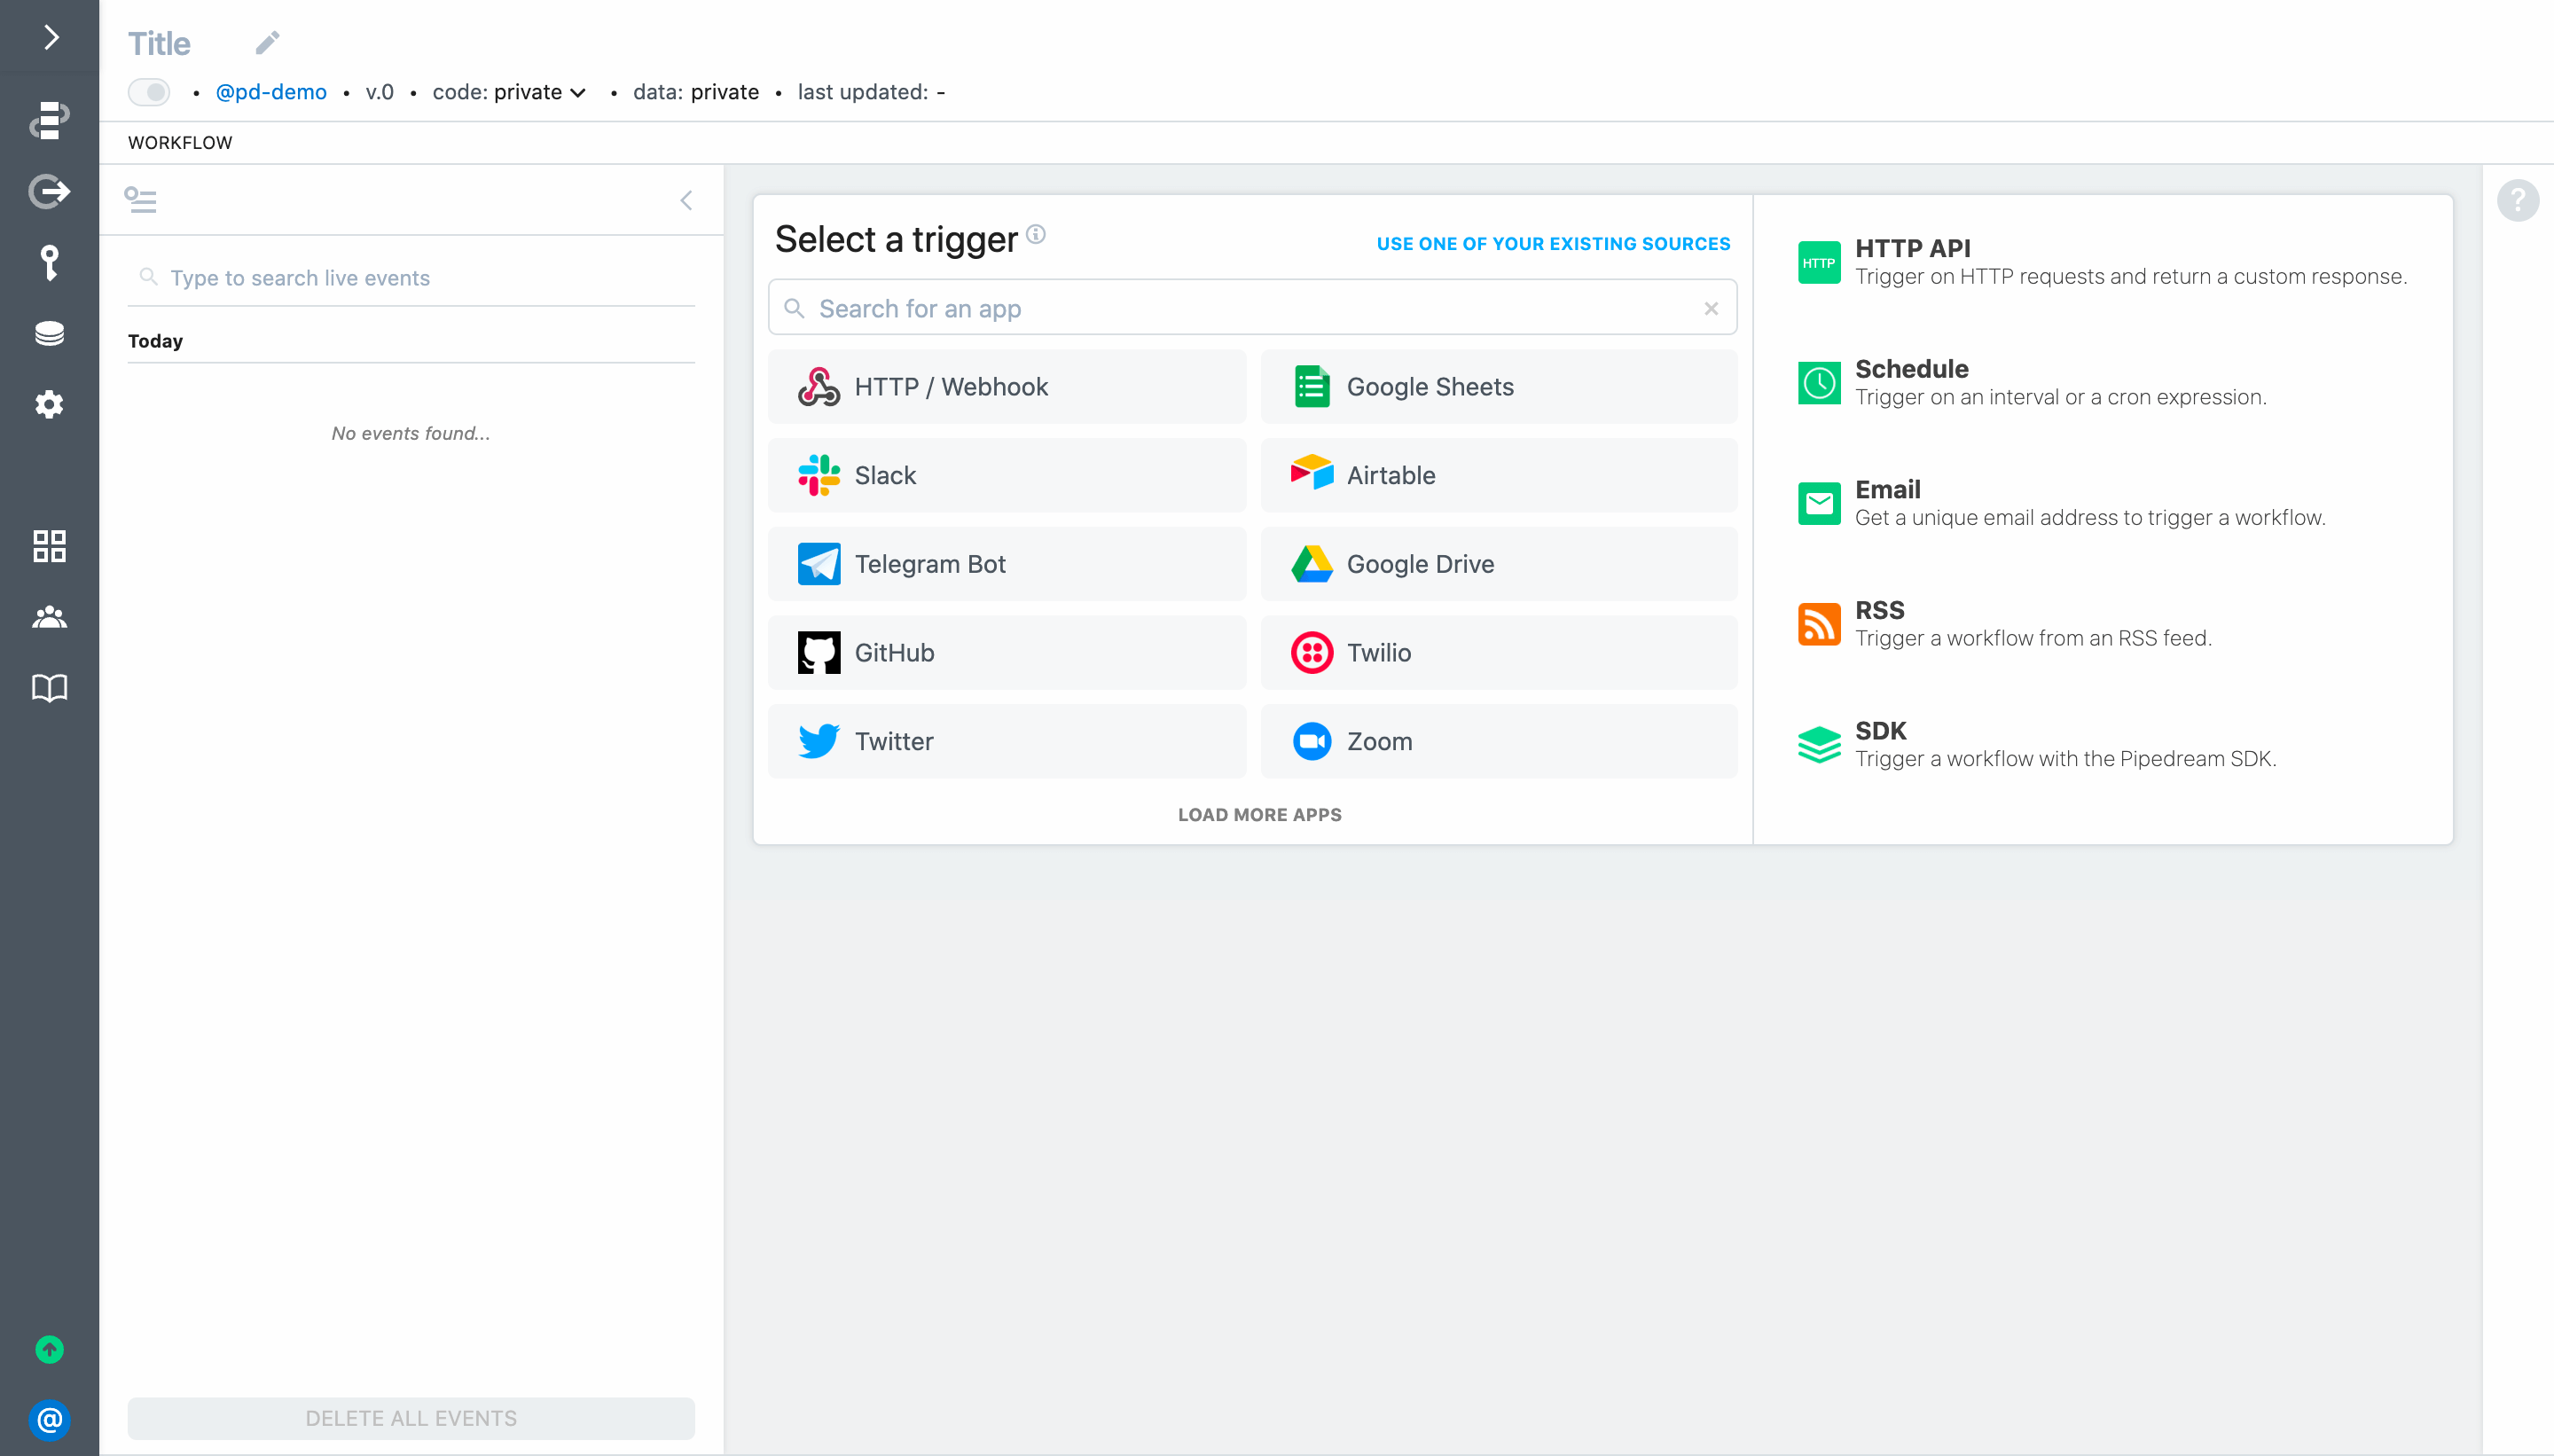
First, create a new workflow by clicking New from https://pipedream.com/workflows (opens new window):

Pipedream will launch the workflow builder:
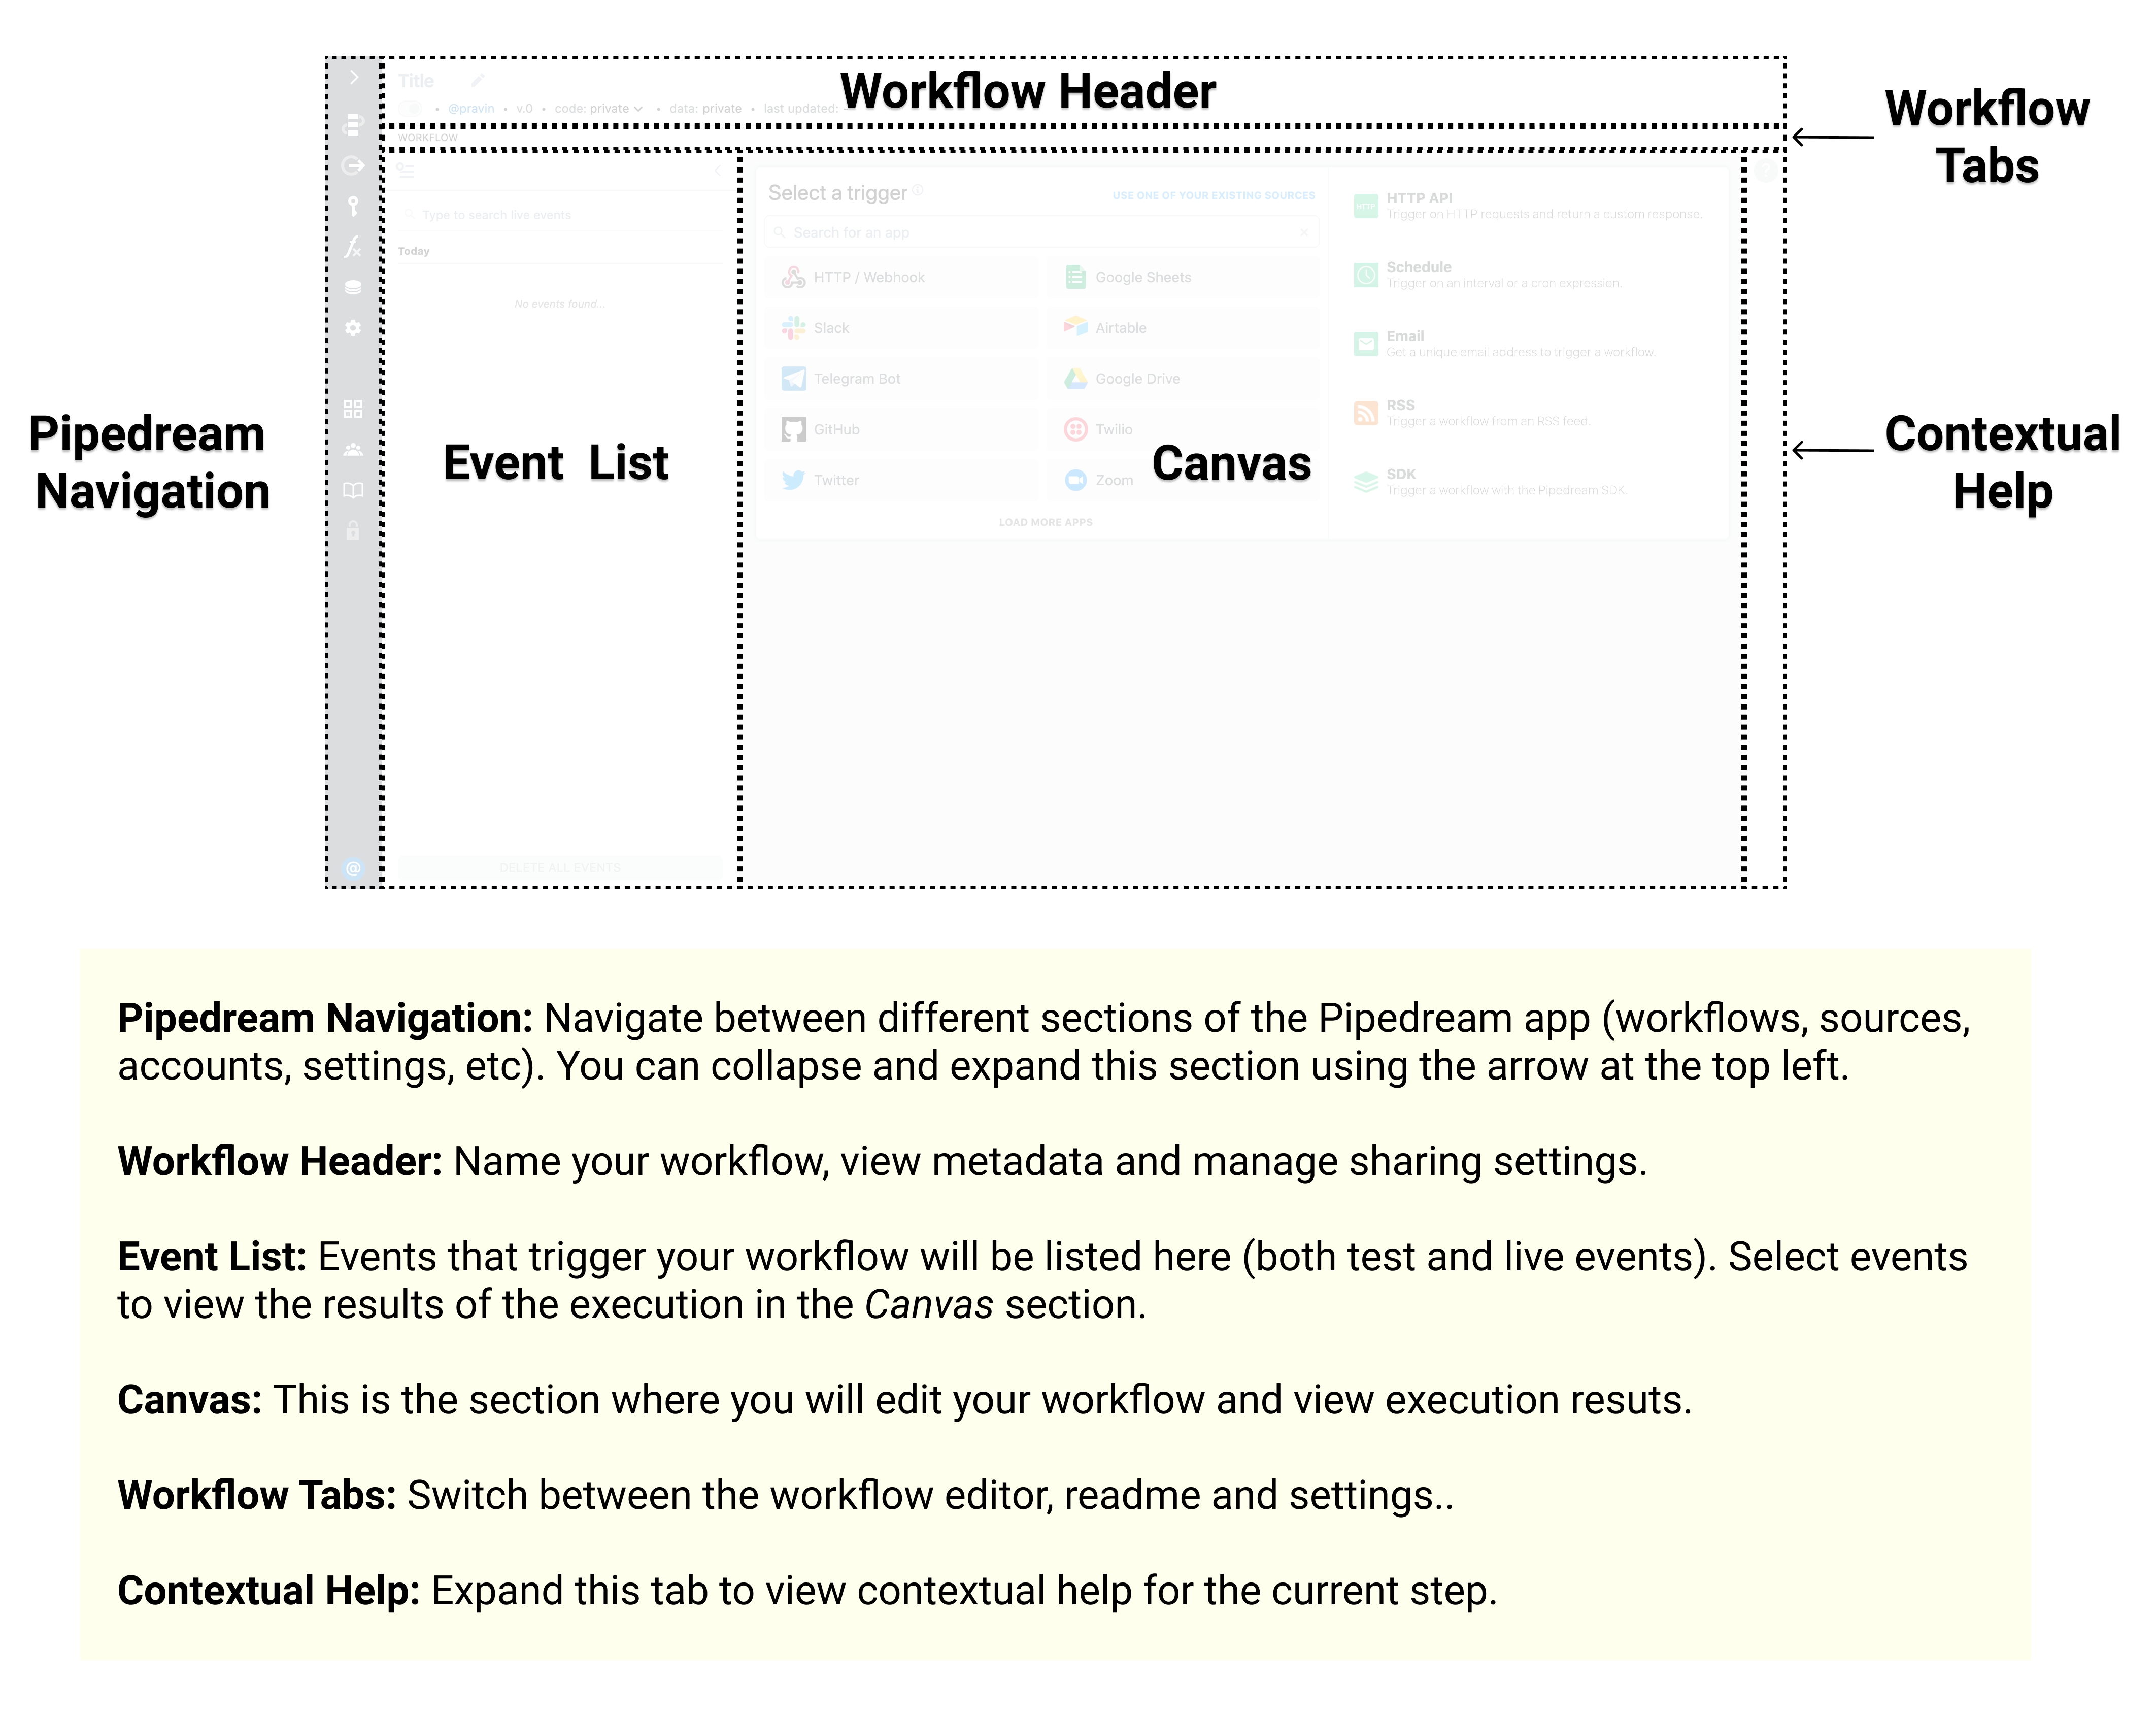
Following is a brief overview of the screen layout:
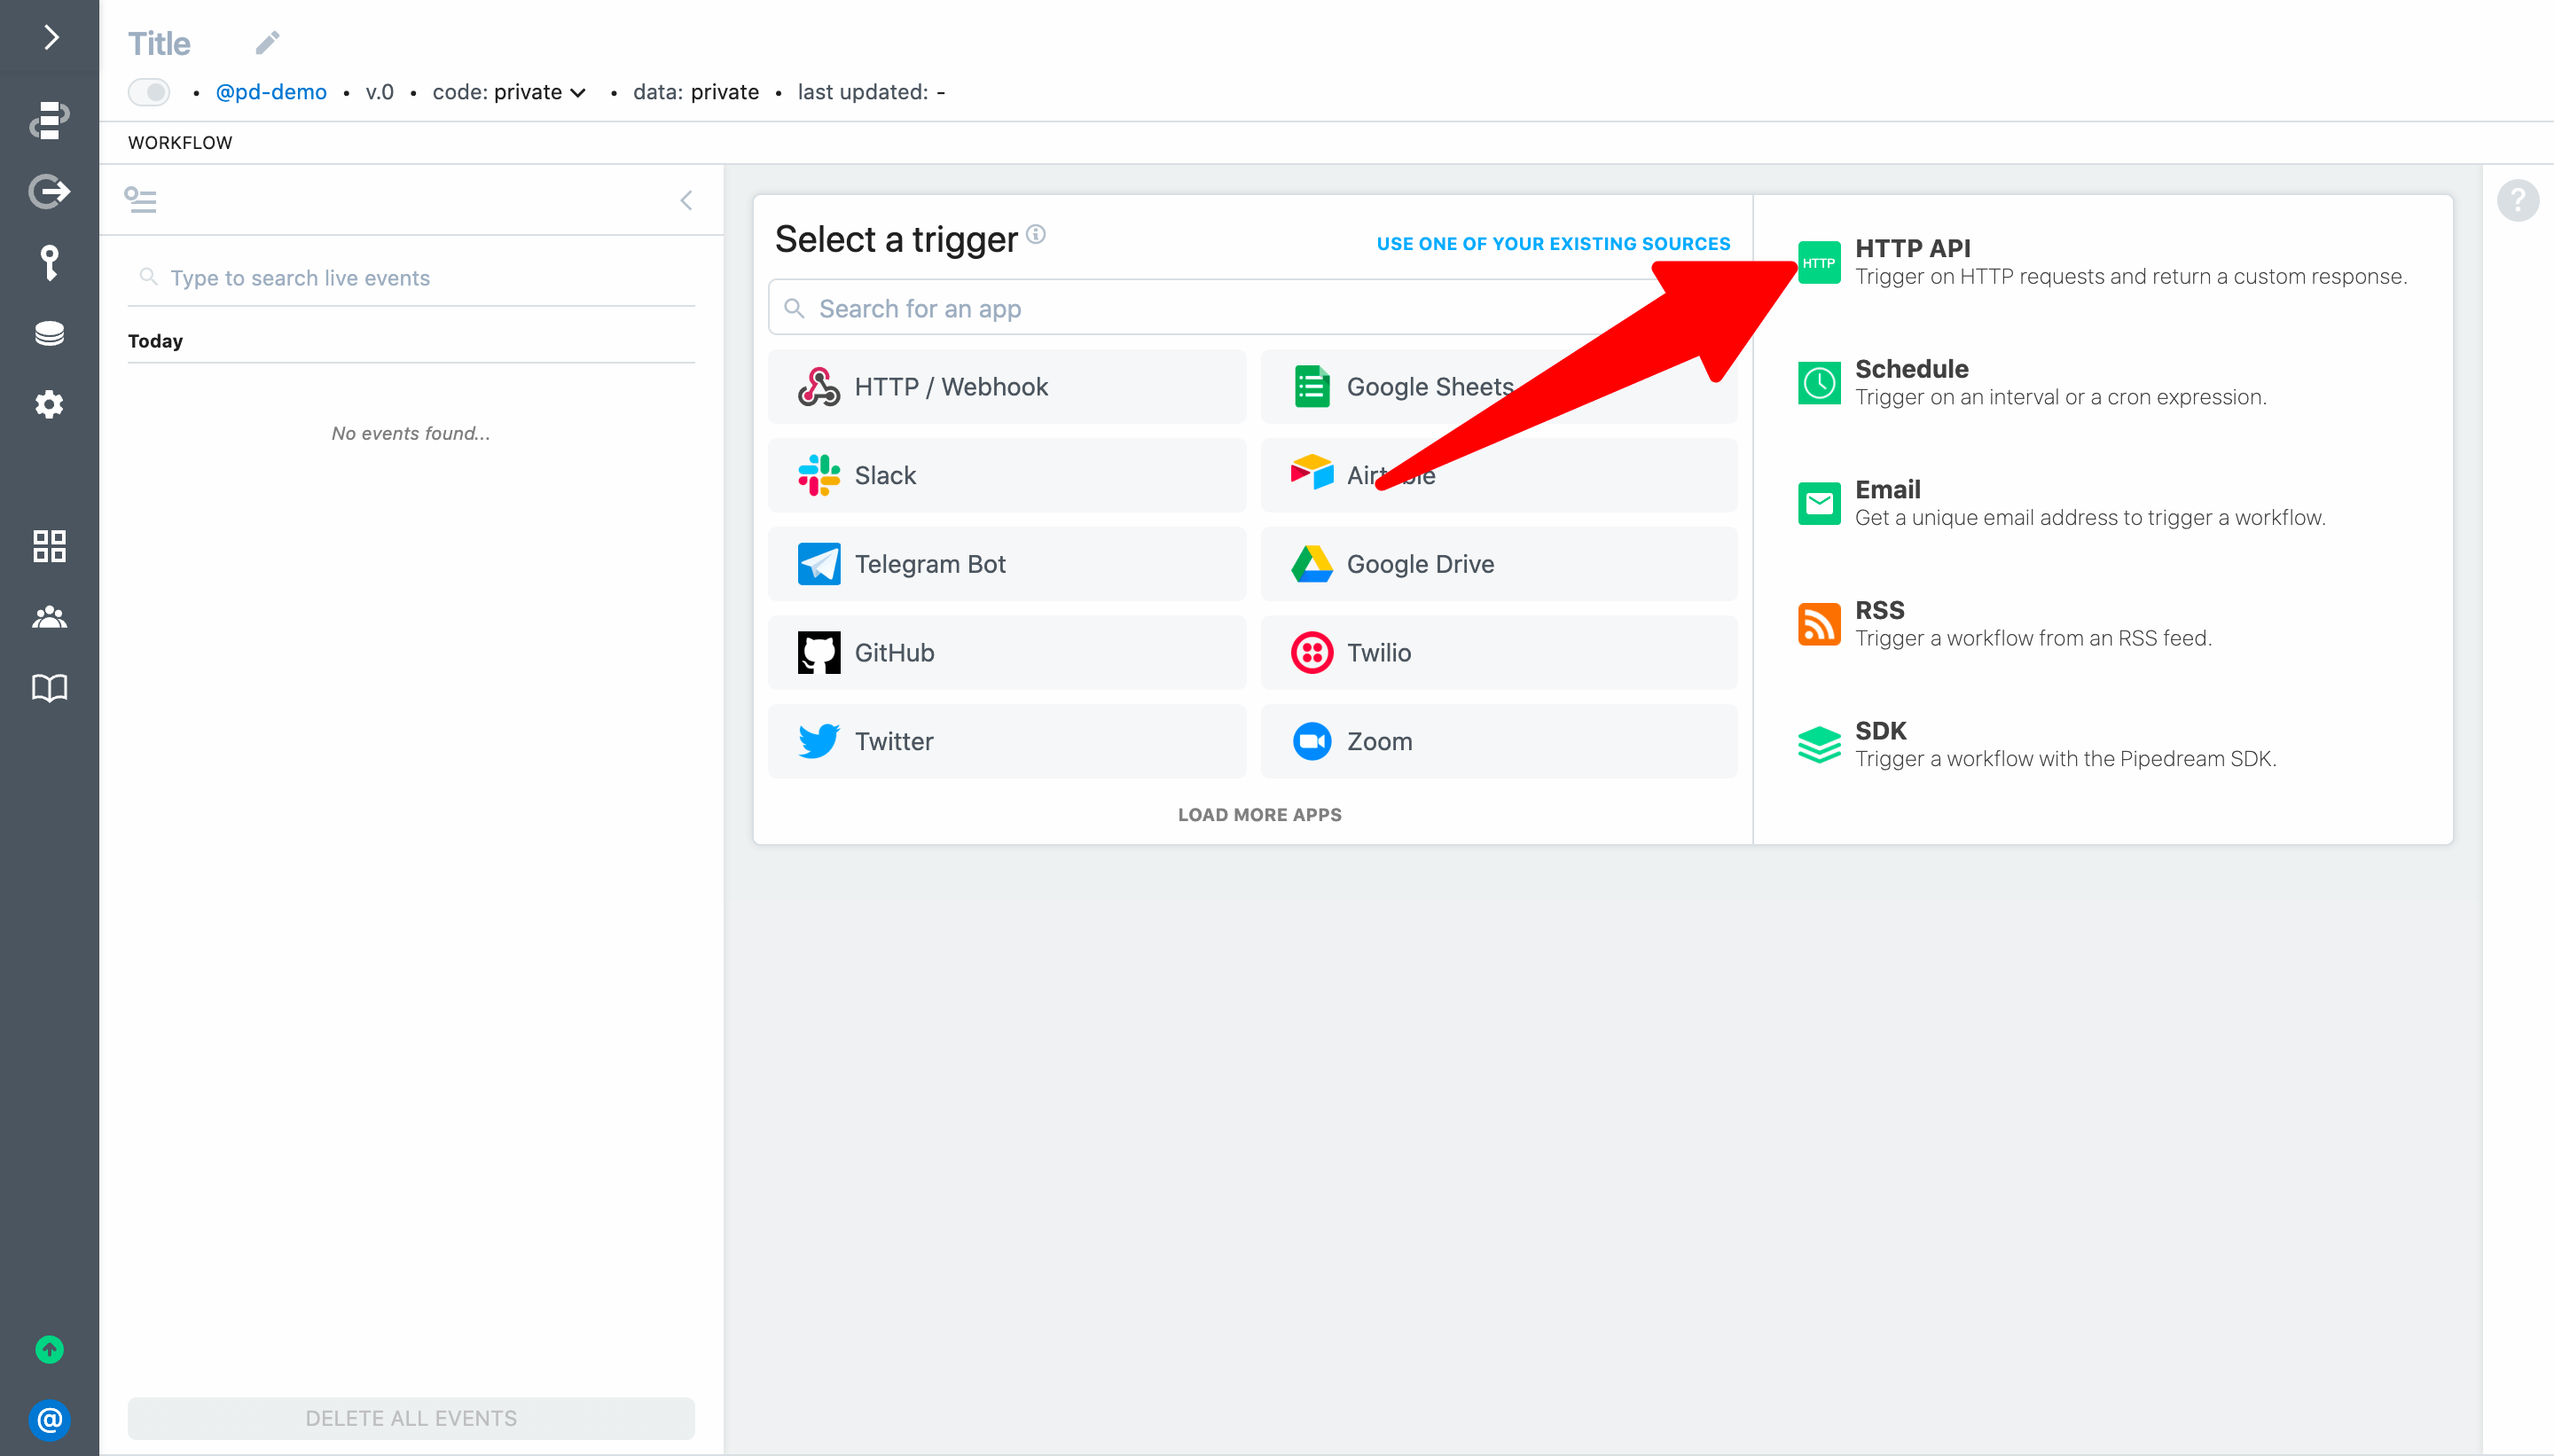
# Generate a unique endpoint URL to trigger the workflow
To create an HTTP or webhook-triggered workflow, select the HTTP API trigger.
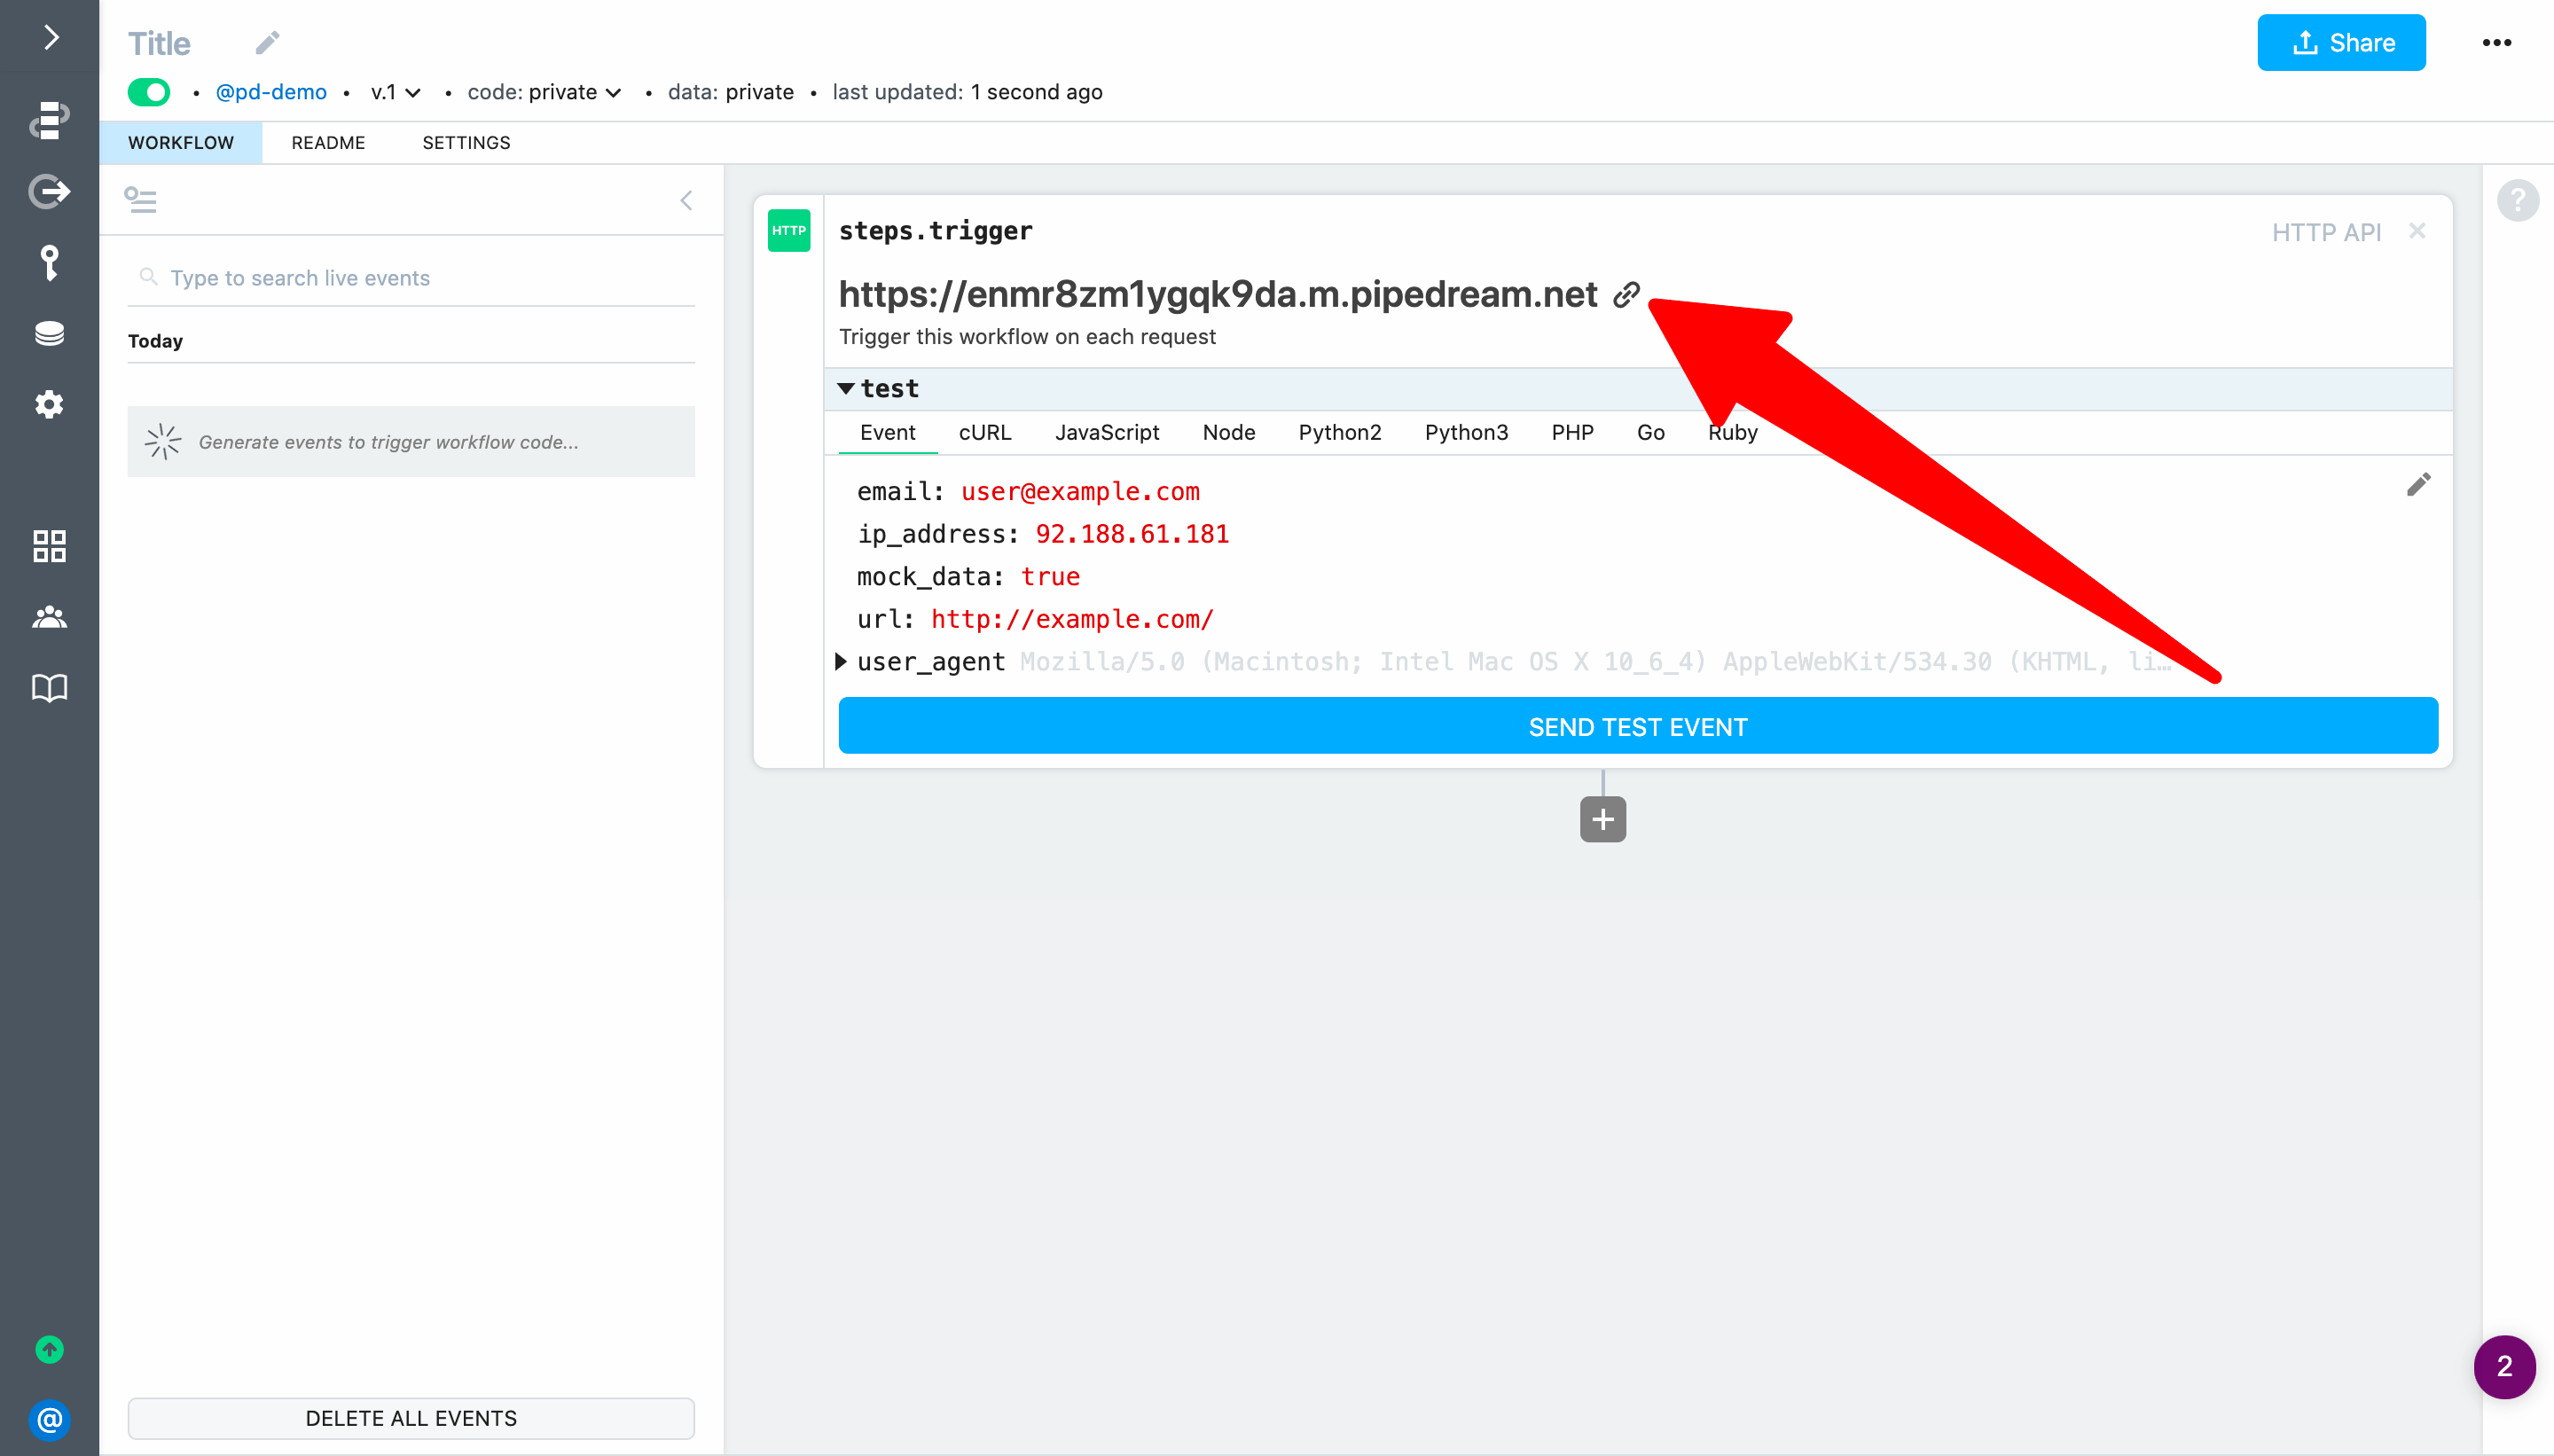
Your workflow will automatically deploy and Pipedream will generate a unique endpoint URL.
# Send HTTP requests to your workflow
Any requests you make to the endpoint URL will trigger your workflow. To test it out:
- Copy the endpoint URL generated by Pipedream
- Open a new browser tab and load the URL

When you return to your workflow, you'll see the requests in the event list (events appear in real-time — you don't need to refresh the page).
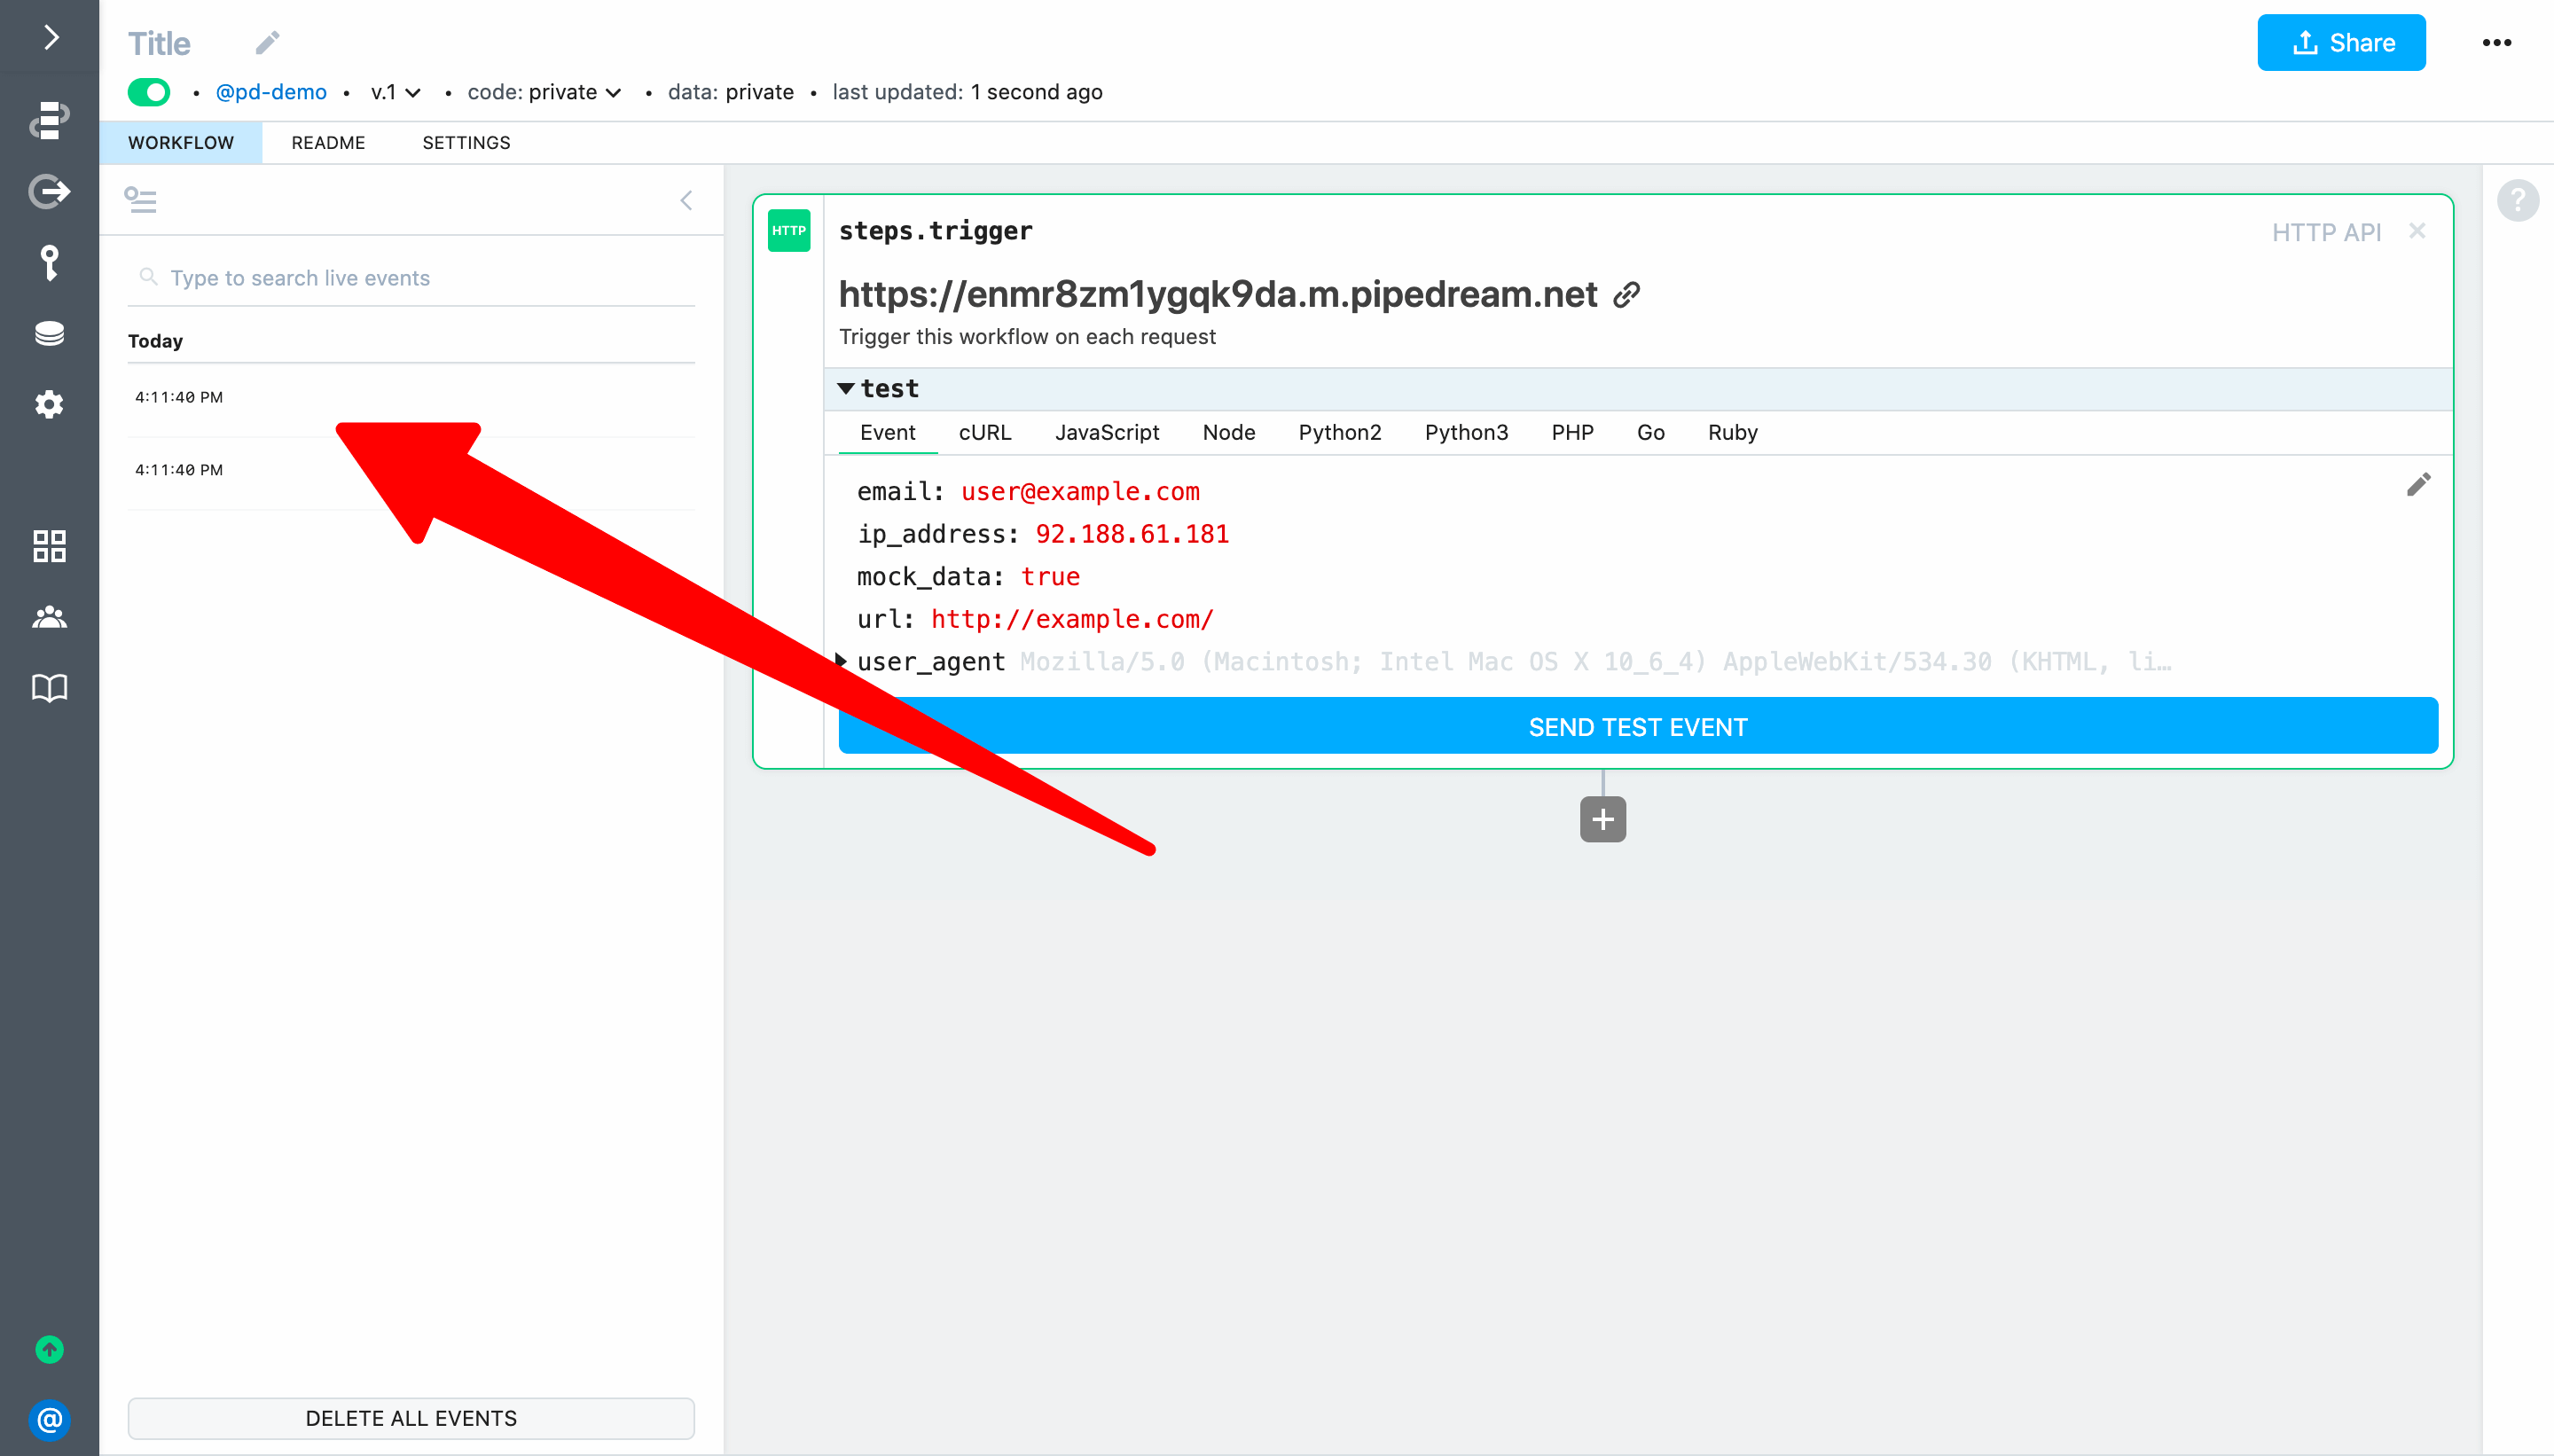
IMPORTANT: You may see multiple events appear in the event list each time you load the endpoint URL in a web browser's address bar. That happens because modern browsers automatically request a favicon.ico resource when you load a URL. We'll update our workflow to handle this case in a later section of the quickstart.
# Inspect workflow events
Select an event from the list to inspect the associated exports and logs (click on an event again to de-select it). The HTTP trigger exports data including the url invoked, method, body, headers, query parameters and more. This data can also be referenced by steps in your workflow via the steps object (for example, to use the trigger event in a later step you can reference steps.trigger.event — we'll cover this in the next example).
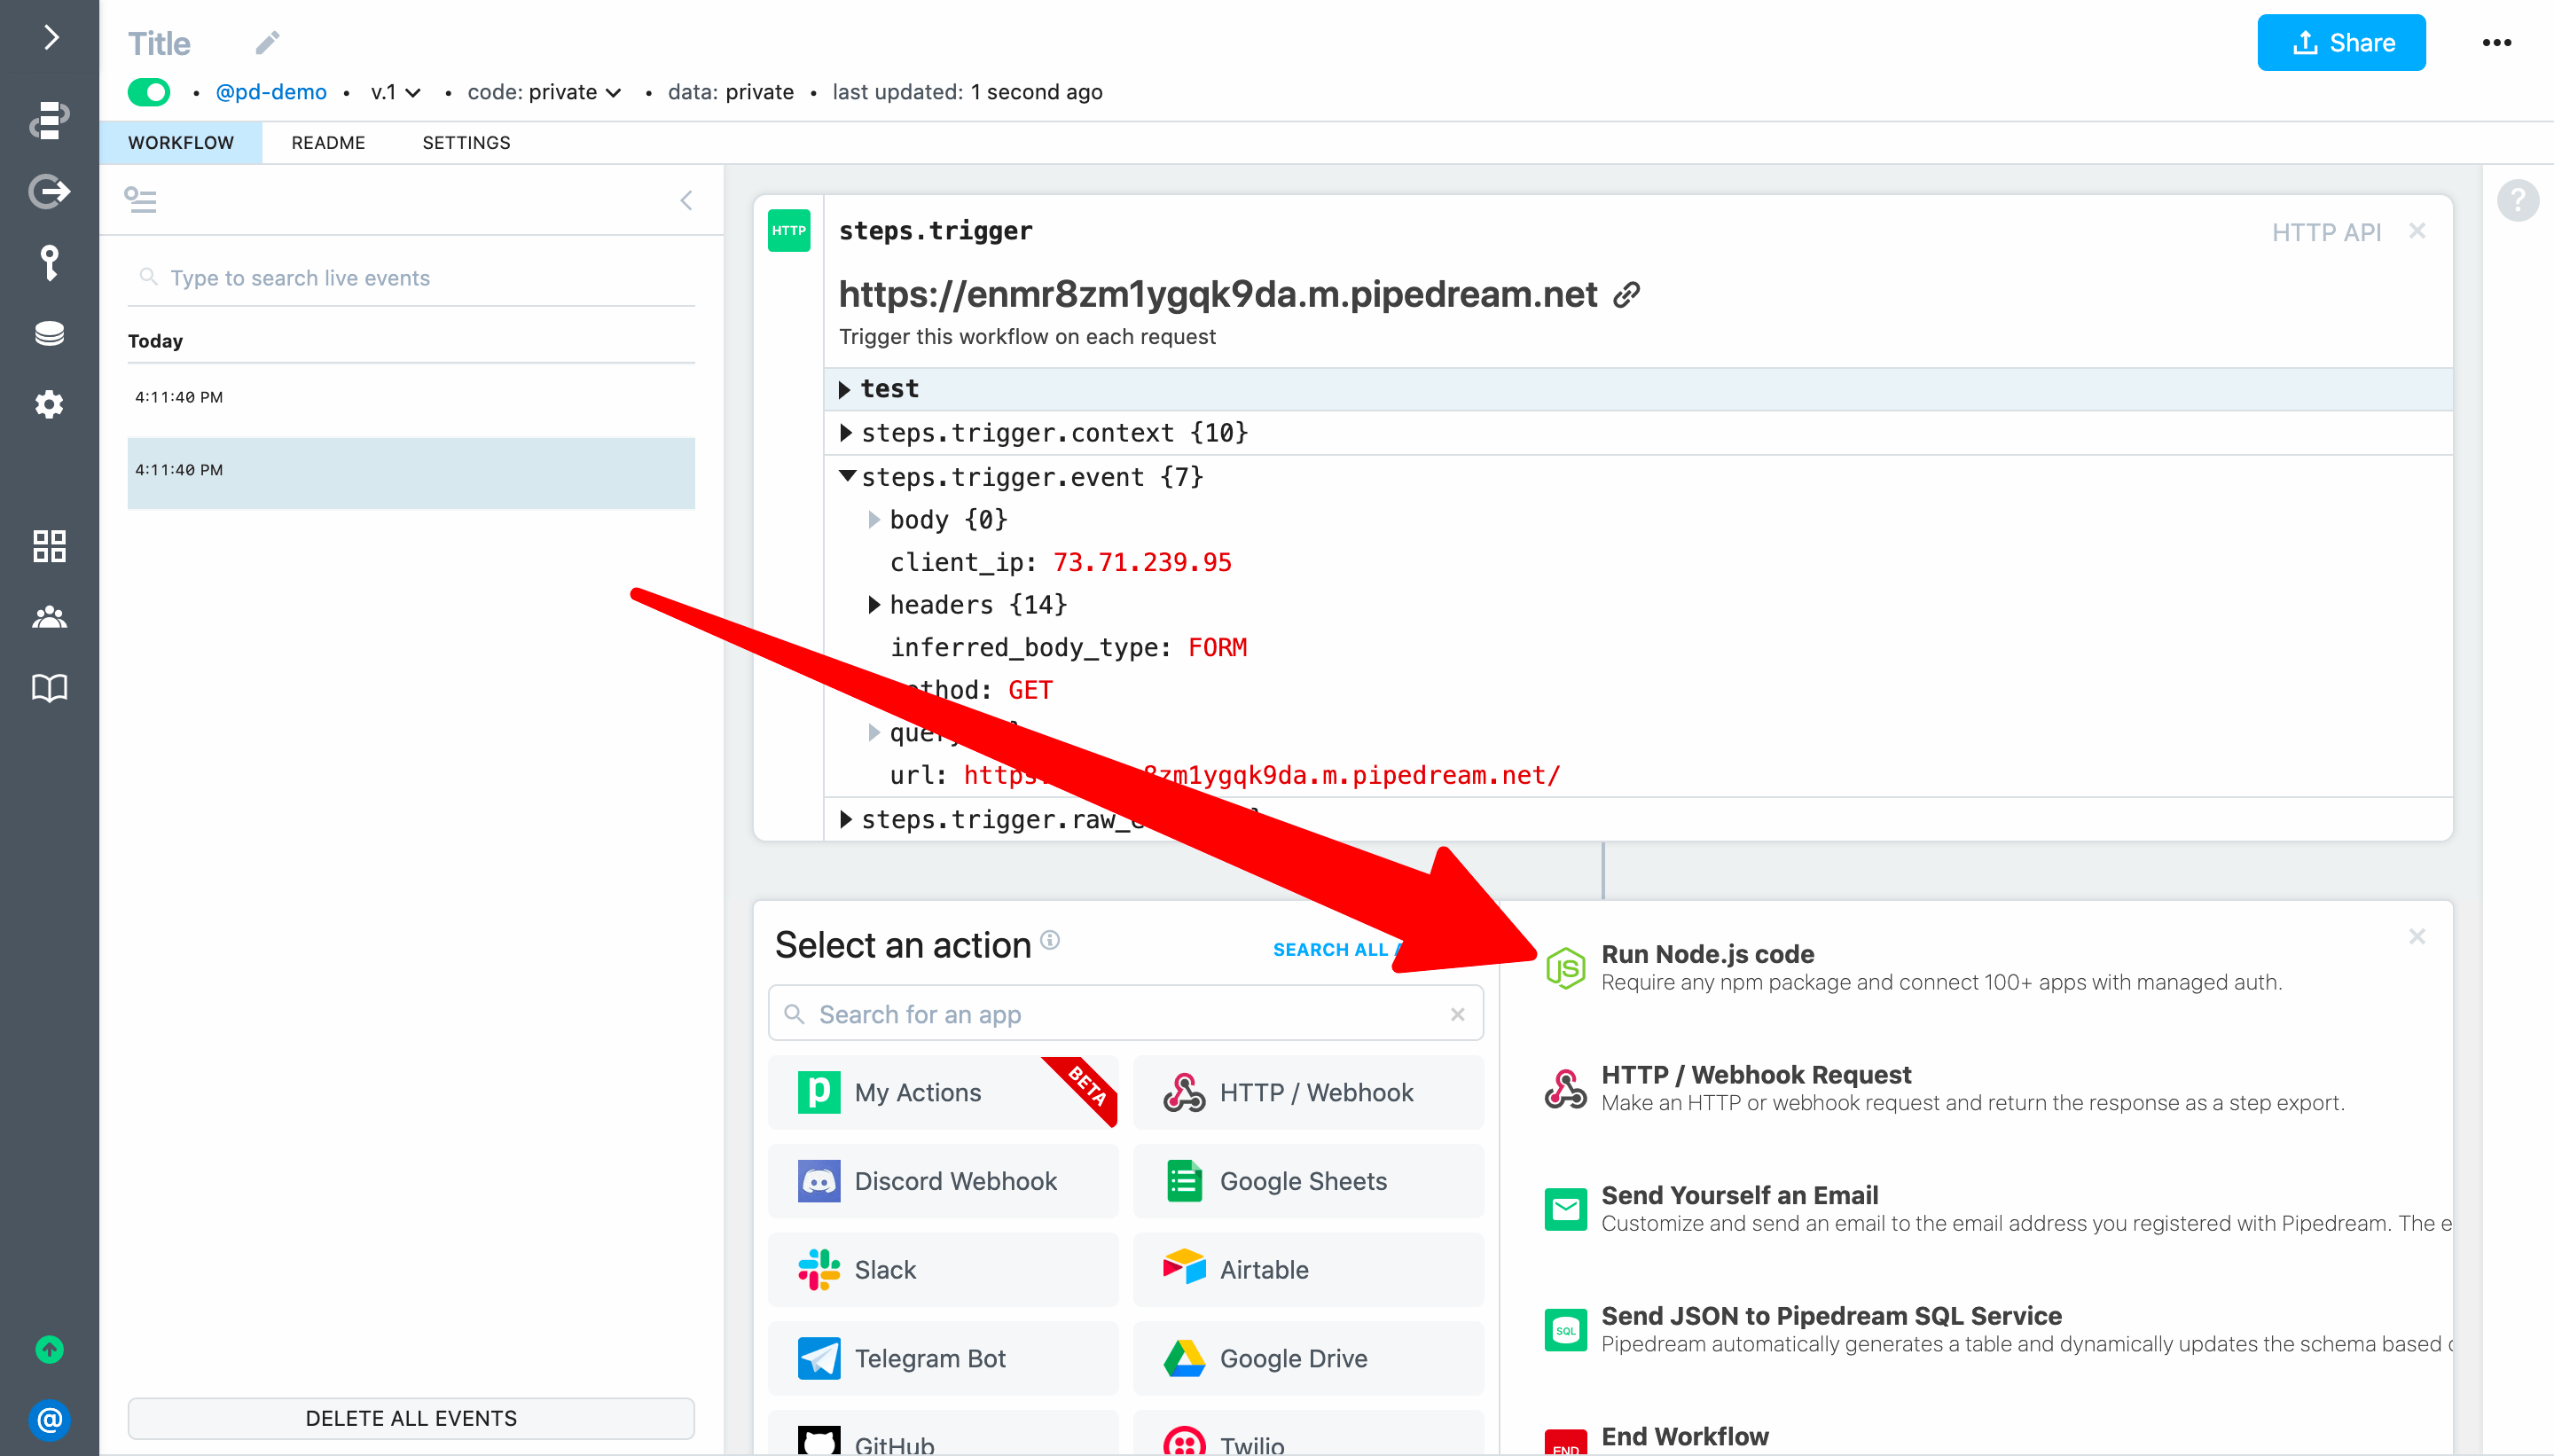
# Return a custom response on each HTTP request
Next, let's use Pipedream's $respond() function to return a custom response from the workflow. First, click on Run Node.js code to add a code step (if the step menu is not expanded, click the + button below the trigger).
Pipedream will add a code step to your workflow.
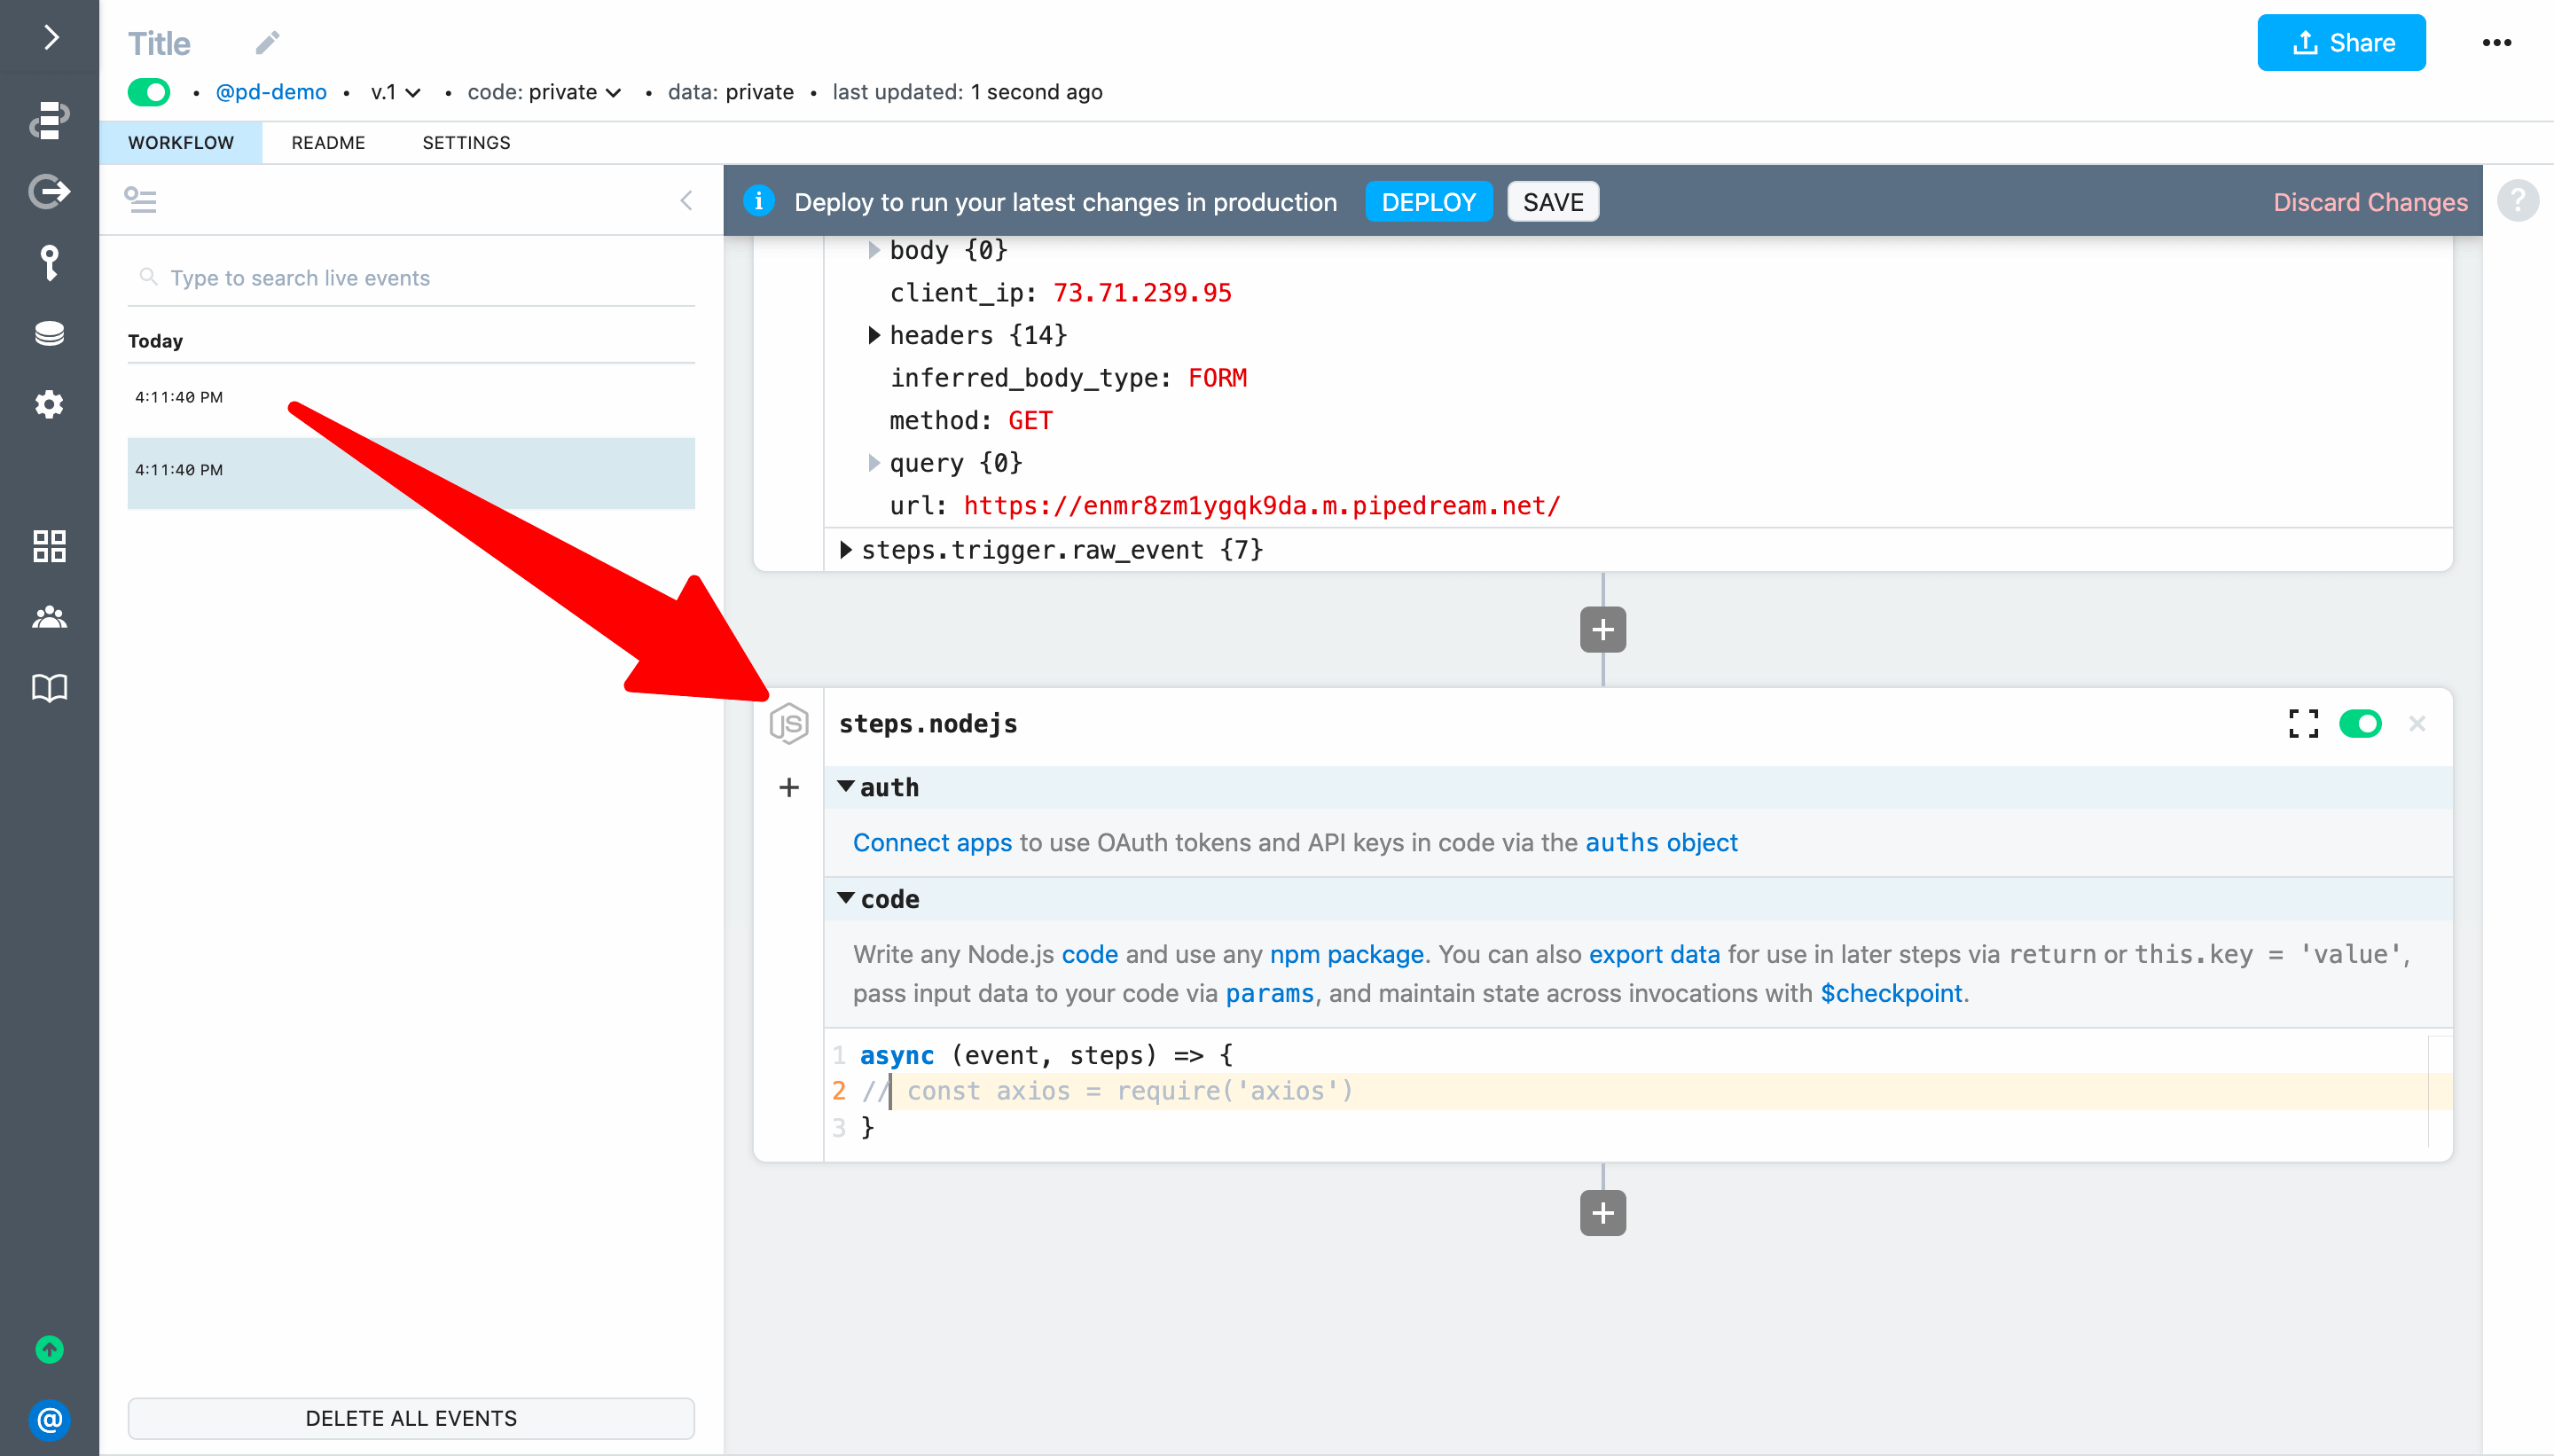
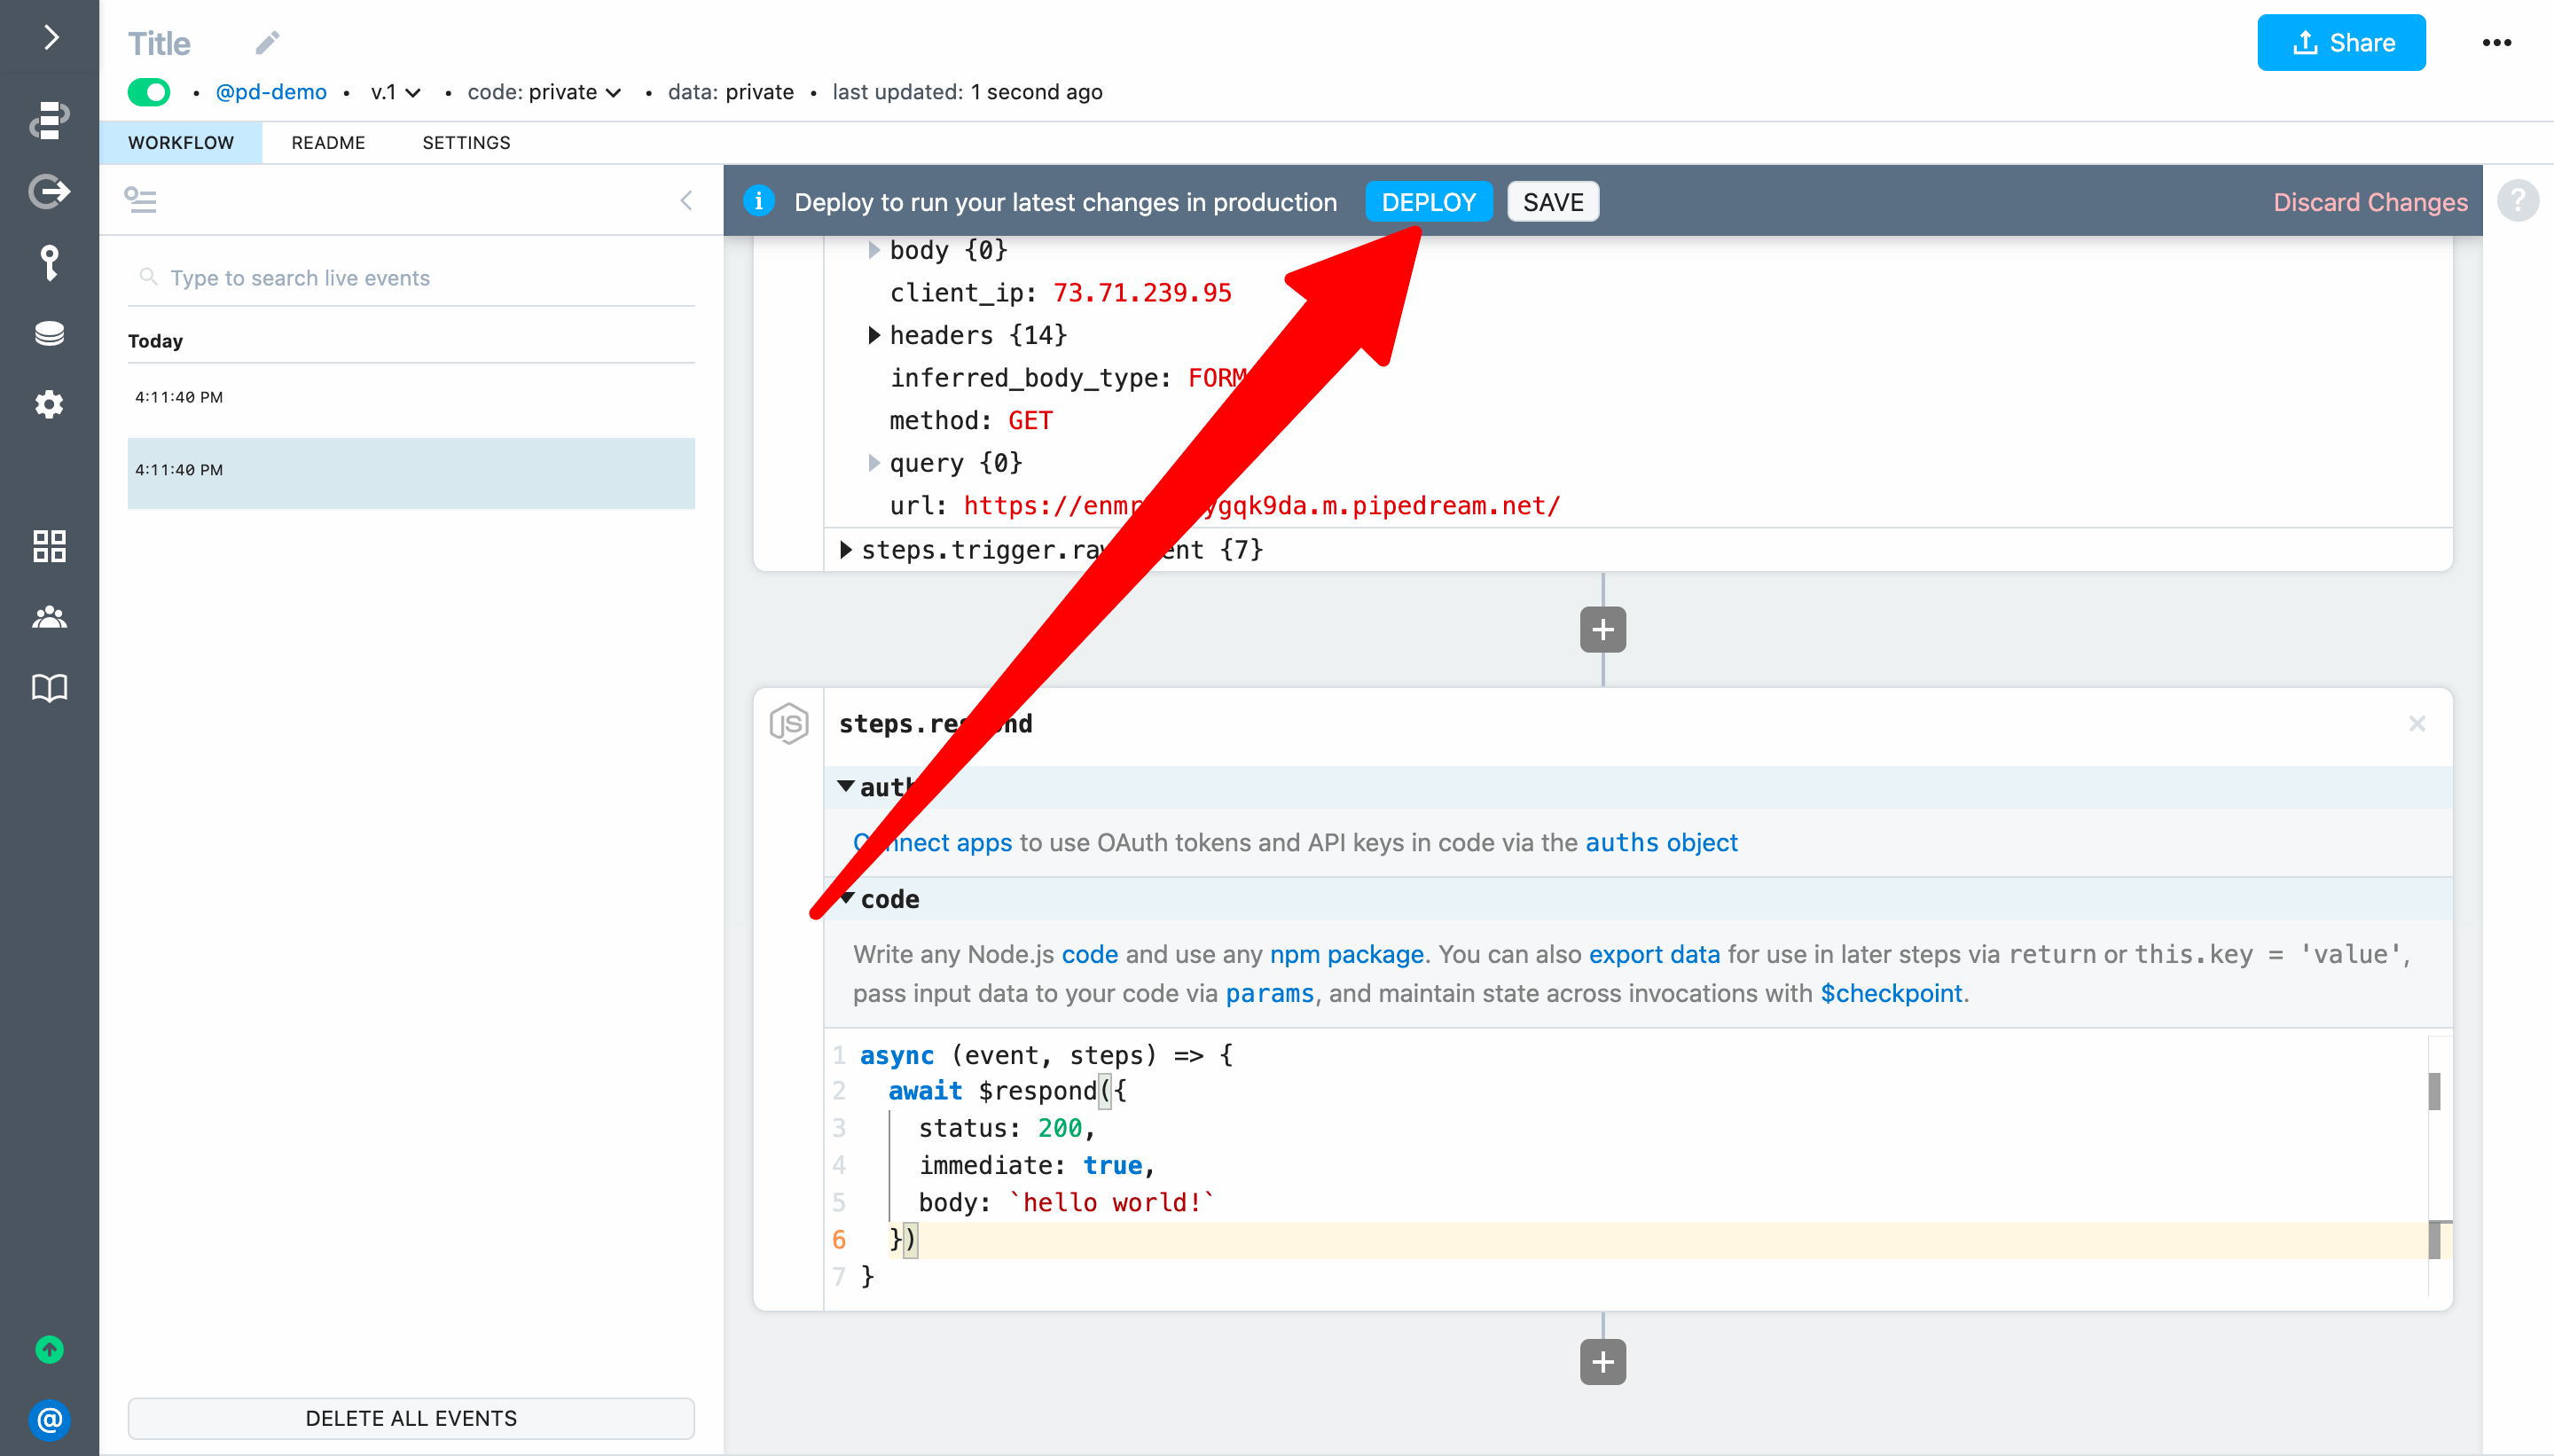
You can write any Node.js code and use any npm package (we'll cover npm in a later part of this guide). For this example, add the following code to return a custom response of hello world! on each HTTP request:
await $respond({
  status: 200,
  immediate: true,
  body: `hello world!`
})
Next, rename the step from steps.nodejs to steps.respond. IMPORTANT: Step names affect workflow functionality and must be unique within a workflow. When you share data between steps, you'll use step names to reference data.
Then click Deploy to run your changes on each new event.
The deploy should complete in about 1-2 seconds. Then reload the endpoint URL in your browser — the response should change to hello world!.
Finally, give your workflow a friendly name like HTTP Quickstart.

Congratulations! You just built your first serverless workflow!
Next, let's pass data in the HTTP request and use it to customize the workflow response.
