
# ServiceNow
Pipedream lets you interact with the ServiceNow REST API (opens new window) in workflows. You can use Pipedream's prebuilt actions (or write your own) to perform common operations, or run any Node code to talk to their API.
# Setting up an app in your ServiceNow instance
Before you can use the ServiceNow REST API from a workflow, you need to configure an OAuth app in your ServiceNow instance that will grant access tokens to your users and authenticate requests to its REST API.
- In your ServiceNow instance, visit the Application Registry and create a new app, choosing the Create an OAuth API endpoint for external clients option.
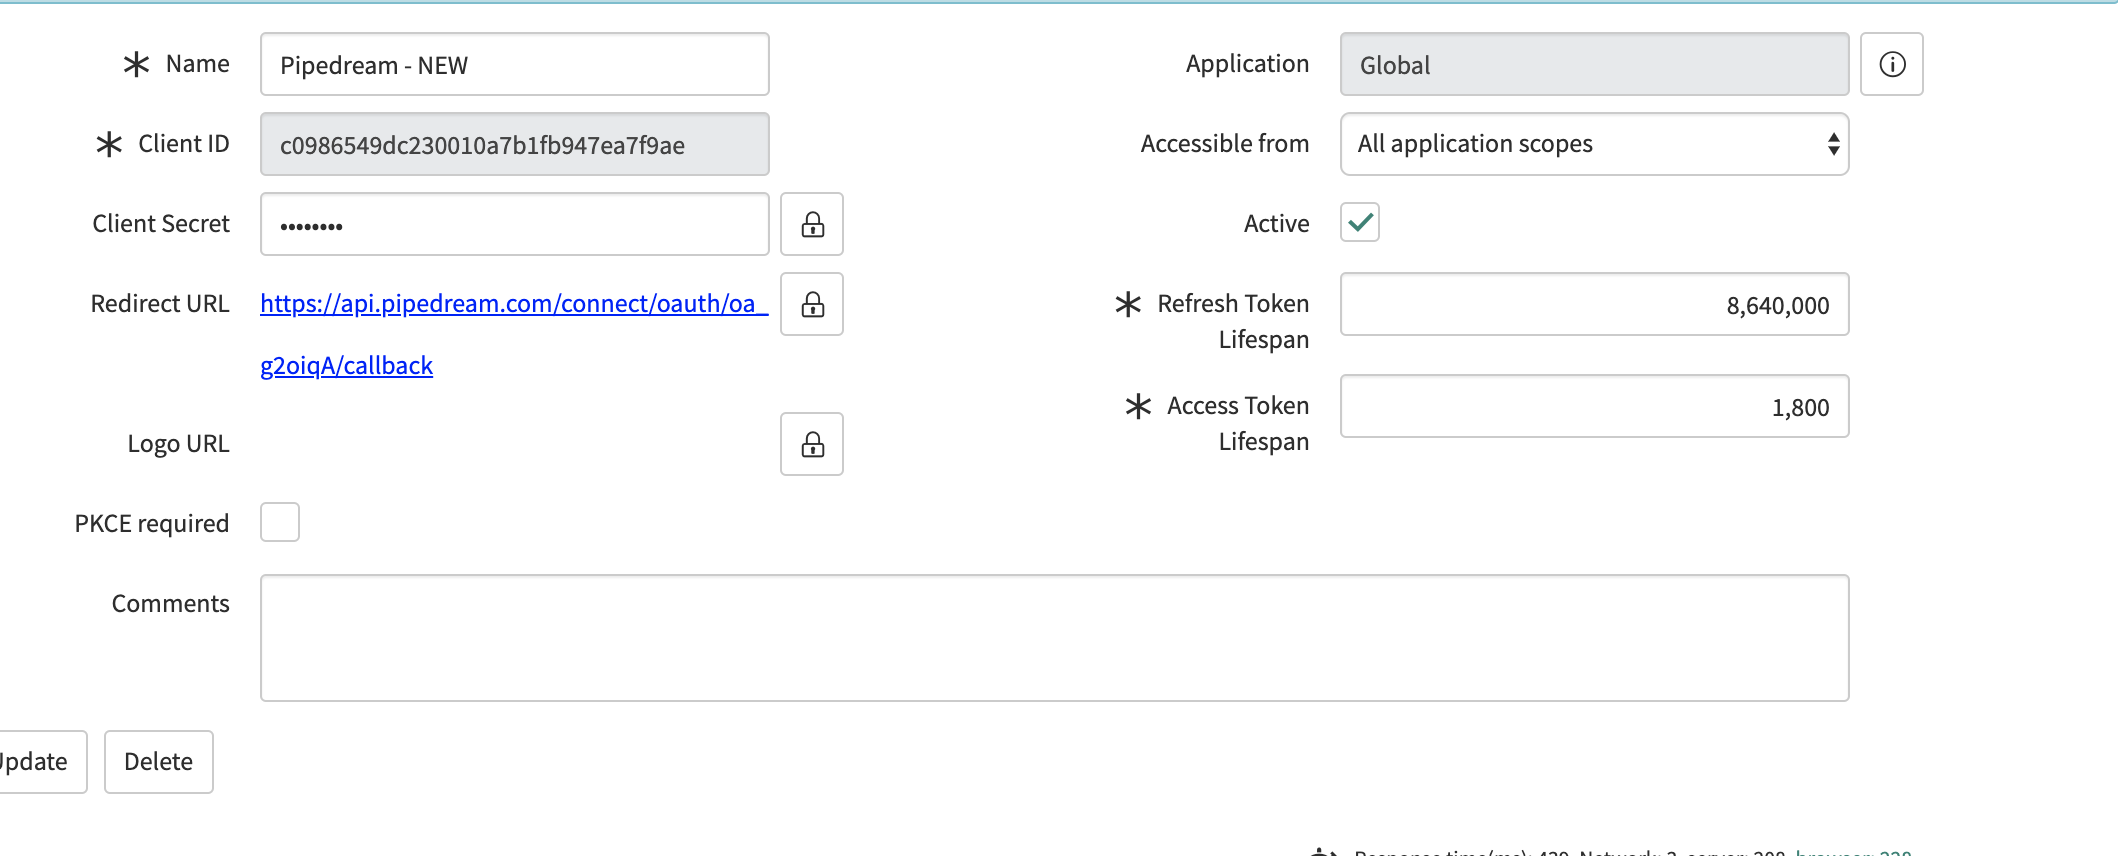
- Name it something memorable, then leave every other field blank or keep the defaults, except for the Redirect URL, which should be:
https://api.pipedream.com/connect/oauth/oa_g2oiqA/callback. Your app should look something like this:
- Next, you'll need to copy the client ID and secret generated in Step 2, and add another app. This time, select the option to Connect to a third party OAuth Provider.
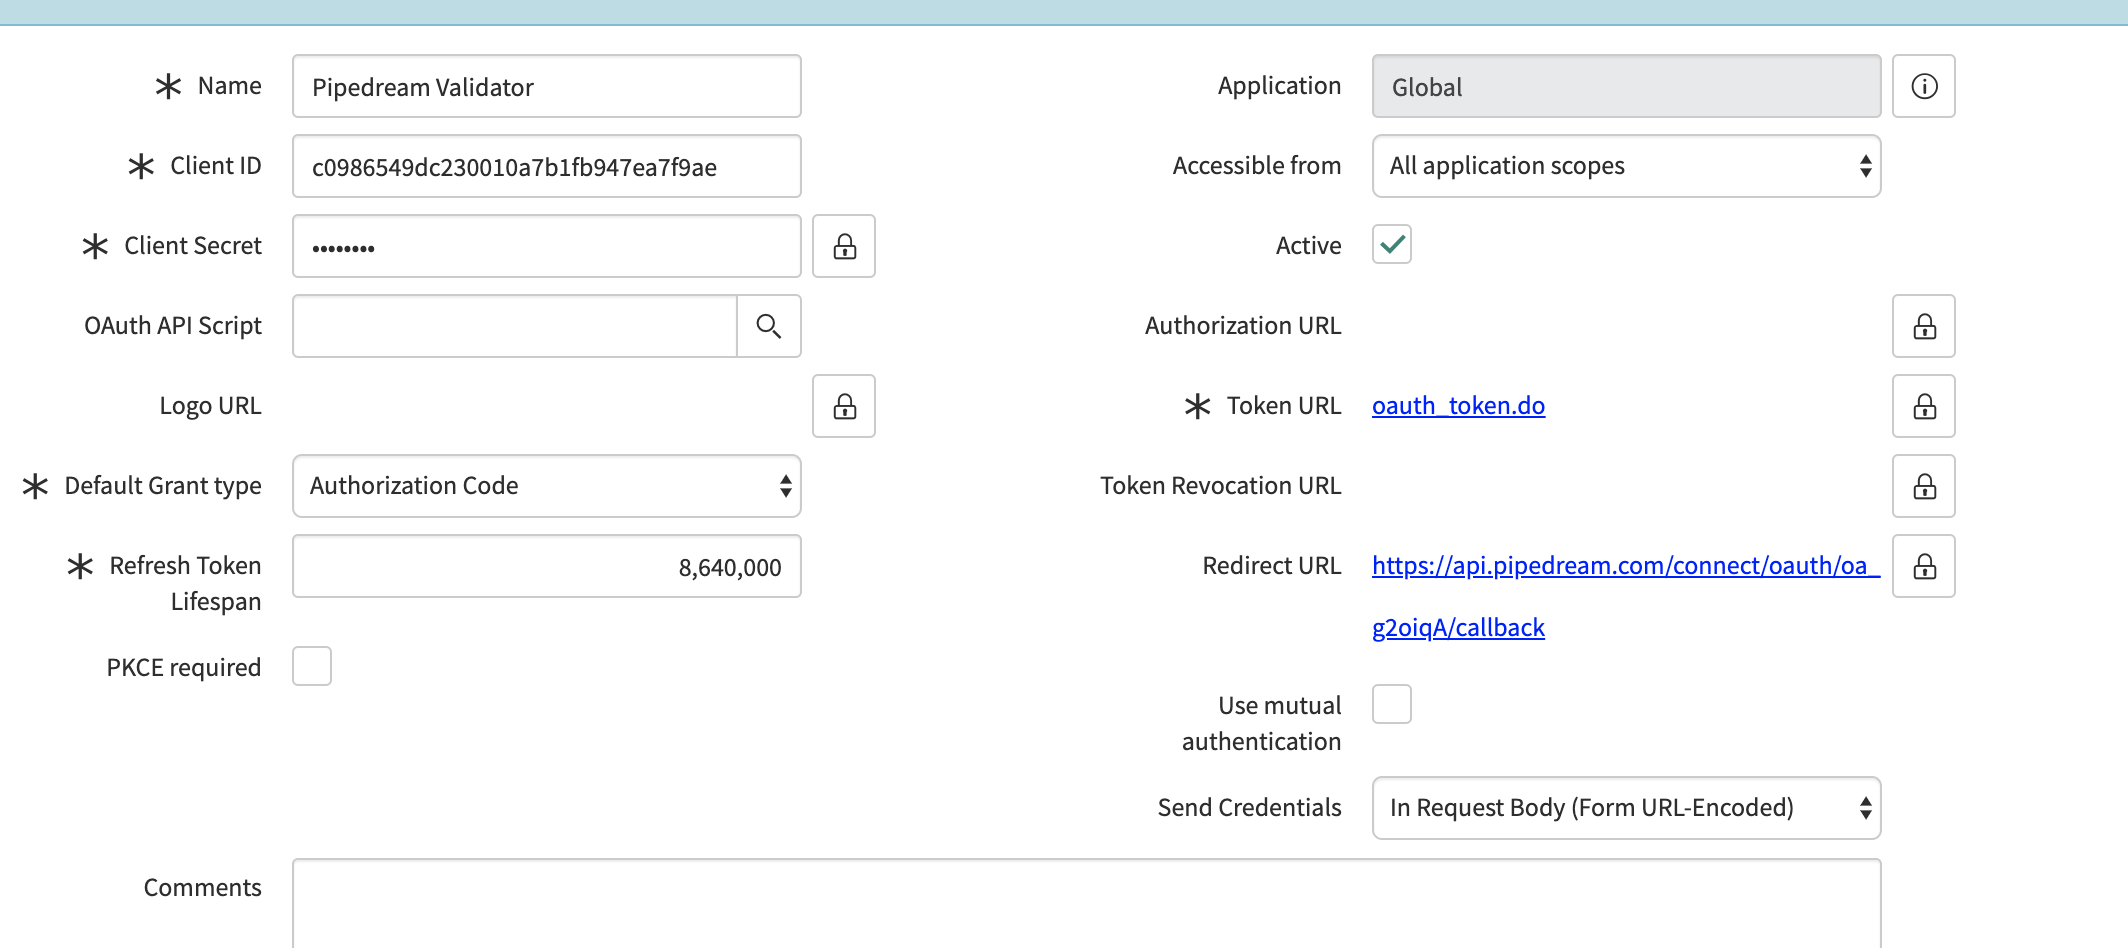
- Name this app something like Pipedream OAuth Validator, and add the client ID / secret from Step 2. Change the grant type to Authorization Code, and set the Token URL to
oauth_token.do(without any hostname, this refers to the current instance). Finally, add the same Redirect URL as you did above:https://api.pipedream.com/connect/oauth/oa_g2oiqA/callback. This app's configuration should look something like this when complete:
- Visit https://pipedream.com/accounts (opens new window), and click the button labeled Click Here to Connect An App in the top-right. In the modal that appears, search for ServiceNow and select it. You'll be prompted to enter the client ID and client secret from Step 2 above, as well as the name of your instance. The instance name is the host portion of your instance's URL: that is, the
dev98042inhttps://dev98042.service-now.com/.
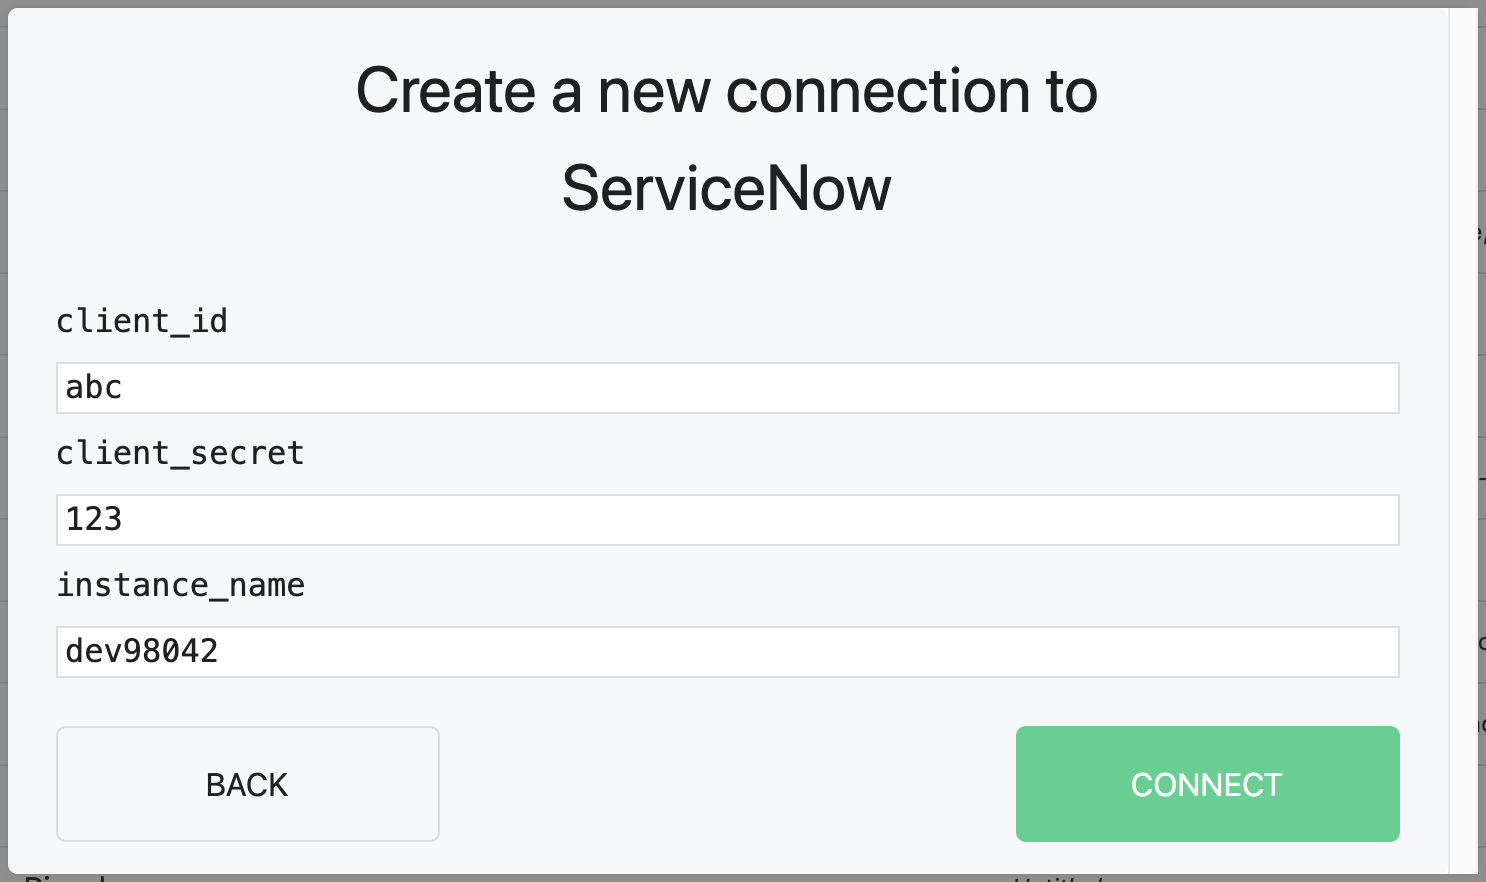
- Press Connect in the bottom-right of the modal. This should open up a new window asking you to login to your ServiceNow instance. This authorizes Pipedream's access to your ServiceNow account, and you should be ready to connect to your instance's REST API!
Collectively, the two apps you configured in your ServiceNow instance allow your instance to issue new OAuth access tokens for the user who authenticated in Step 6. This allows Pipedream to retrieve a fresh access token before it makes requests to the ServiceNow REST API.
# ServiceNow Authorization Reference
This ServiceNow doc (opens new window) describes the general flow we ask you to implement above. In that doc, the app you create in Step 2 is referred to as the client application, and the app in Step 4 is referred to as the OAuth provider application registry record.