Since ServiceNow requires OAuth configuration in your instance, you need to manually configure two OAuth apps in your ServiceNow instance to grant access tokens and authenticate requests to the REST API.Please follow the steps below to set up the required OAuth applications.
Create External Client OAuth App
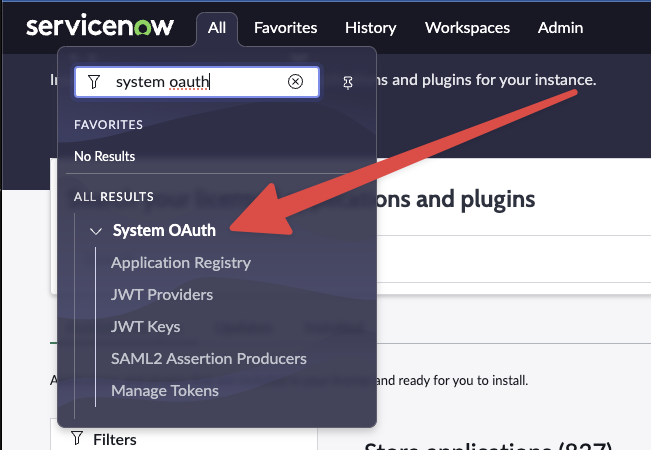
Access ServiceNow Developer Portal
Sign into your ServiceNow Developer Portal account to create or access an instance.

Configure Application Settings
Name your app
Pipedream. Use the default settings but specify the Redirect URL:
Create OAuth Validator App
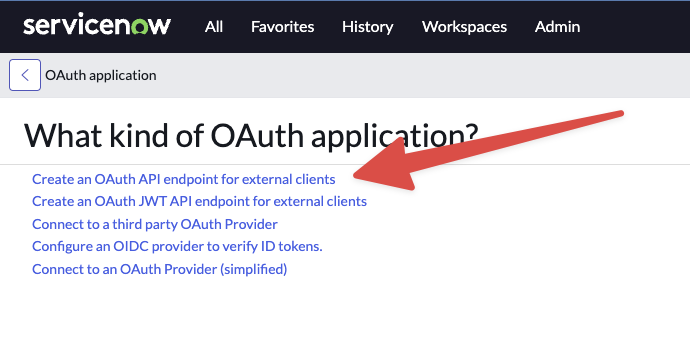
Create OAuth Provider App
Go back to System OAuth > Application Registry > New and select Connect to an OAuth Provider (simplified).
Configure Validator Settings
Name this app
Pipedream OAuth Validator and add the previously copied client ID and secret.Set Authorization Details
Set the grant type to Authorization Code and the Token URL to
oauth_token.do.Connect to Pipedream
Access Pipedream Accounts
Visit Pipedream’s account page, and click Click Here to Connect An App.
Enter Connection Details
Enter the client ID, client secret, and your instance name (e.g.,
dev98042 from https://dev98042.service-now.com/).Troubleshooting
For Hardened or Mature Instances: The standard instructions may not apply perfectly to customized or hardened ServiceNow instances. If you face a 504 Gateway Time-out error or similar issues, consider these additional steps:
- Assign a dedicated role and service account for this integration
- Ensure the role has ACLs configured for the
oauth_credentialtable and other necessary tables