Quickstart
Build a workflow

Quickstart - Workflow Development

Sign up for a free Pipedream account (no credit card required) and complete this quickstart guide to learn the basic patterns for workflow development:

Create a project

Workflows must be created in Projects. Projects make it easy to organize your workflows and collaborate with your team.

Go to https://pipedream.com/projects and click on Create Project.

create project

Next, enter a project name and click Create Project. For this example, we'll name our project Getting Started. You may also click the icon to the right to generate a random project name.

configure project

ℹ️

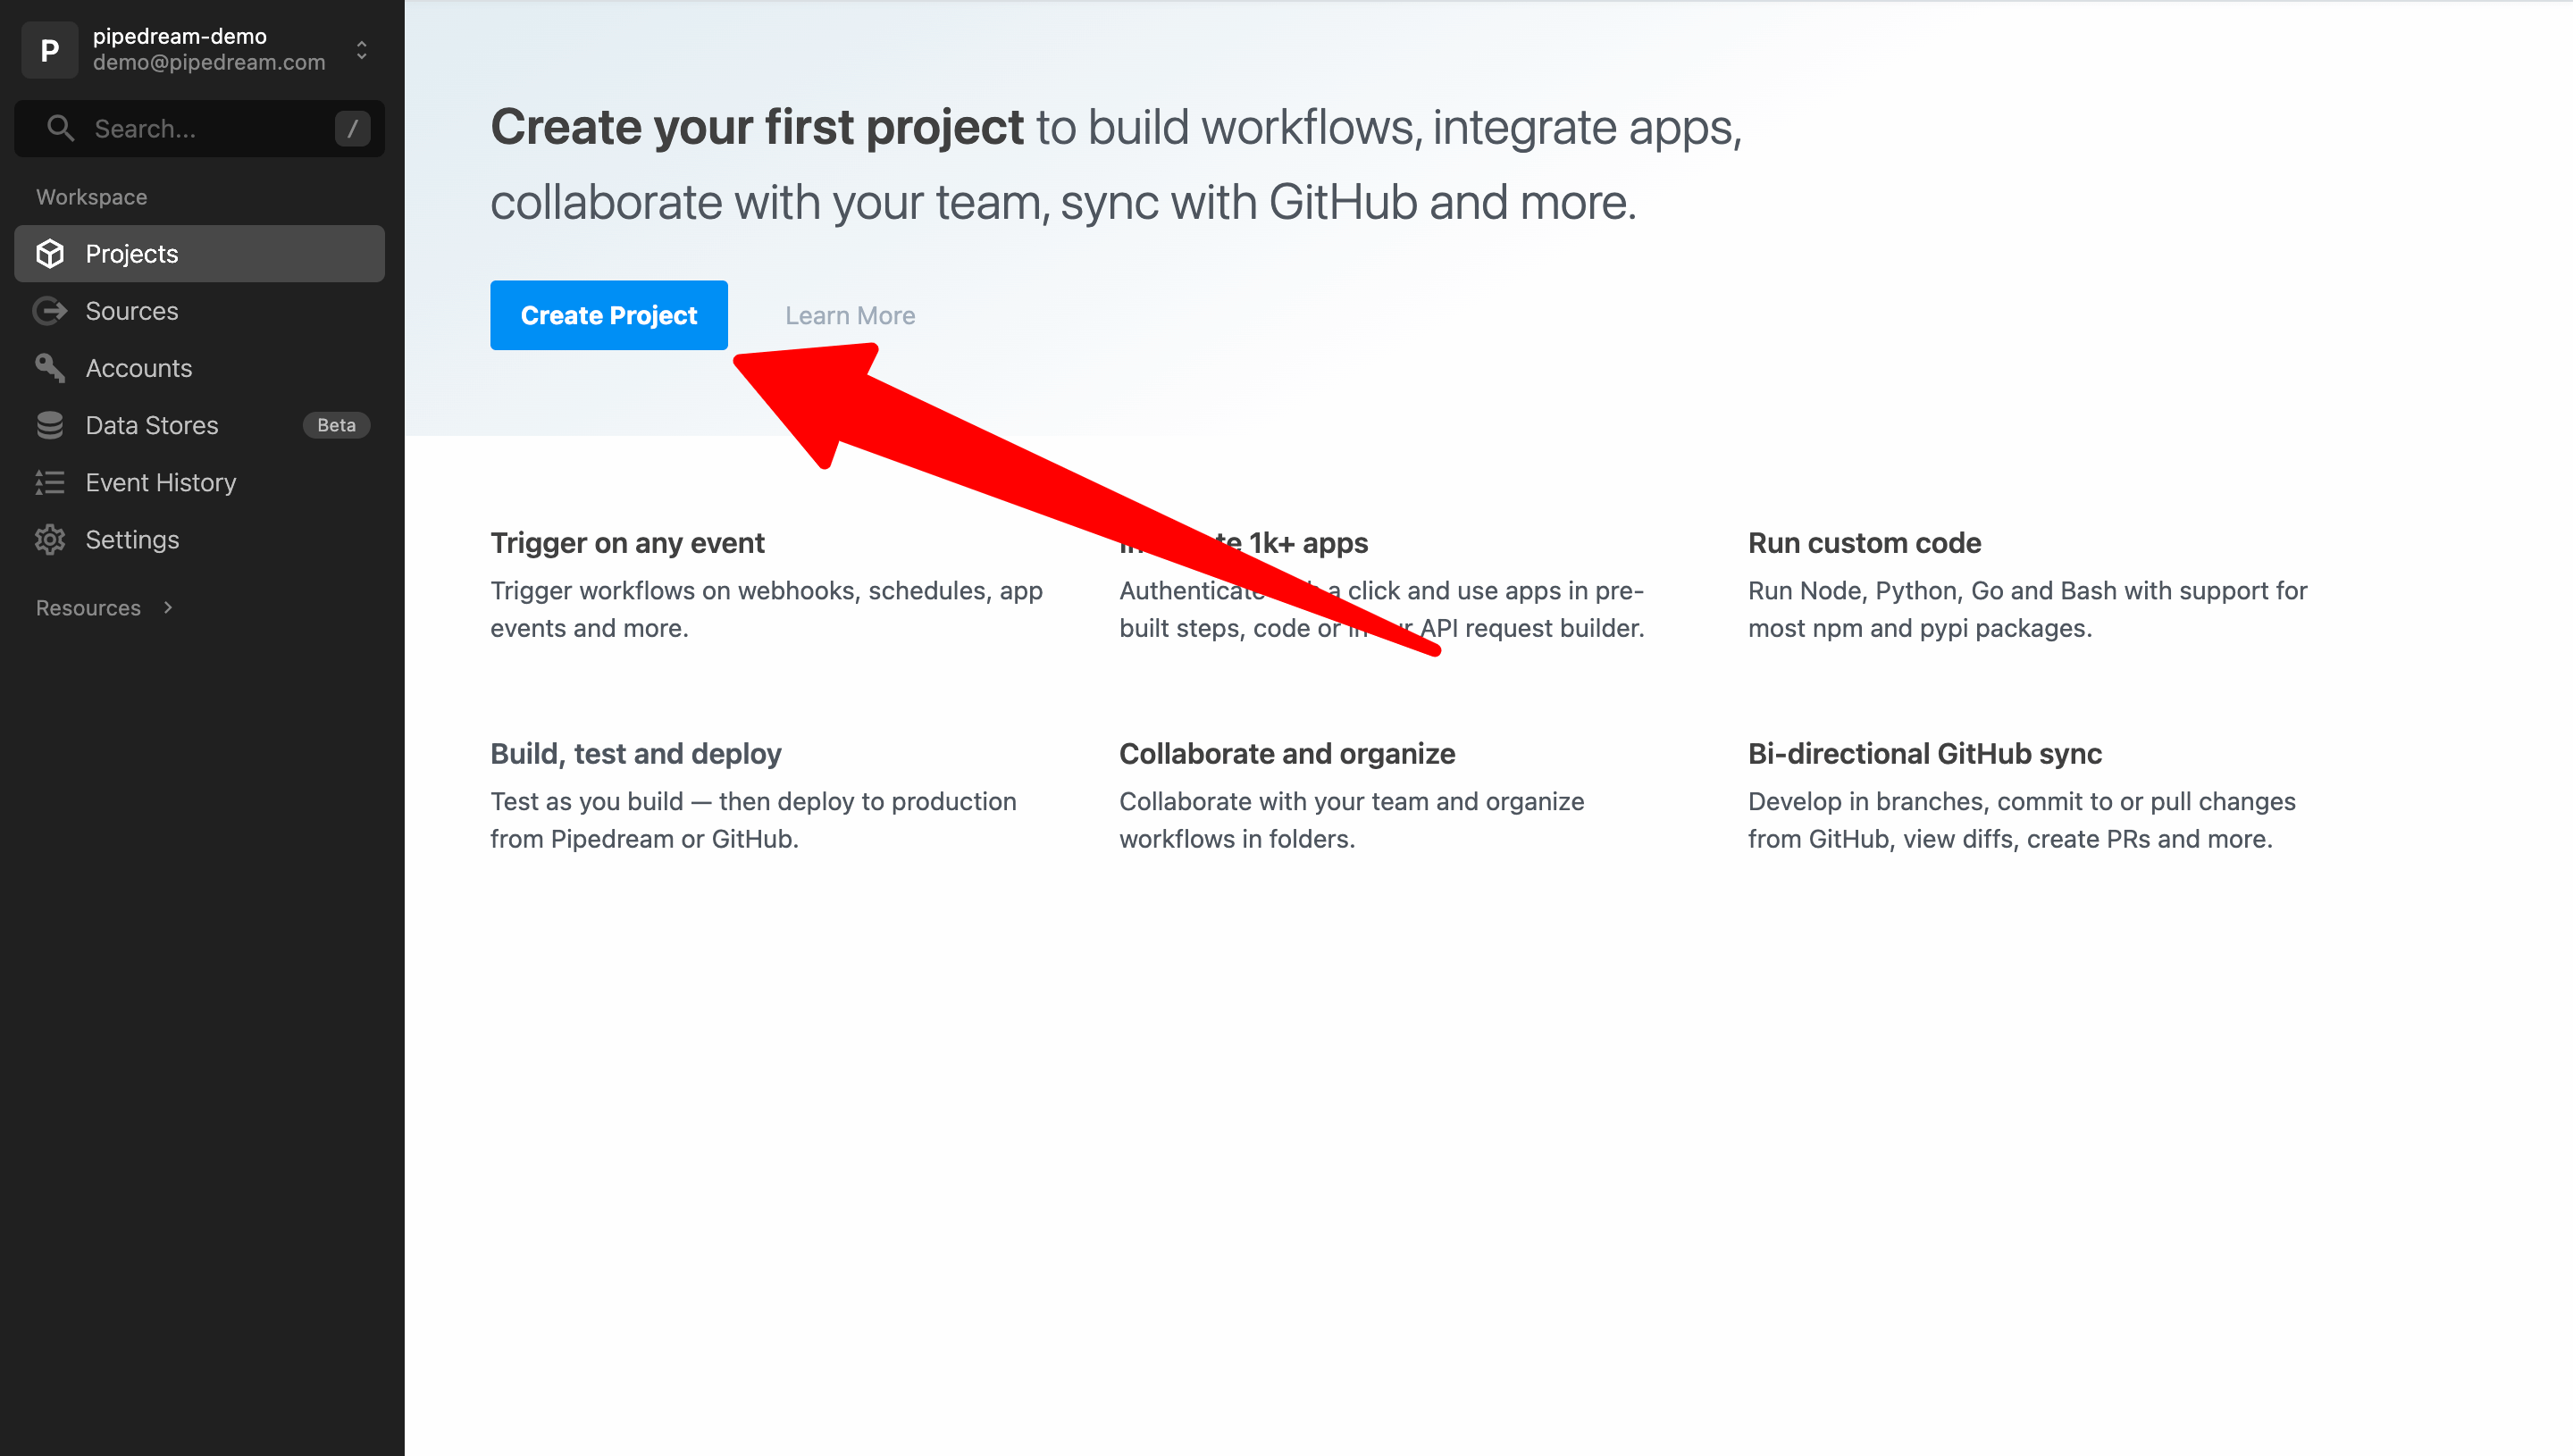
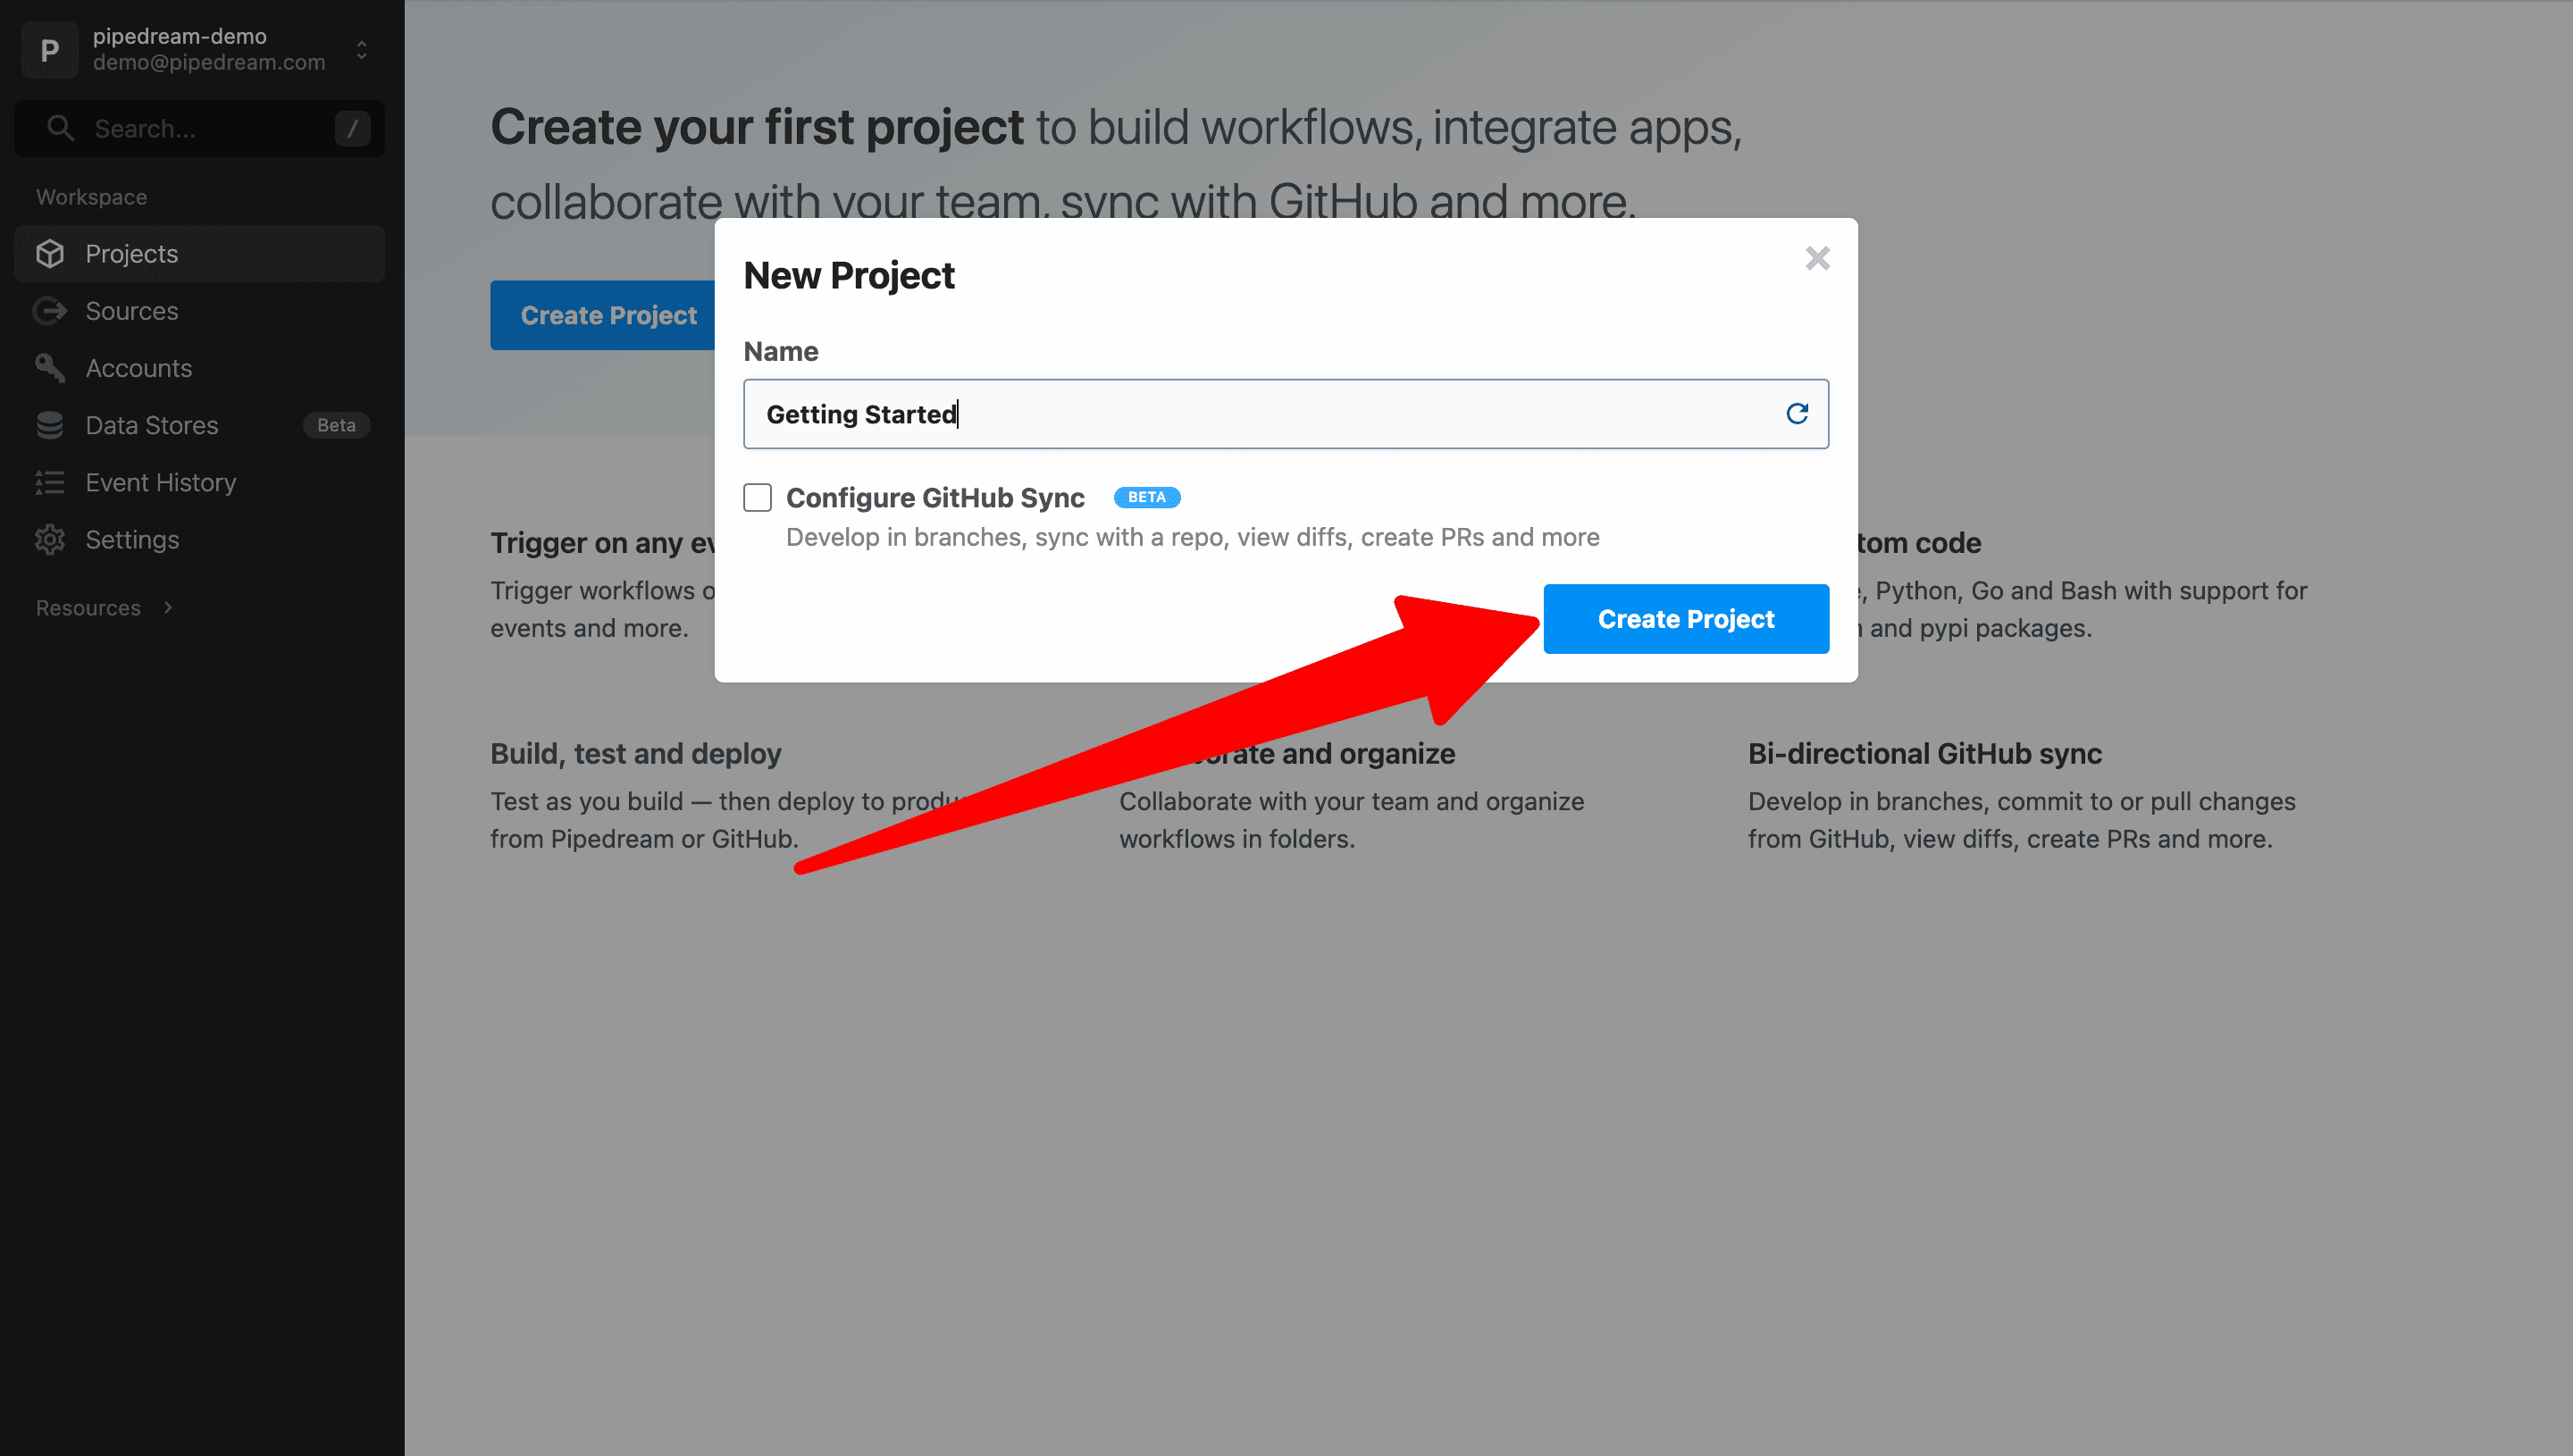
Configure GitHub Sync for projects to enable git-based version control and unlock the ability to develop in branches, commit to or pull changes from GitHub, view diffs, create PRs and more. To learn more, complete this quickstart guide to learn the basics of workflow development and then follow the quickstart guide for GitHub Sync.

Create a workflow

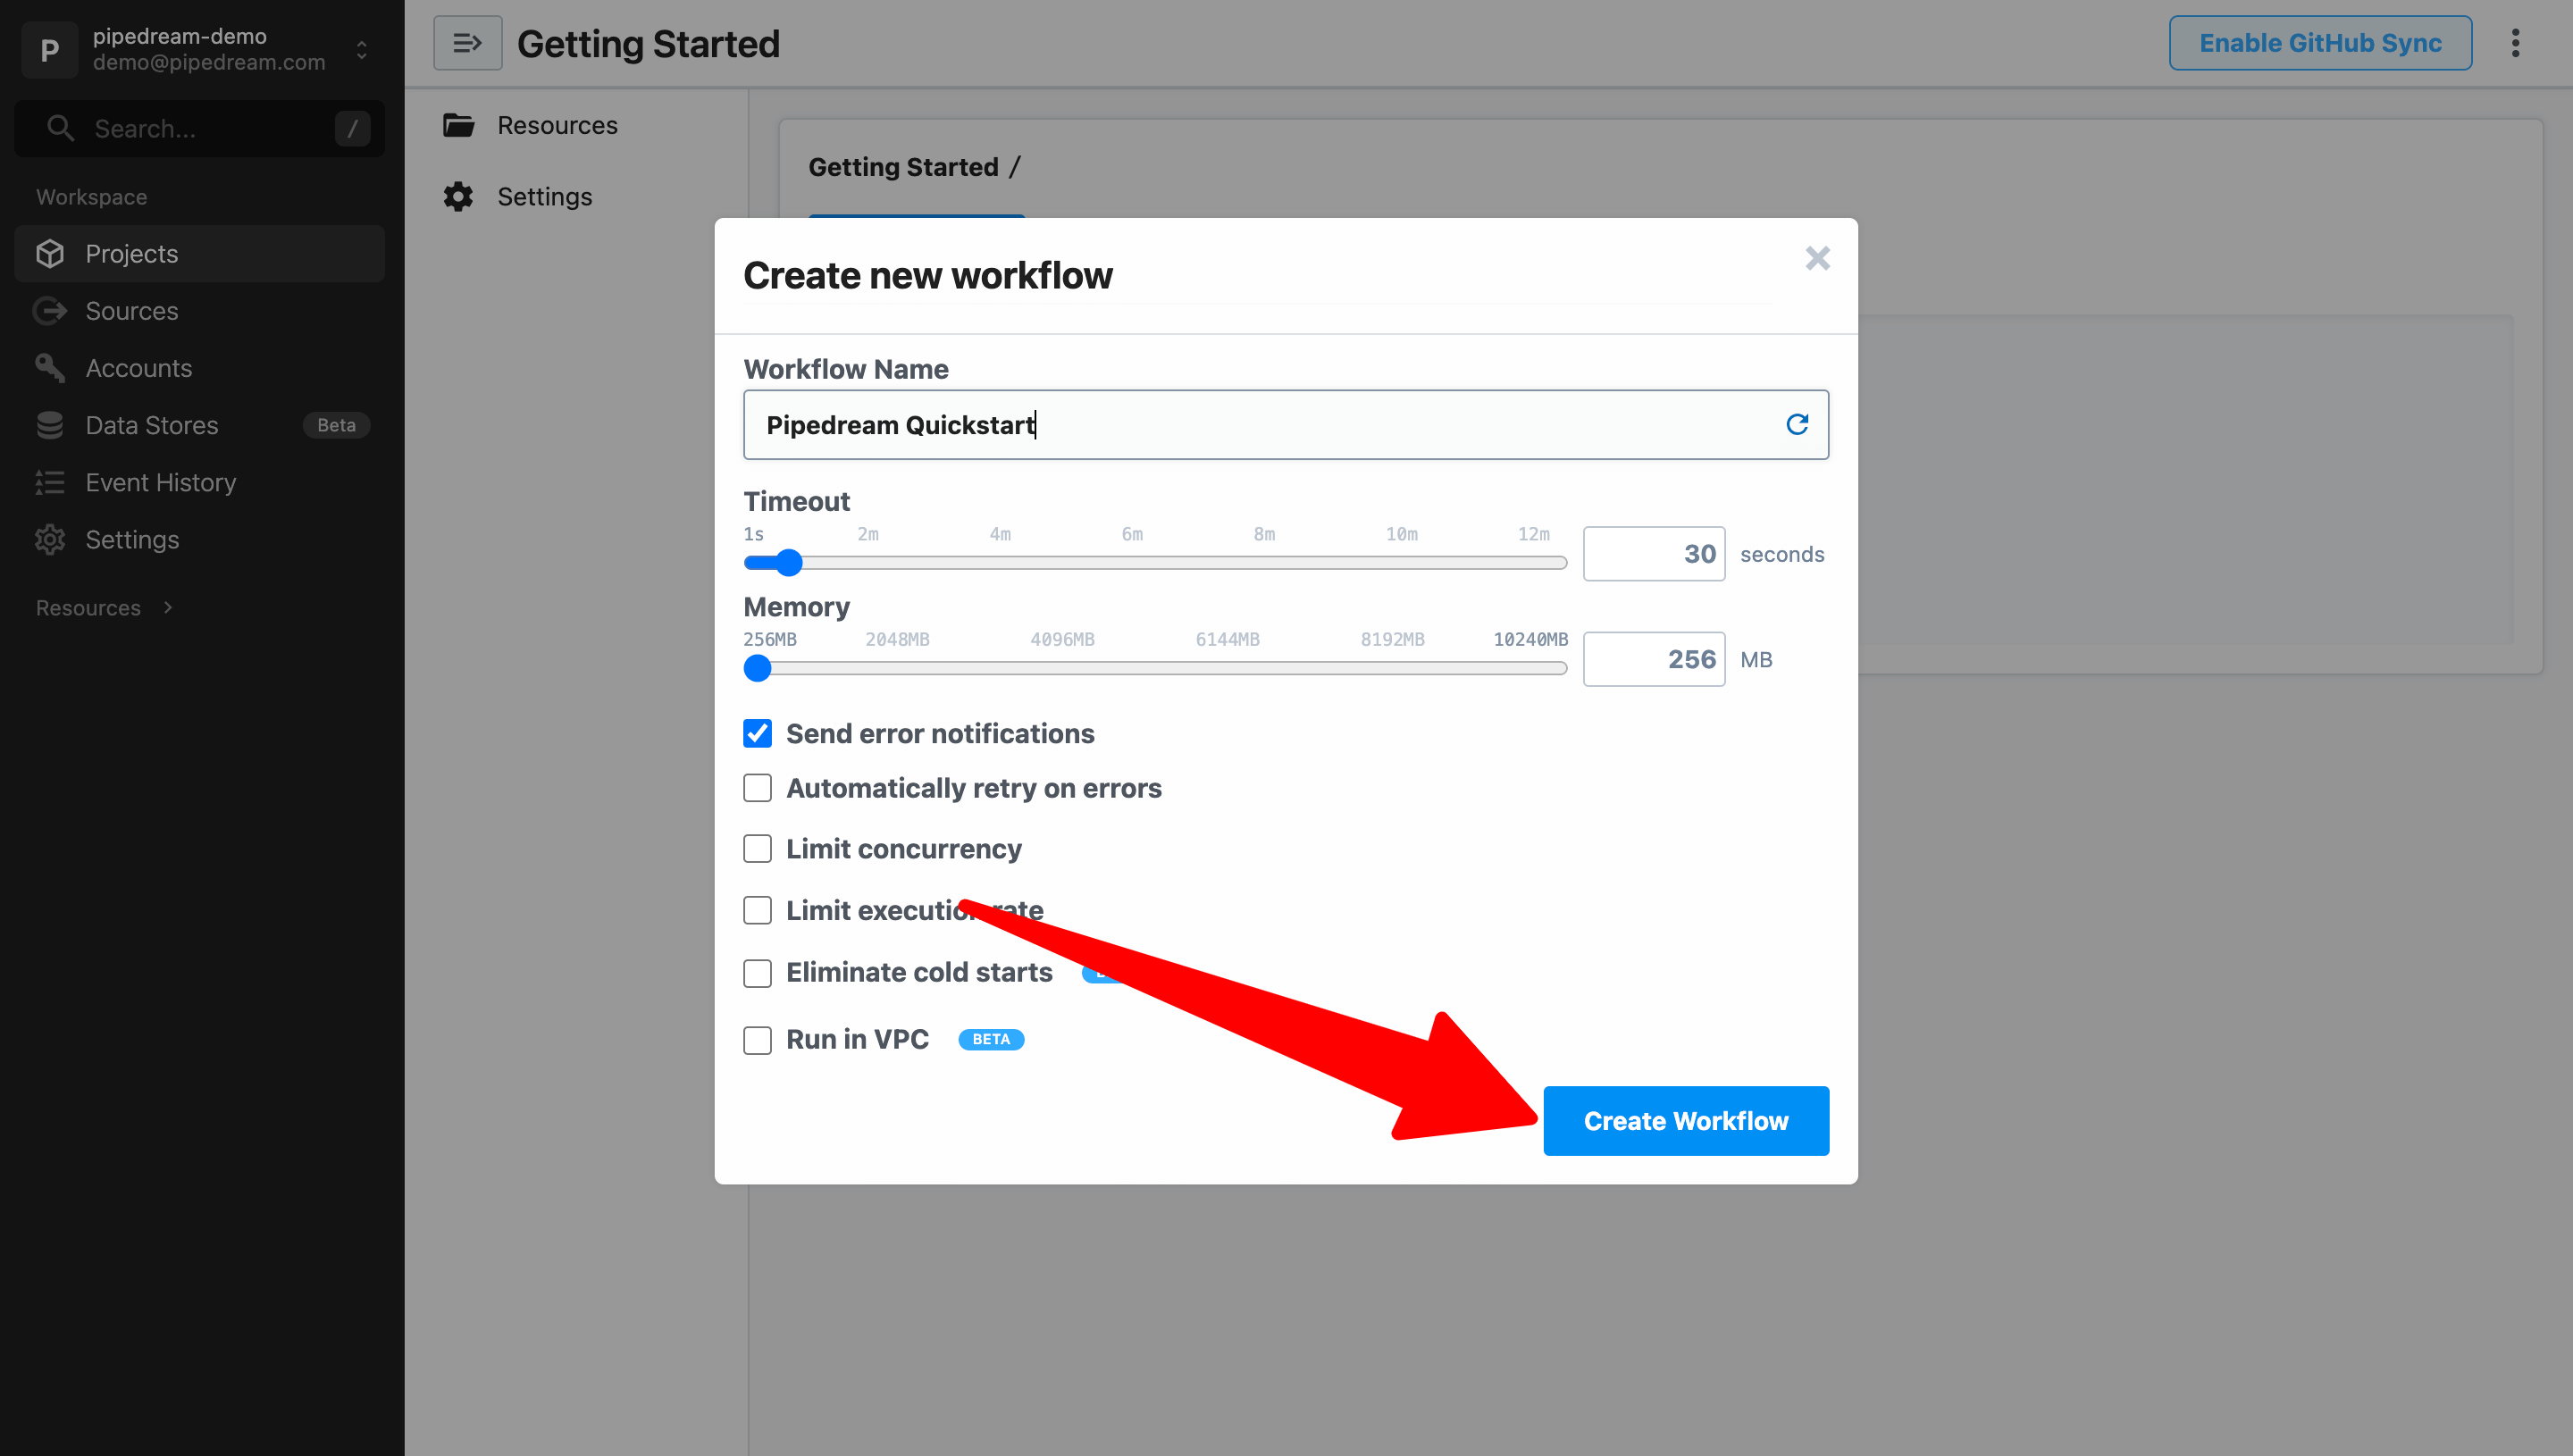
After the project is created, use the New button to create a new workflow.

Create a new workflow

Name the workflow and click Create Workflow to use the default settings. For this example, we'll name the workflow Pipedream Quickstart.

Configure new workflow

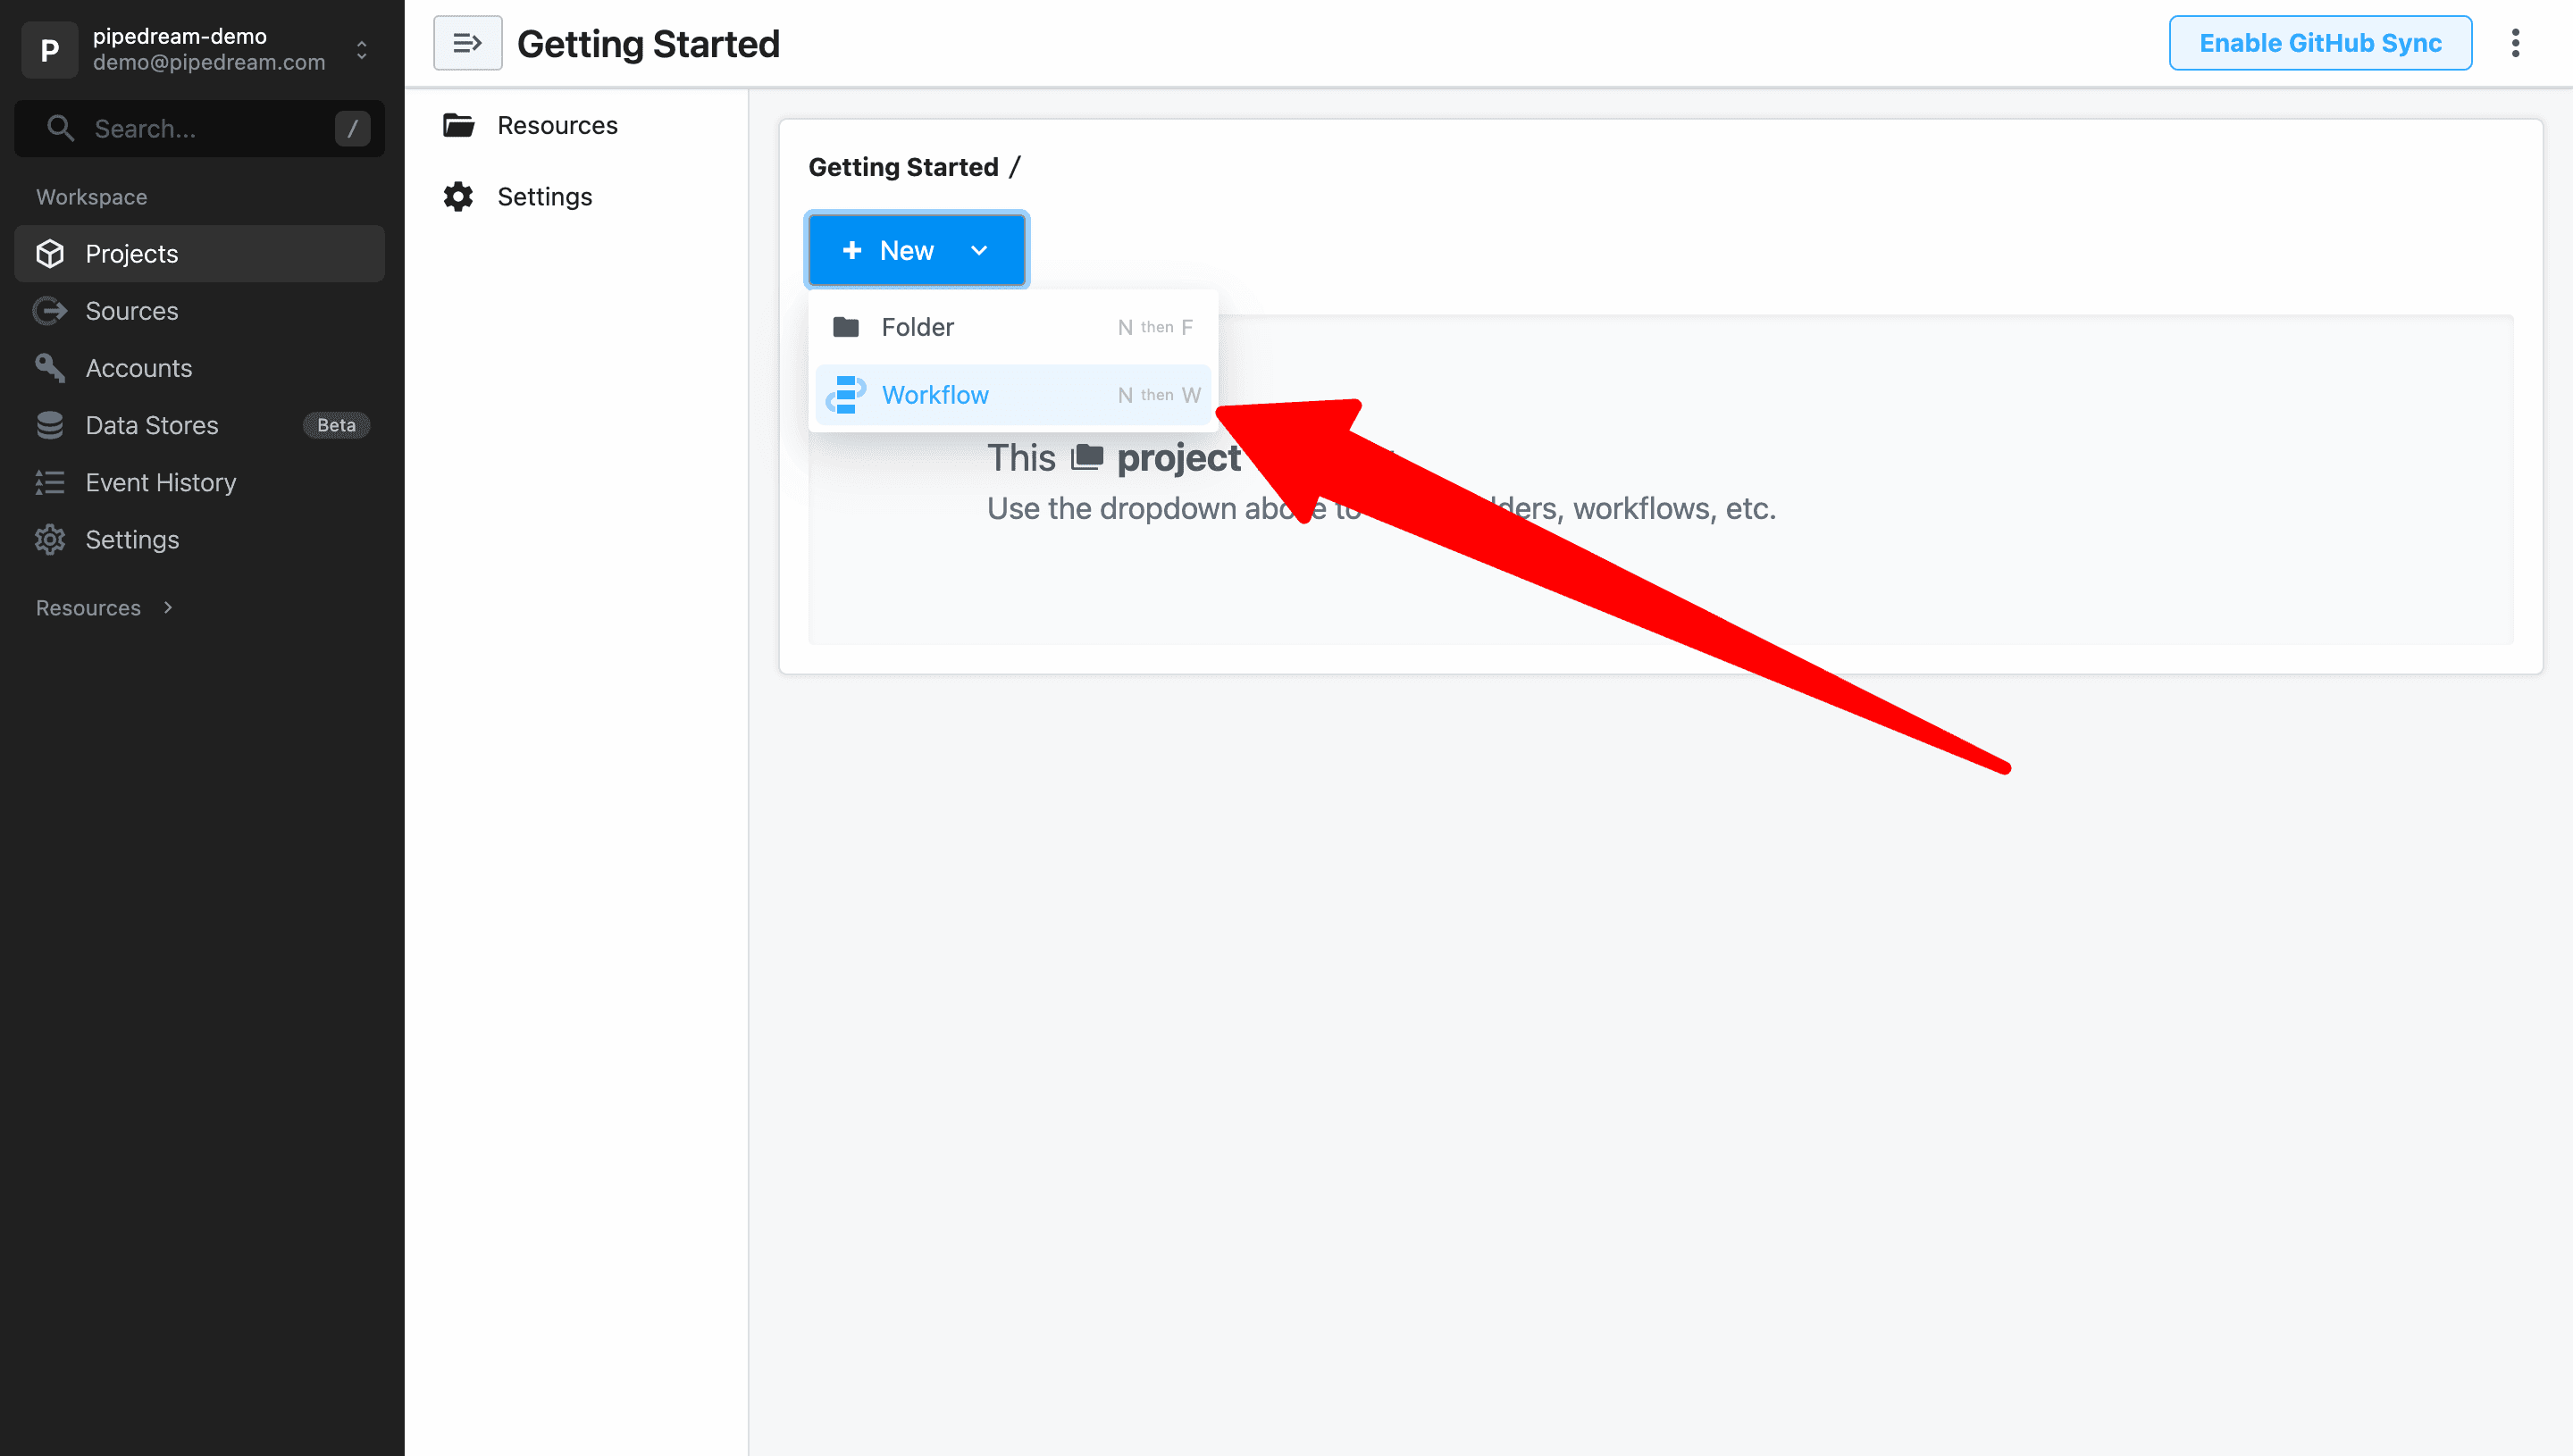
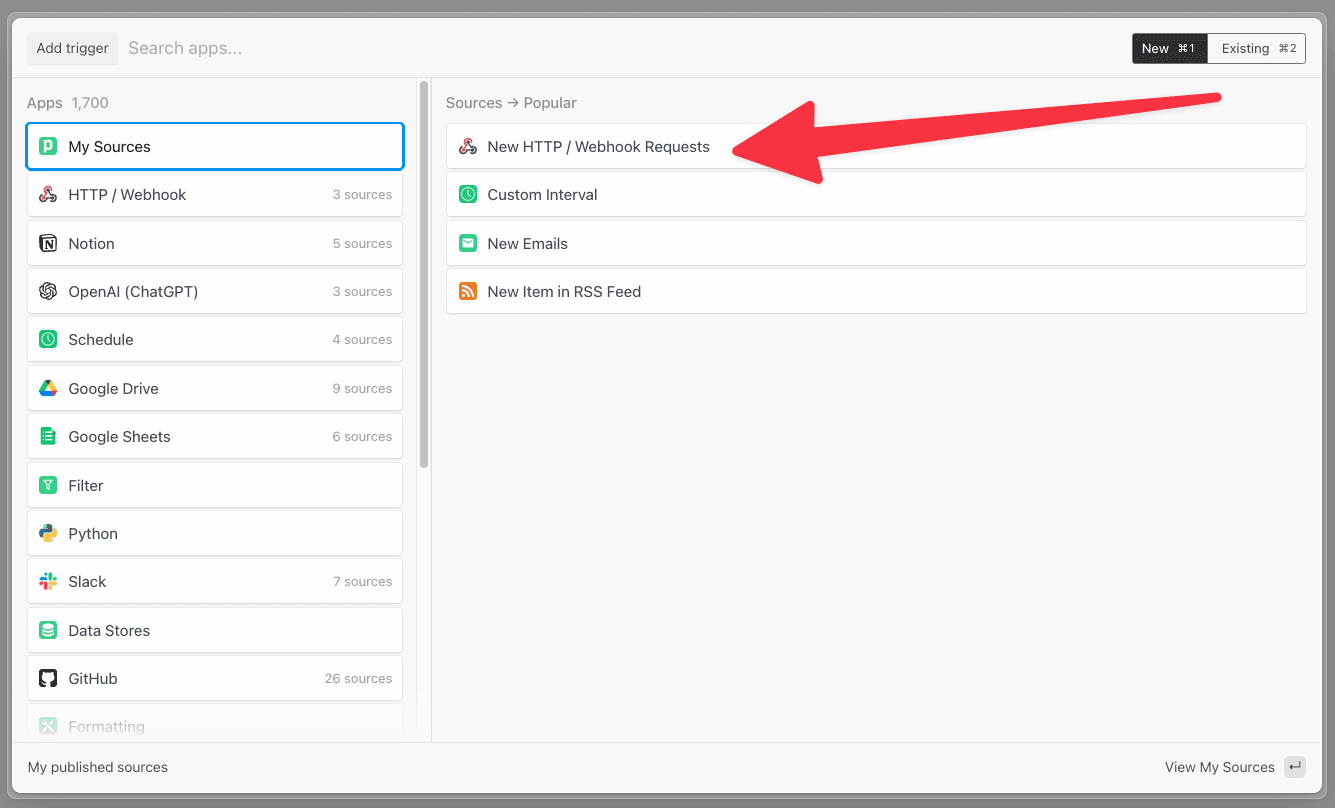
Add an HTTP / Webhook trigger

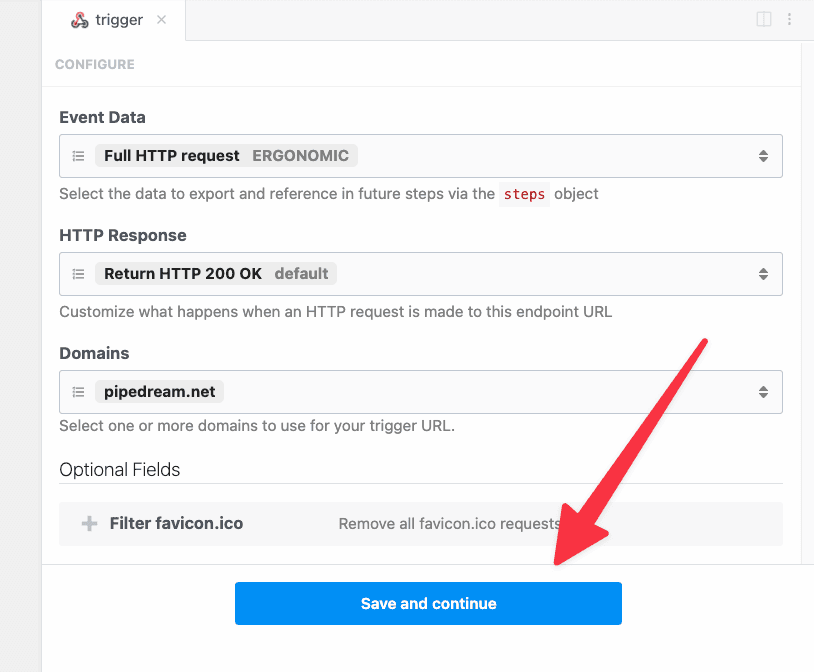
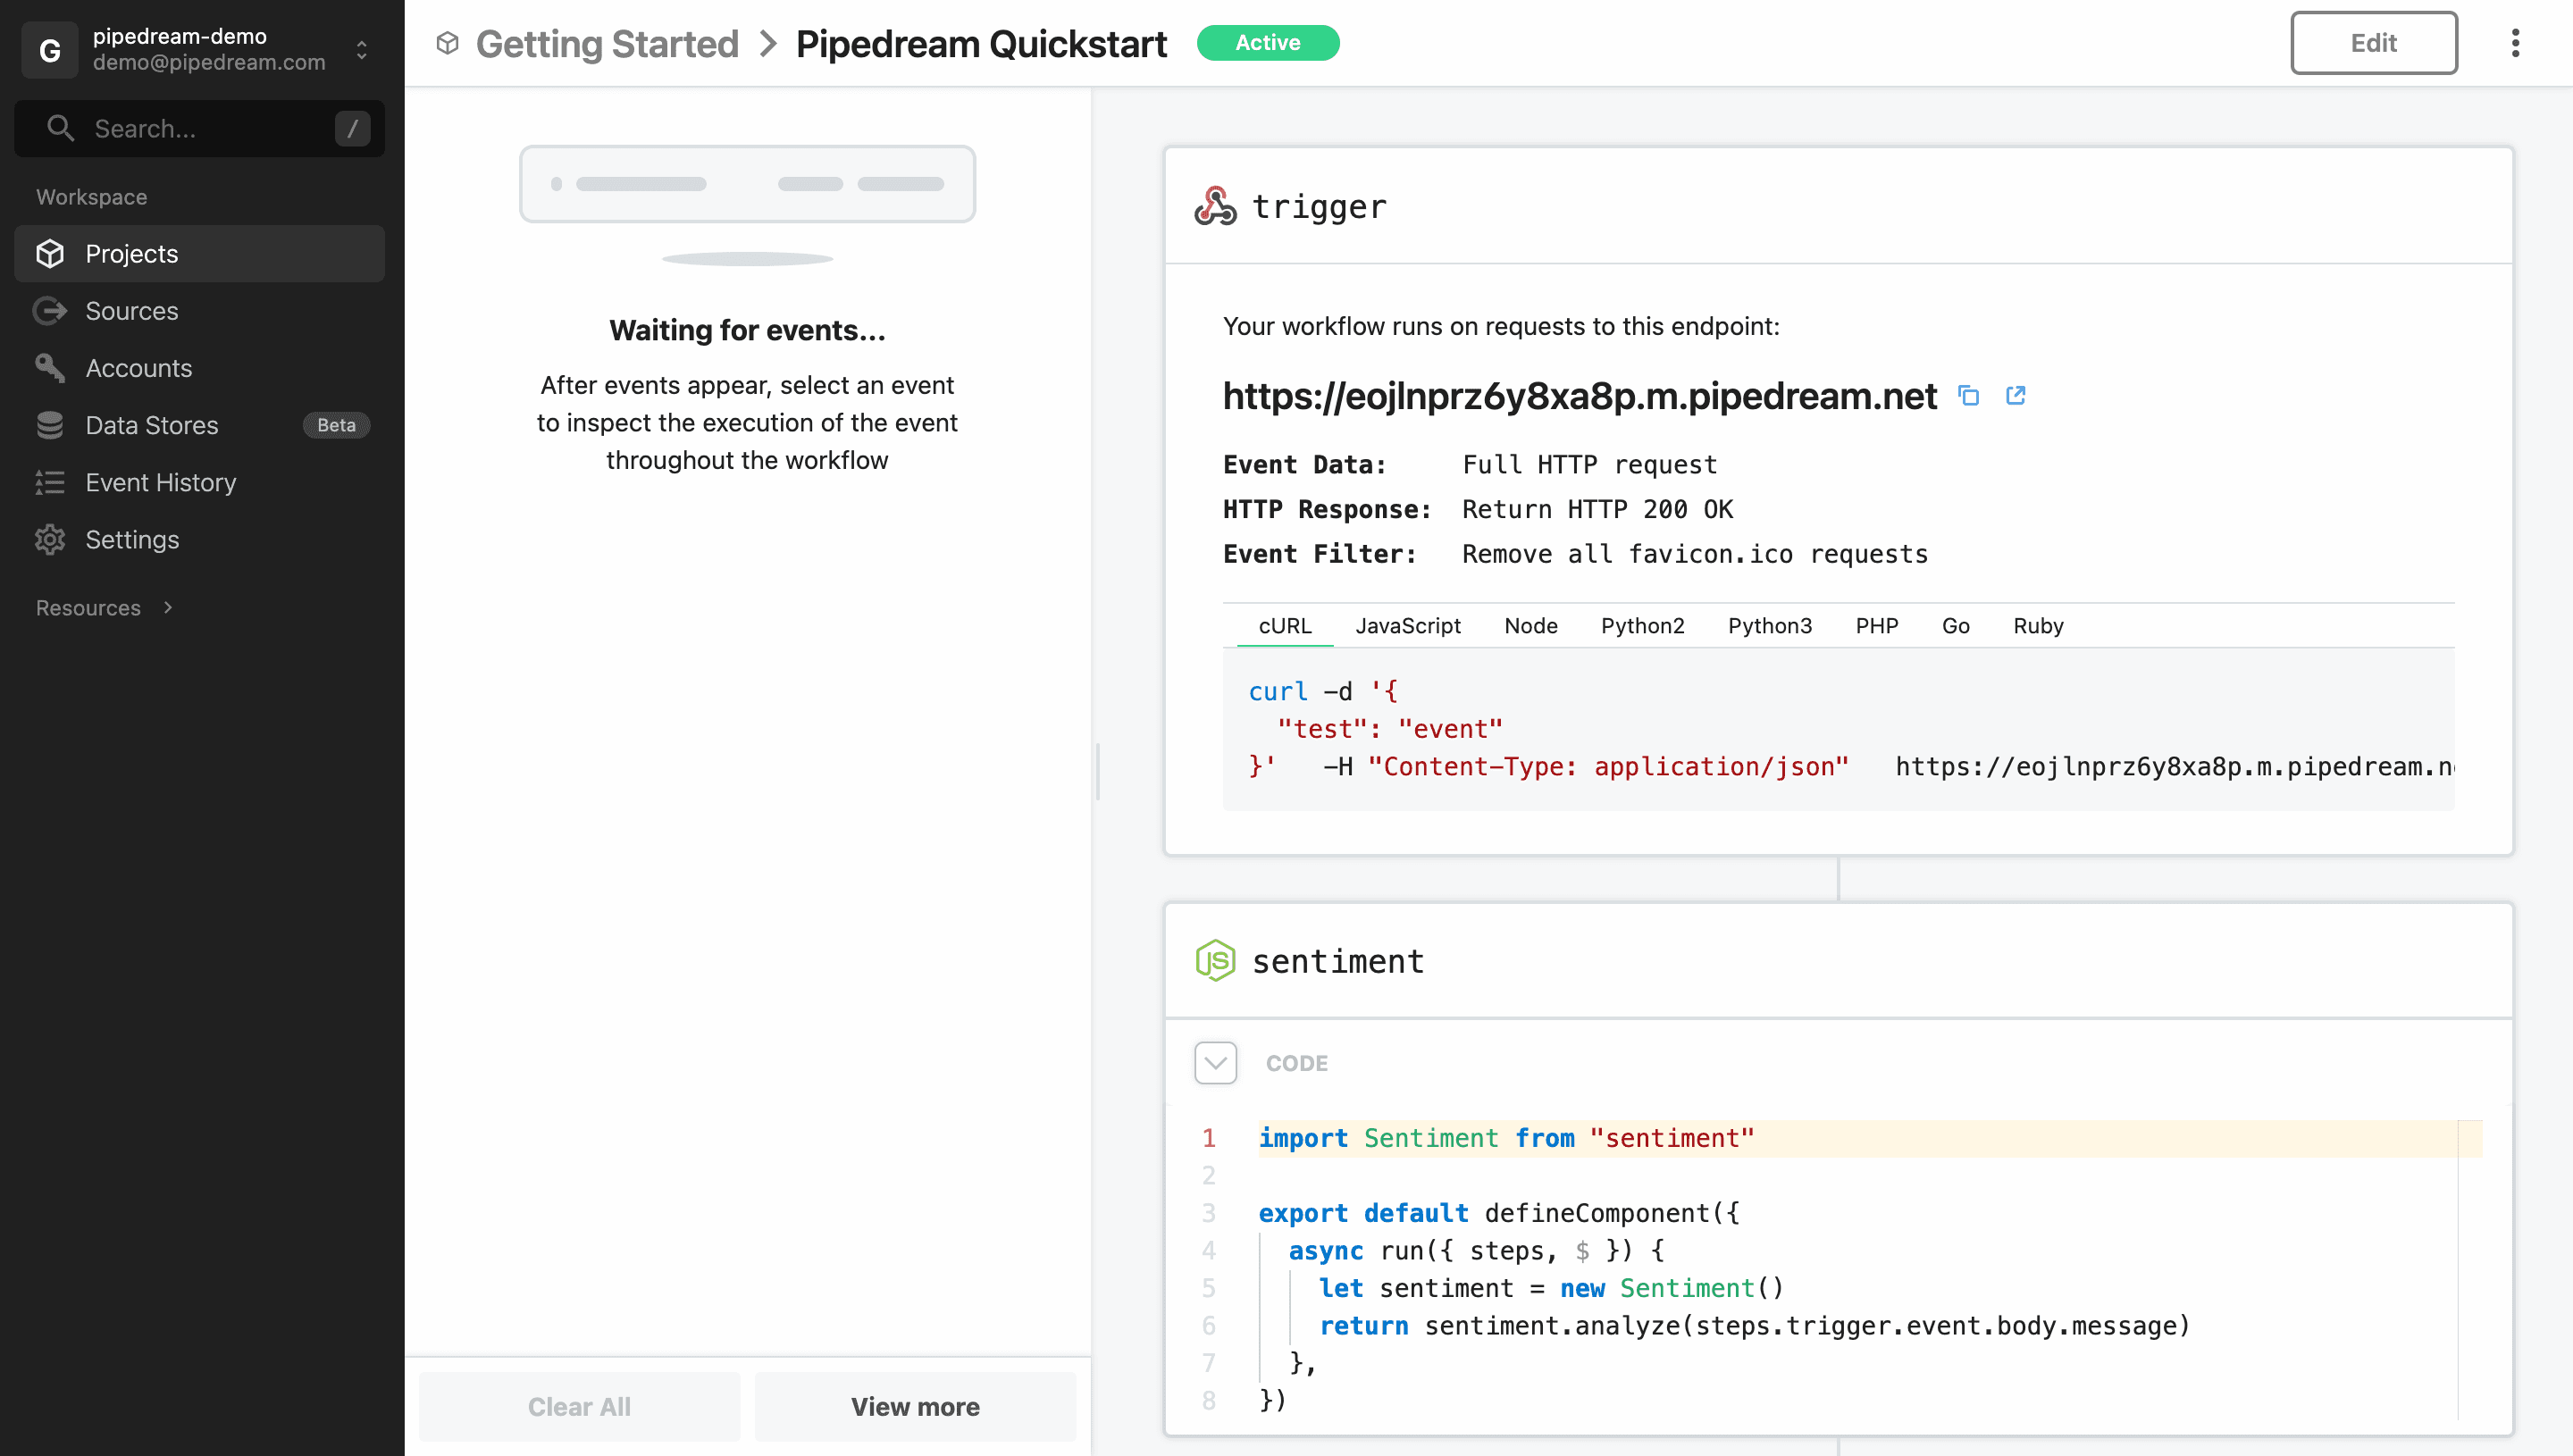
Next, Pipedream will launch the workflow builder and prompt you to add a trigger. For this example, select HTTP / Webhook Requests.

Add HTTP trigger

Click Save and continue to accept the default settings.

Save trigger

Pipedream will generate a unique URL to trigger this workflow. Once your workflow is deployed, your workflow will run on every request to this URL.

Unique URL

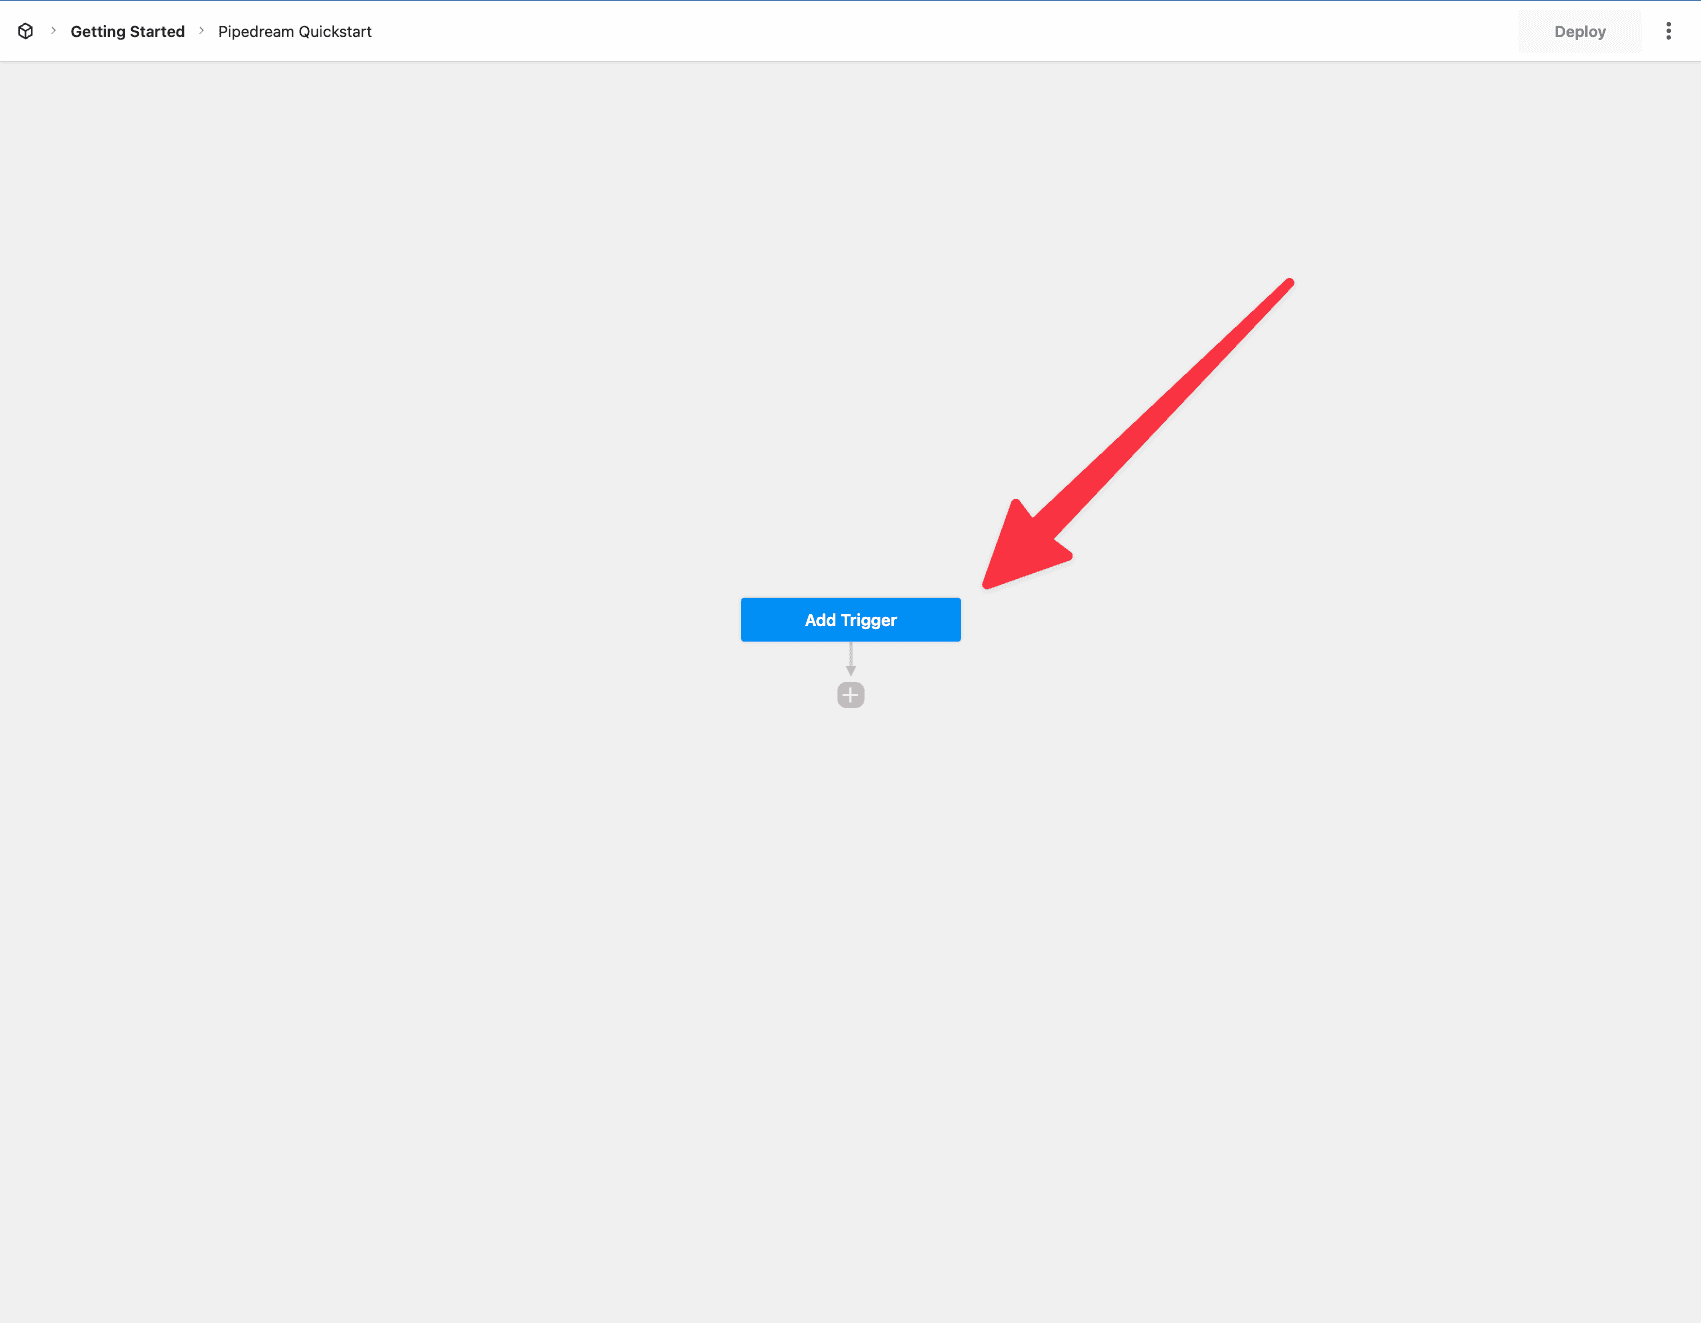
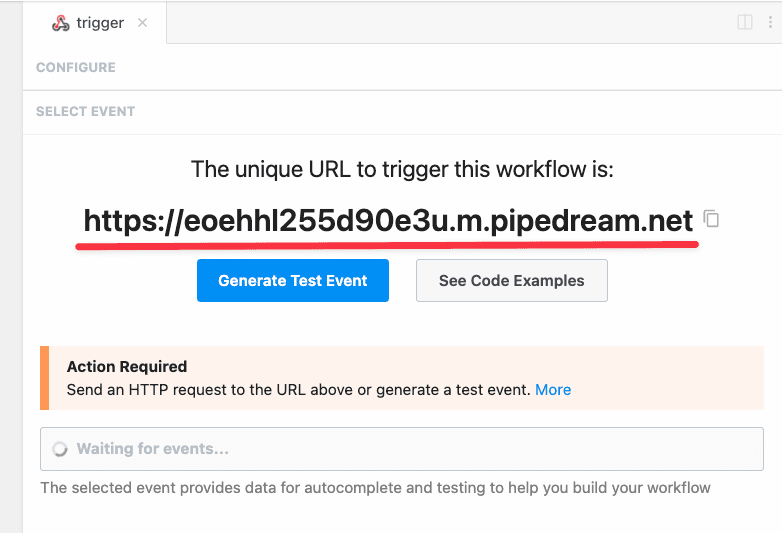
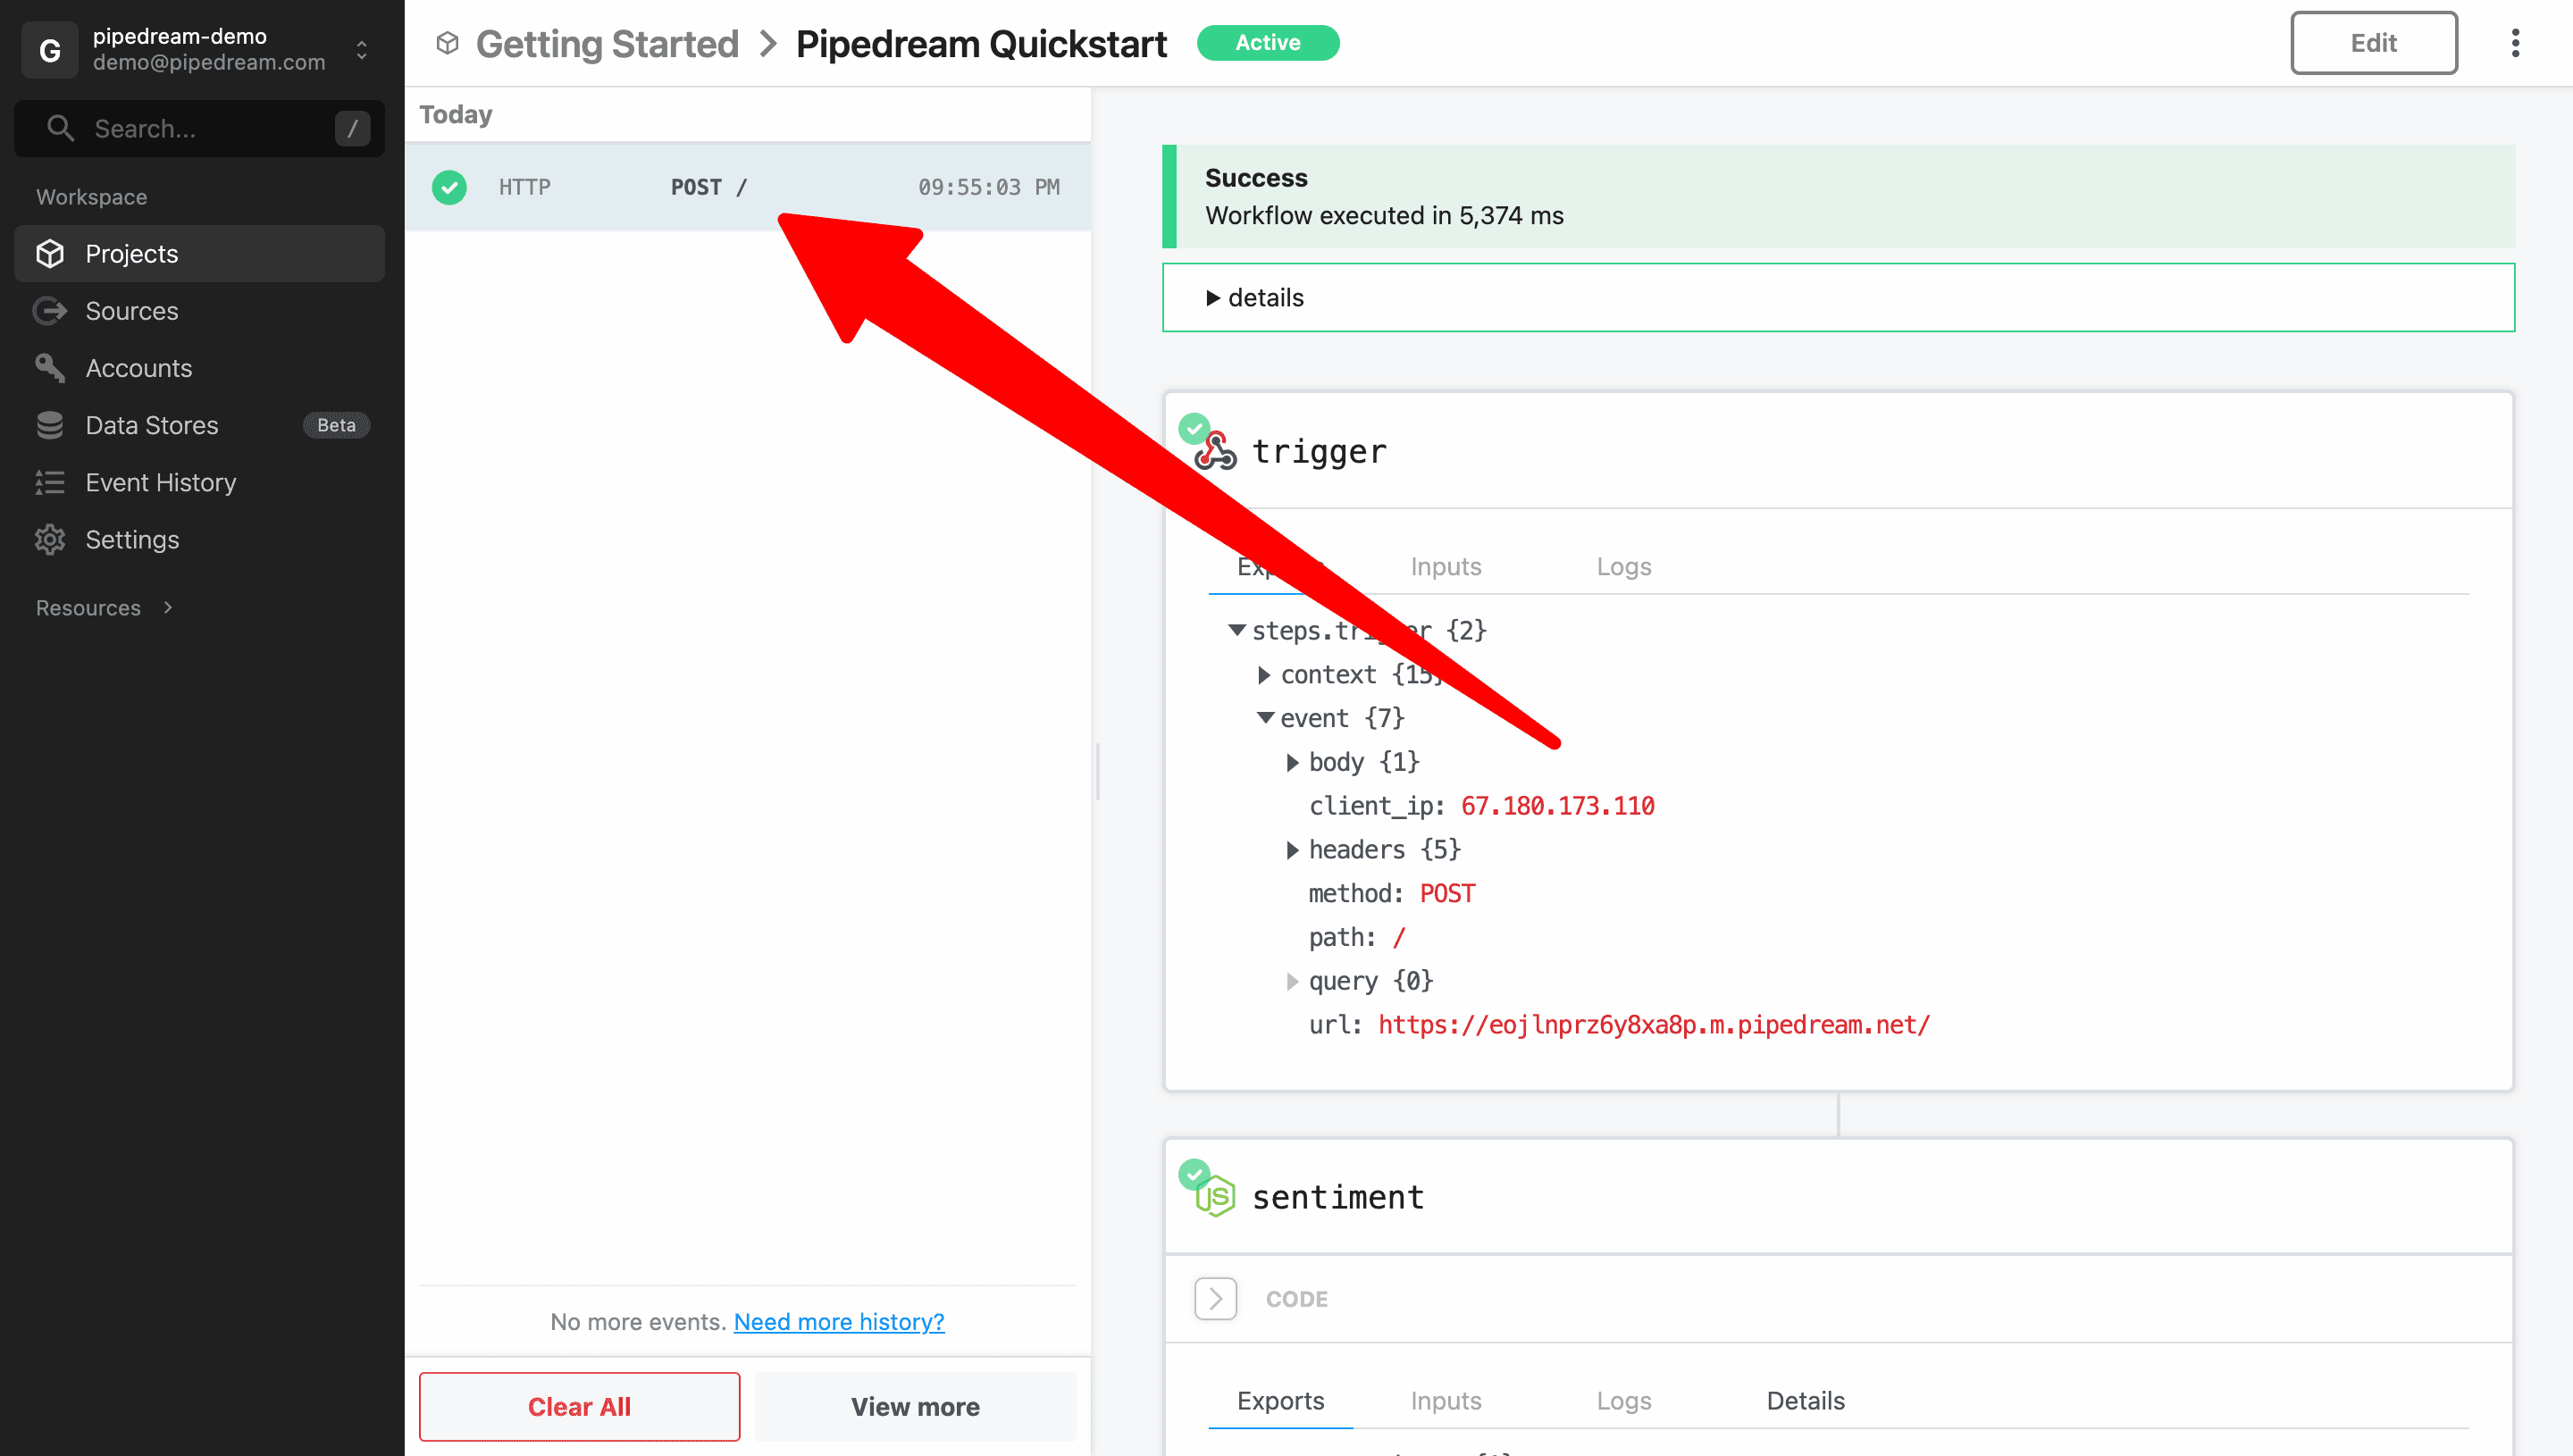
Generate a test event

Next, generate a test event to help you build the workflow.

ℹ️

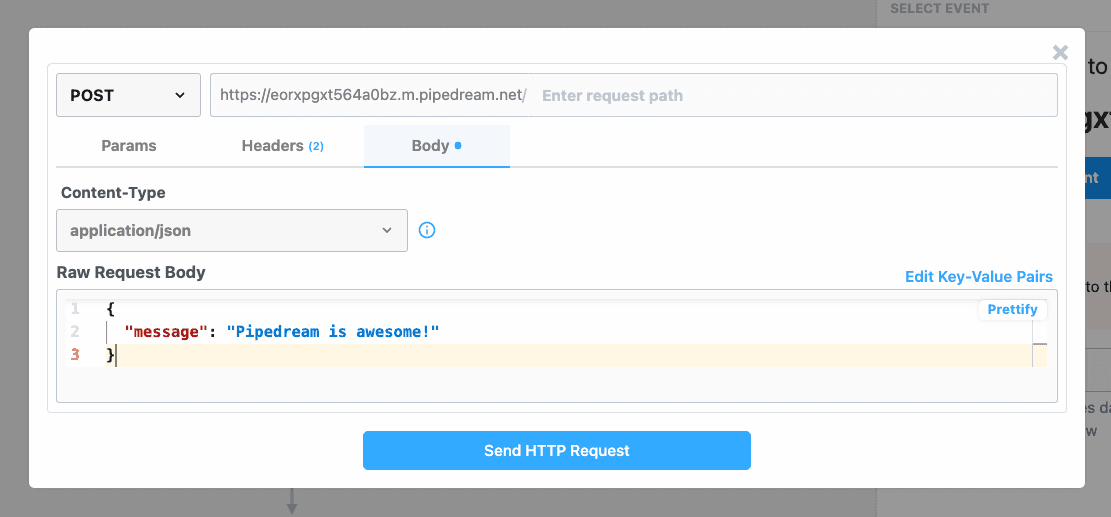
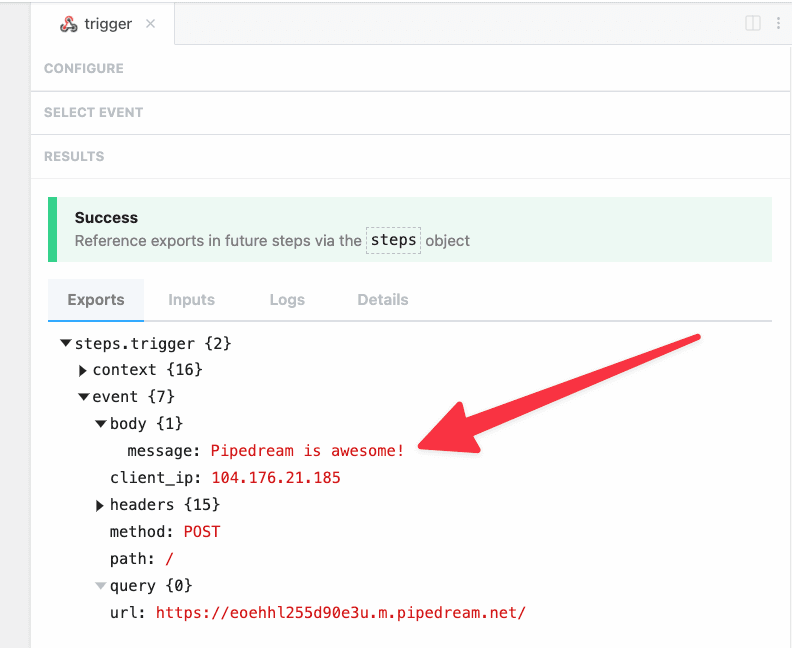
The test event will be used to provide autocomplete suggestion as you build your workflow. The data will also be used when testing later steps. You may generate or select a different test event at any time when building a workflow.

For this example, let's use the following test event data:

{
  "message": "Pipedream is awesome!"
}

Pipedream makes it easy to generate test events for your HTTP trigger. Click on Generate Test Event to open the HTTP request builder. Copy and paste the JSON data above into the Raw Request Body field and click Send HTTP Request.

Generate Test Event

Pipedream will automatically select and display the contents of the selected event. Validate that the message was received as part the event body.

Inspect trigger event

ℹ️

You may also send live data to the unique URL for your workflow using your favorite HTTP tool or by running a cURL command, e.g.,

curl -d '{"message": "Pipedream is awesome!"}' \
  -H "Content-Type: application/json" \
  YOUR_ENDPOINT_URL

Enrich trigger data using Node.js and npm

Before we send data to Google Sheets, let's use the npm 
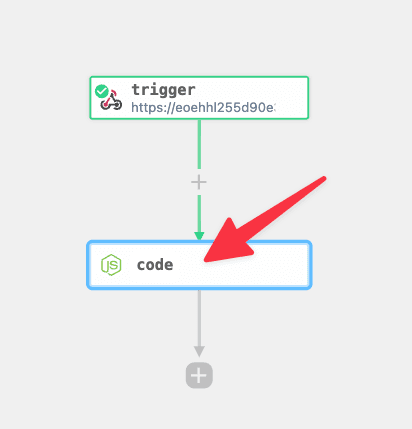
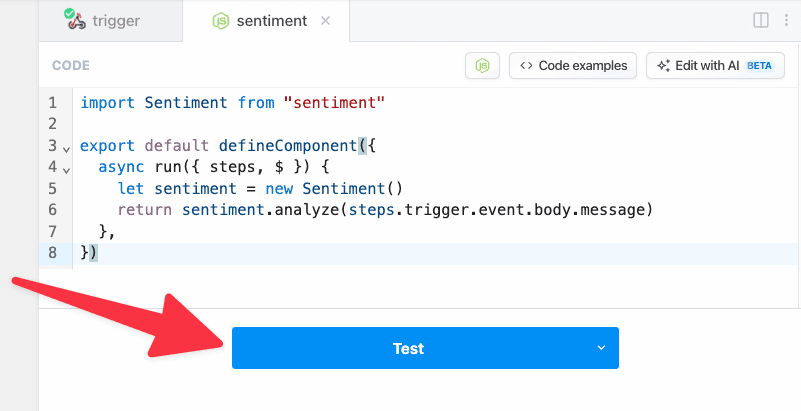
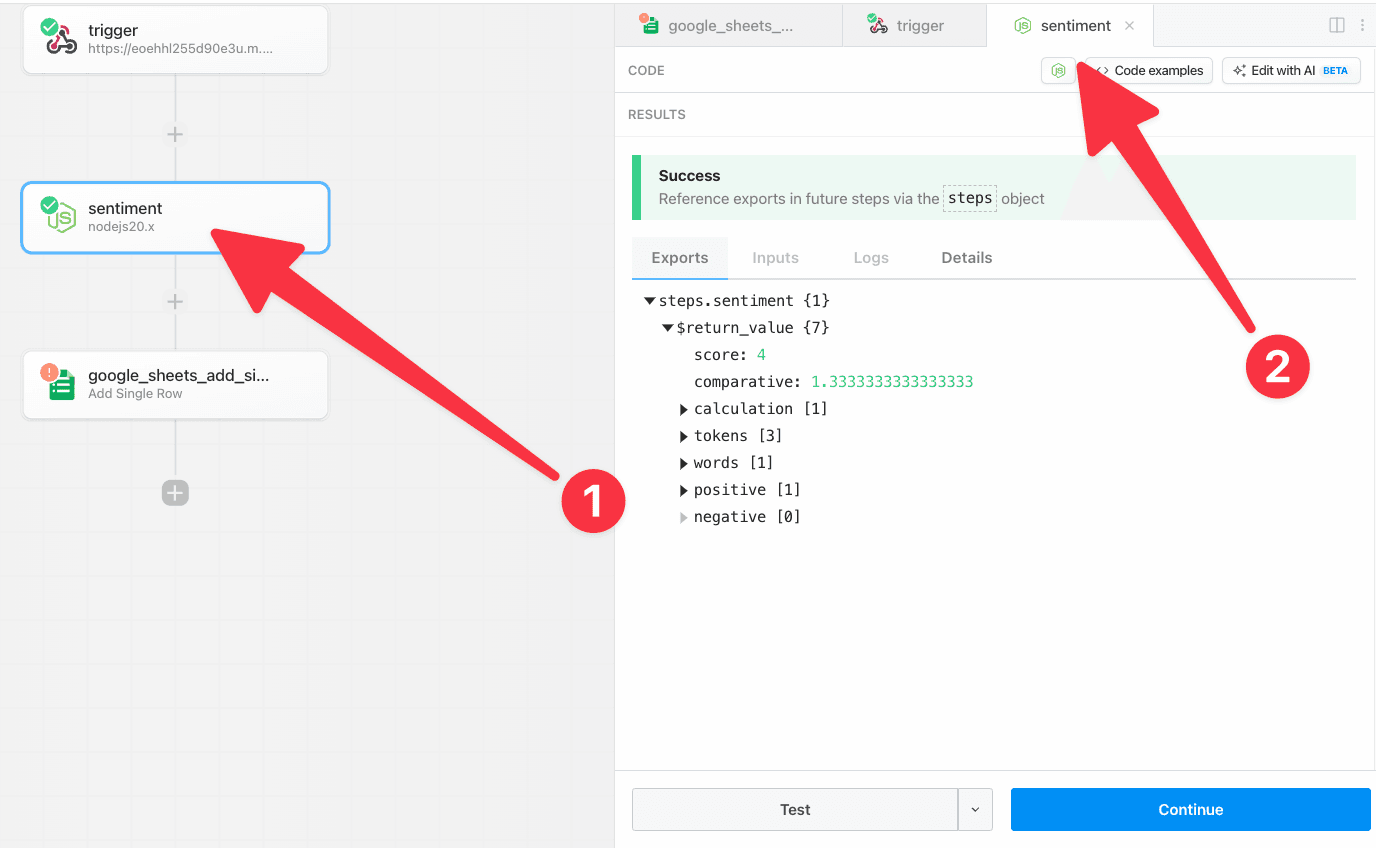
sentiment package to generate a sentiment score for our message. To do that, click Continue or the + button.

Continue from trigger

That will open the Add a step menu. Select Run custom code.

Add step

Pipedream will add a Node.js code step. Rename the step to sentiment.

Rename step to sentiment

Next, add the following code to the code step:

import Sentiment from "sentiment"
 
export default defineComponent({
  async run({ steps, $ }) {
    let sentiment = new Sentiment()
    return sentiment.analyze(steps.trigger.event.body.message)
  },
})

This code imports the npm package, passes the message we sent to our trigger to the analyze() function by referencing steps.trigger.event.body.message and then returns the result.

ℹ️

To use any npm package on Pipedream, just import it. There's no npm install or package.json required.

ℹ️

Any data you 
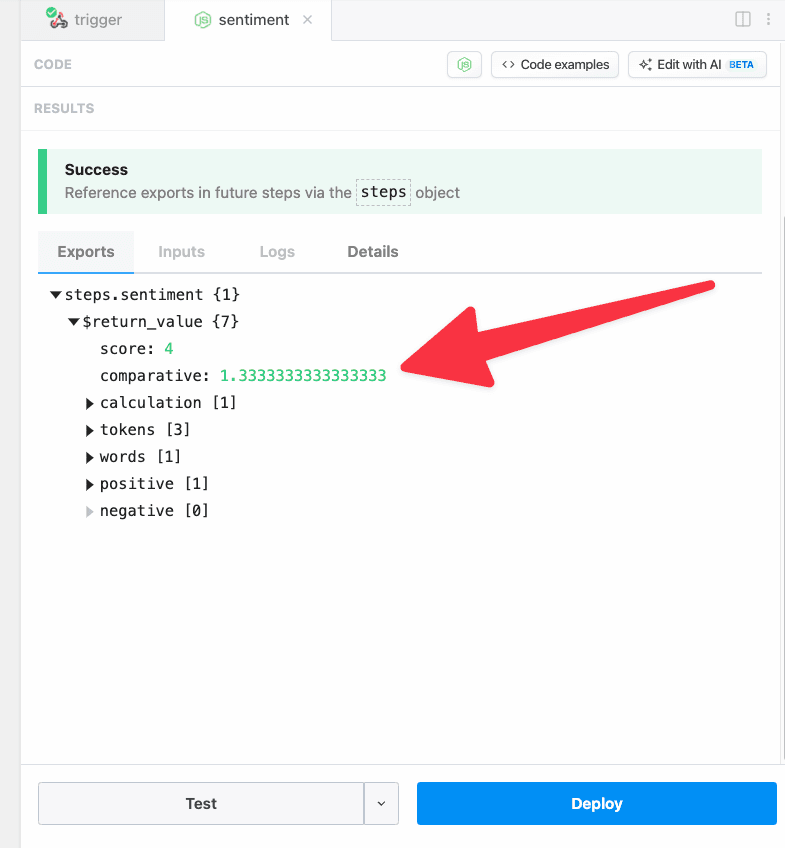
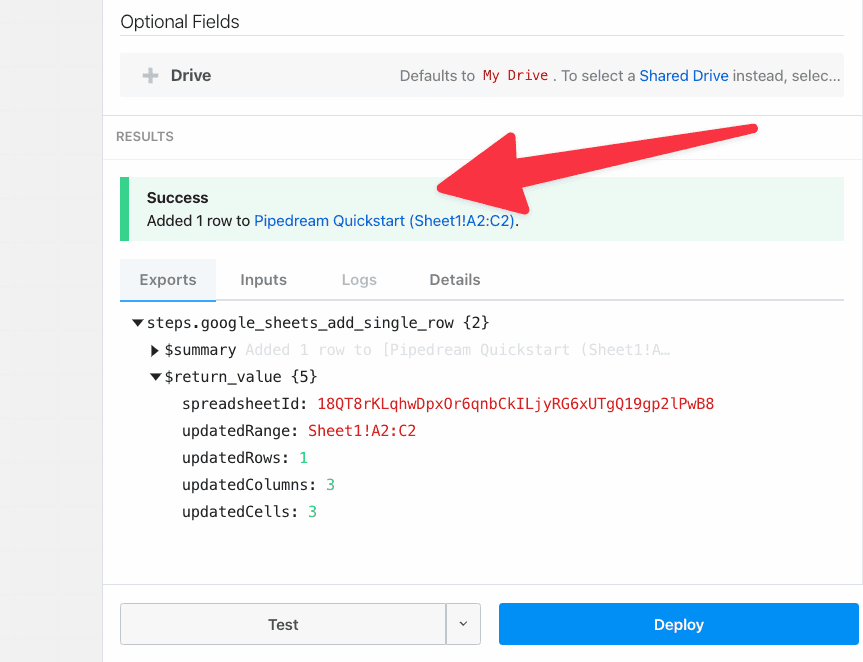
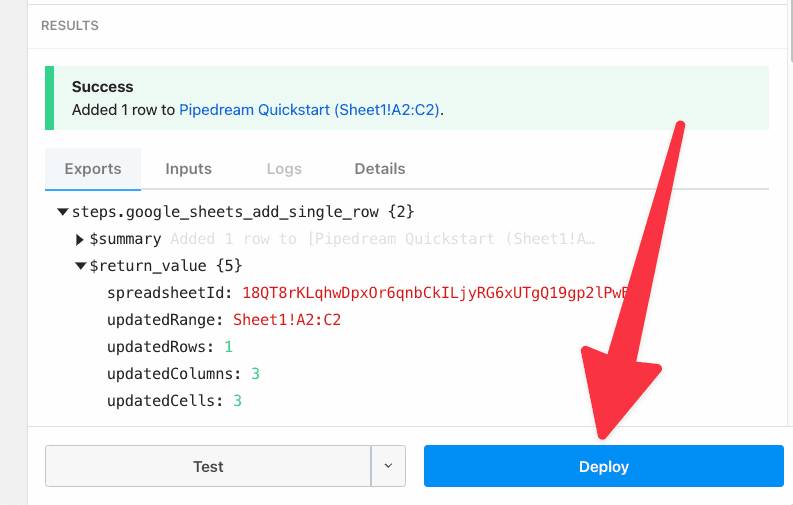
return from a step is exported so it can be inspected and referenced it in future steps via the steps object. In this example, return values will be exported to steps.sentiment.$return_value because we renamed the step to sentiment .

Your code step should now look like the screenshot below. To run the step and test the code, click the Test button.

Test code step

You should see the results of the sentiment analysis when the test is complete.

Test results

ℹ️

When you Test a step, only the current step is executed. Use the caret to test different ranges of steps including the entire workflow.

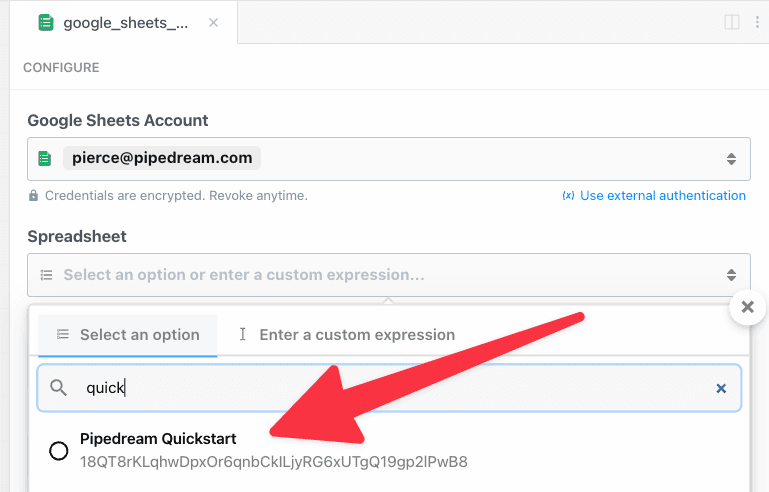
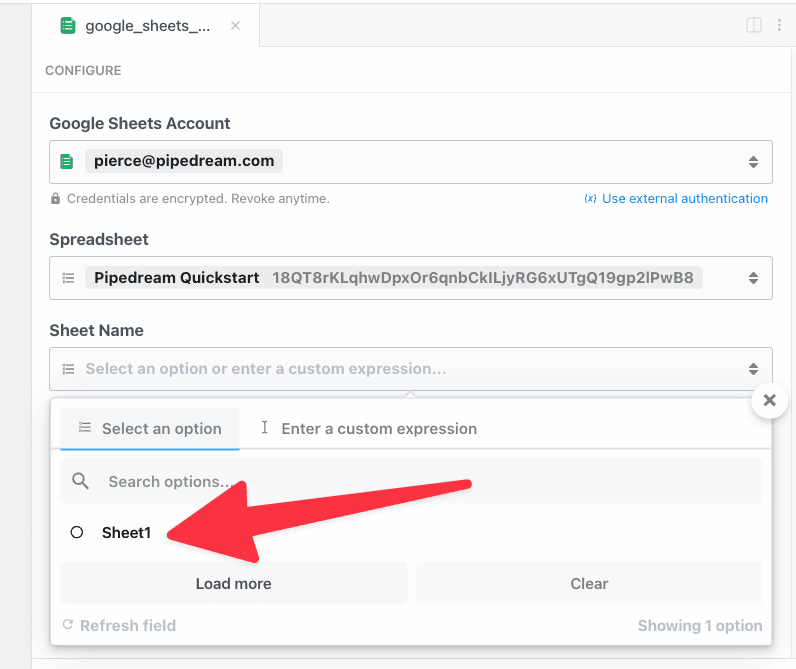
Save data to Google Sheets

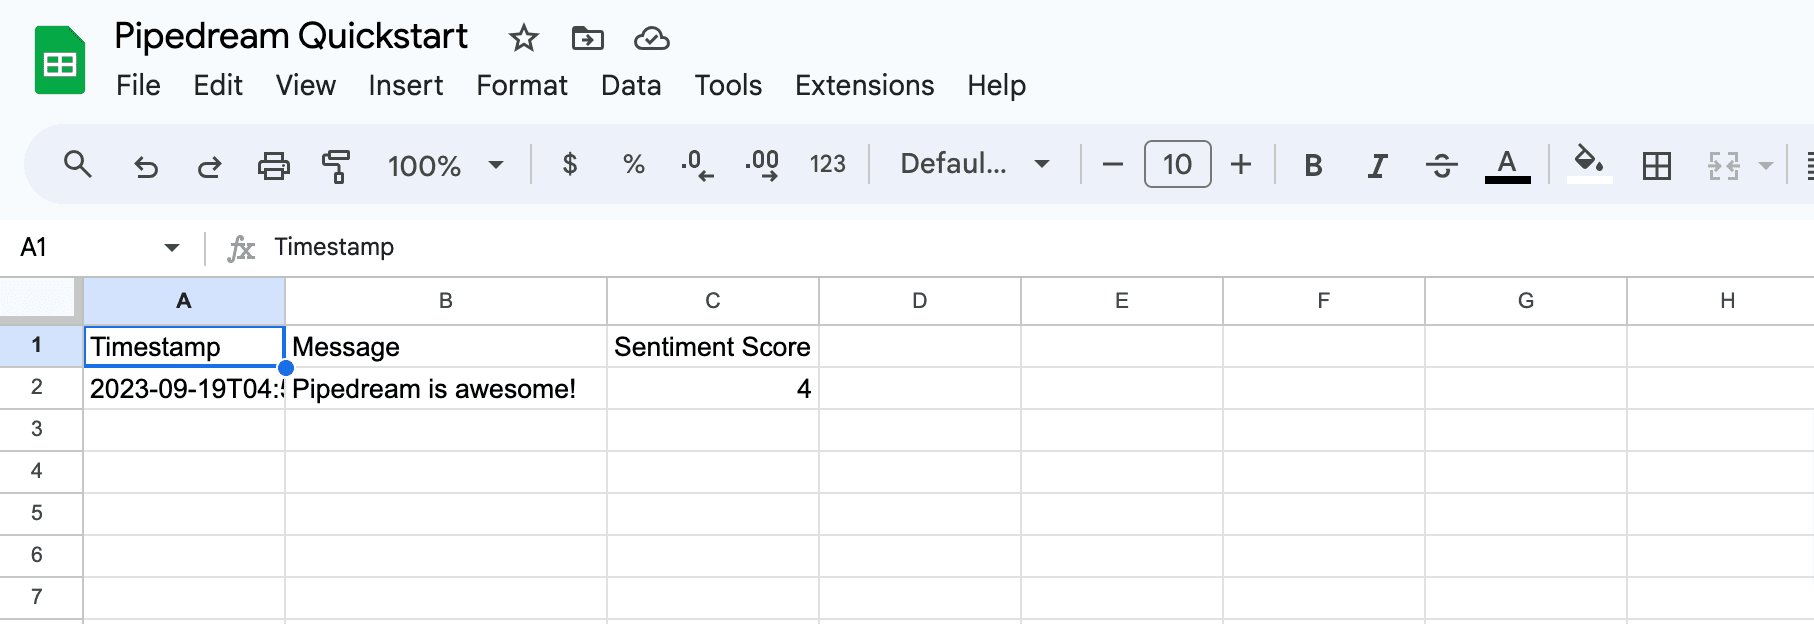
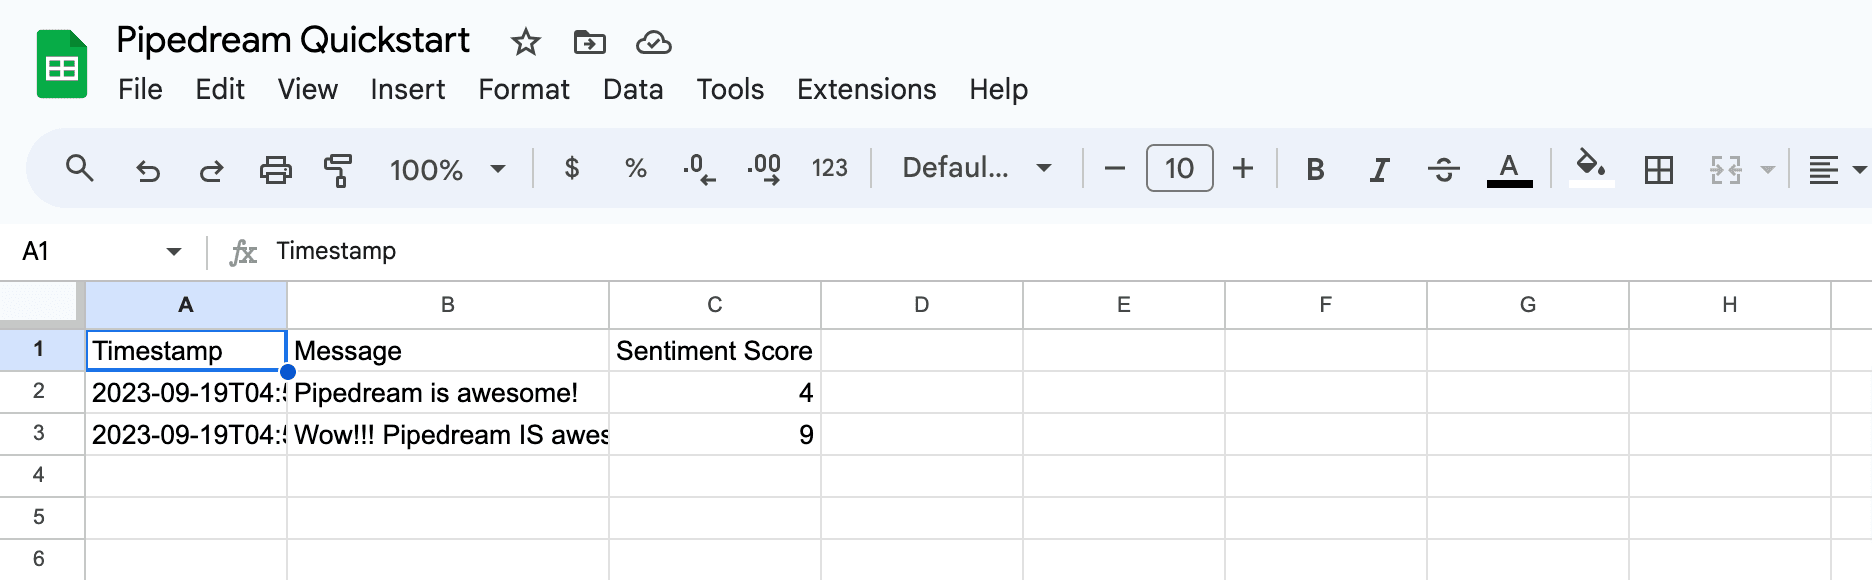
Next, create a Google Sheet and add Timestamp, Message and Sentiment Score to the first row. These labels act as our column headers amd will help us configure the Google Sheets step of the workflow.

Empty Sheet

Next, let's add a step to the workflow to send the data to Google Sheets. First, click + after the 
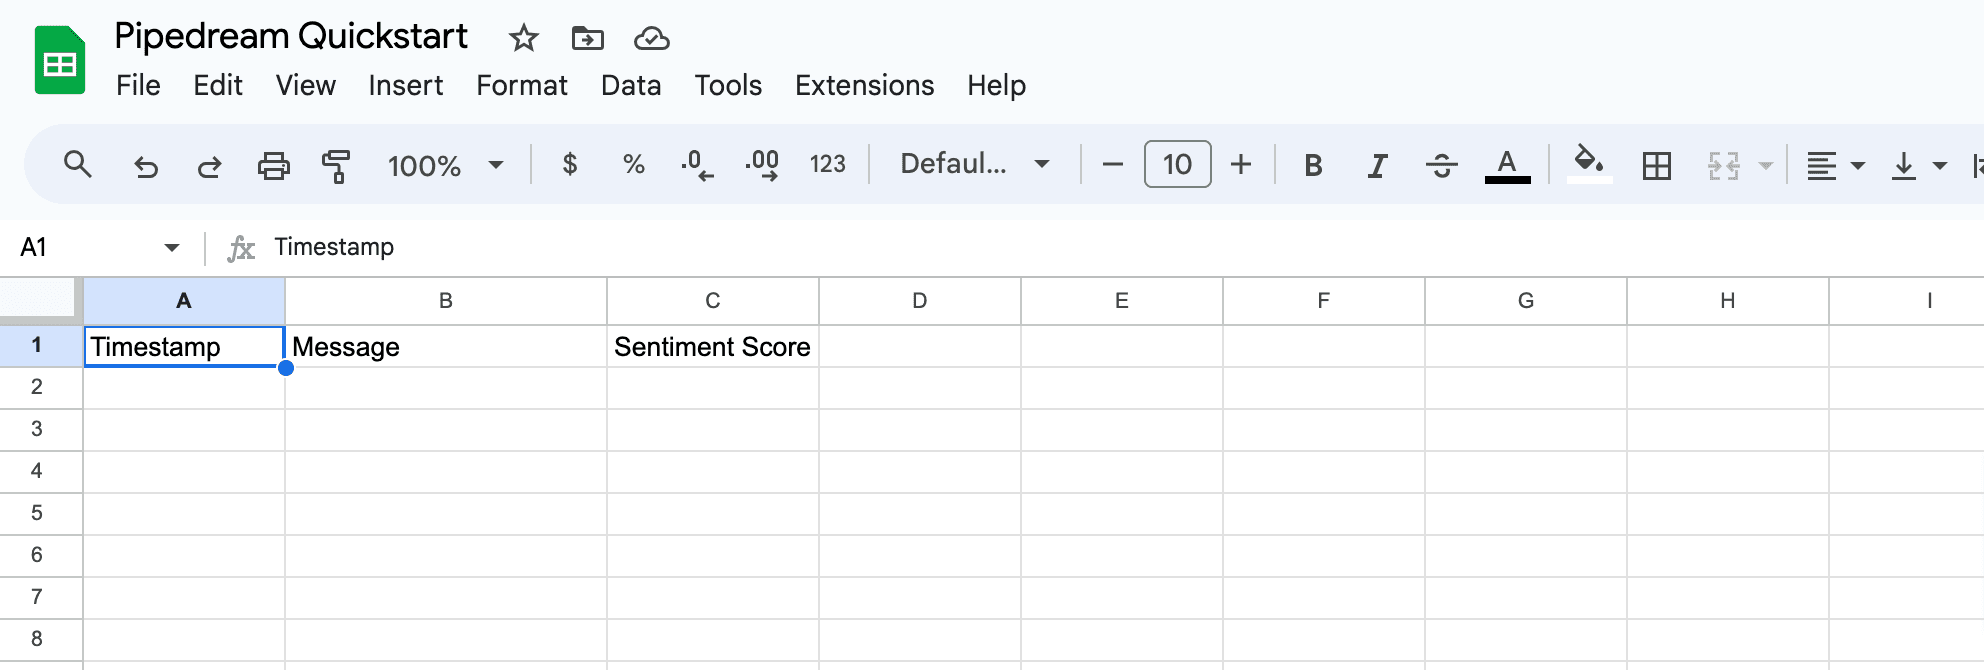
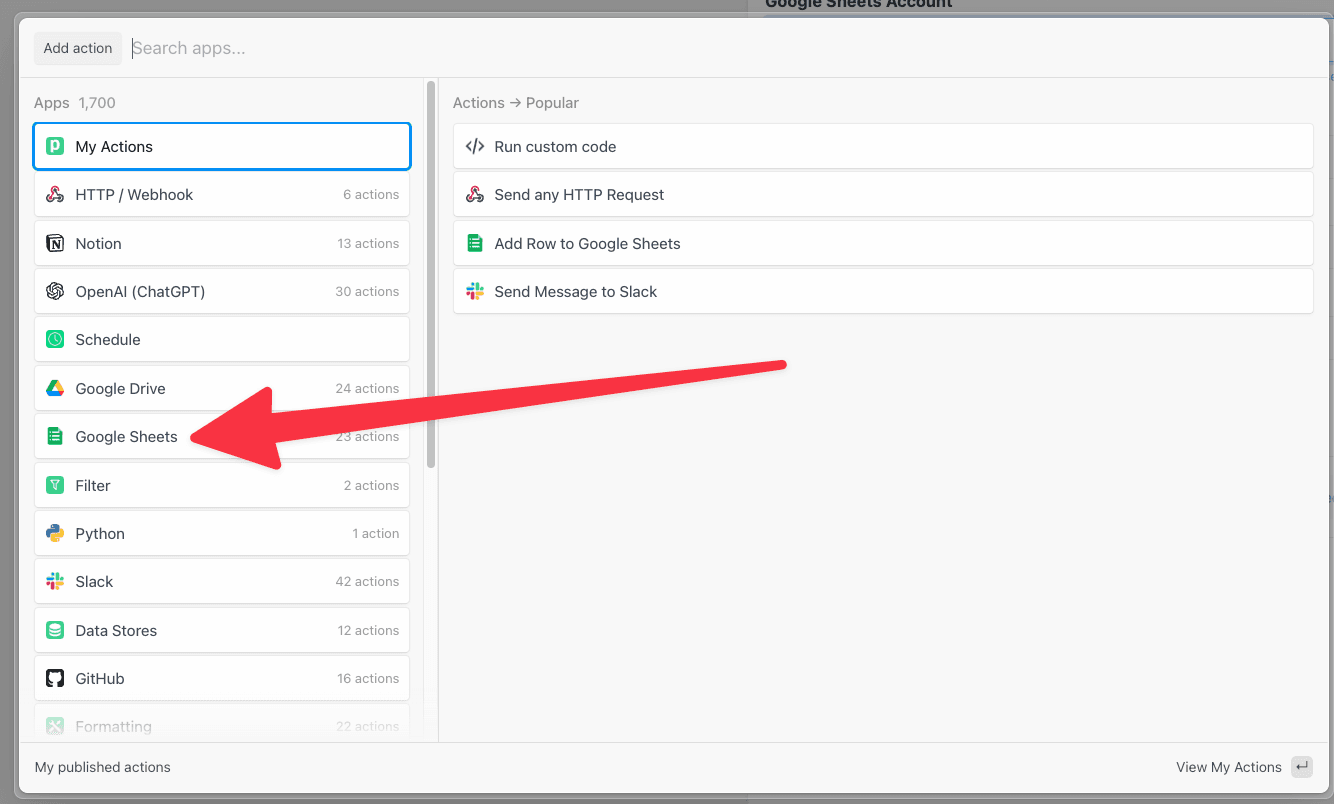
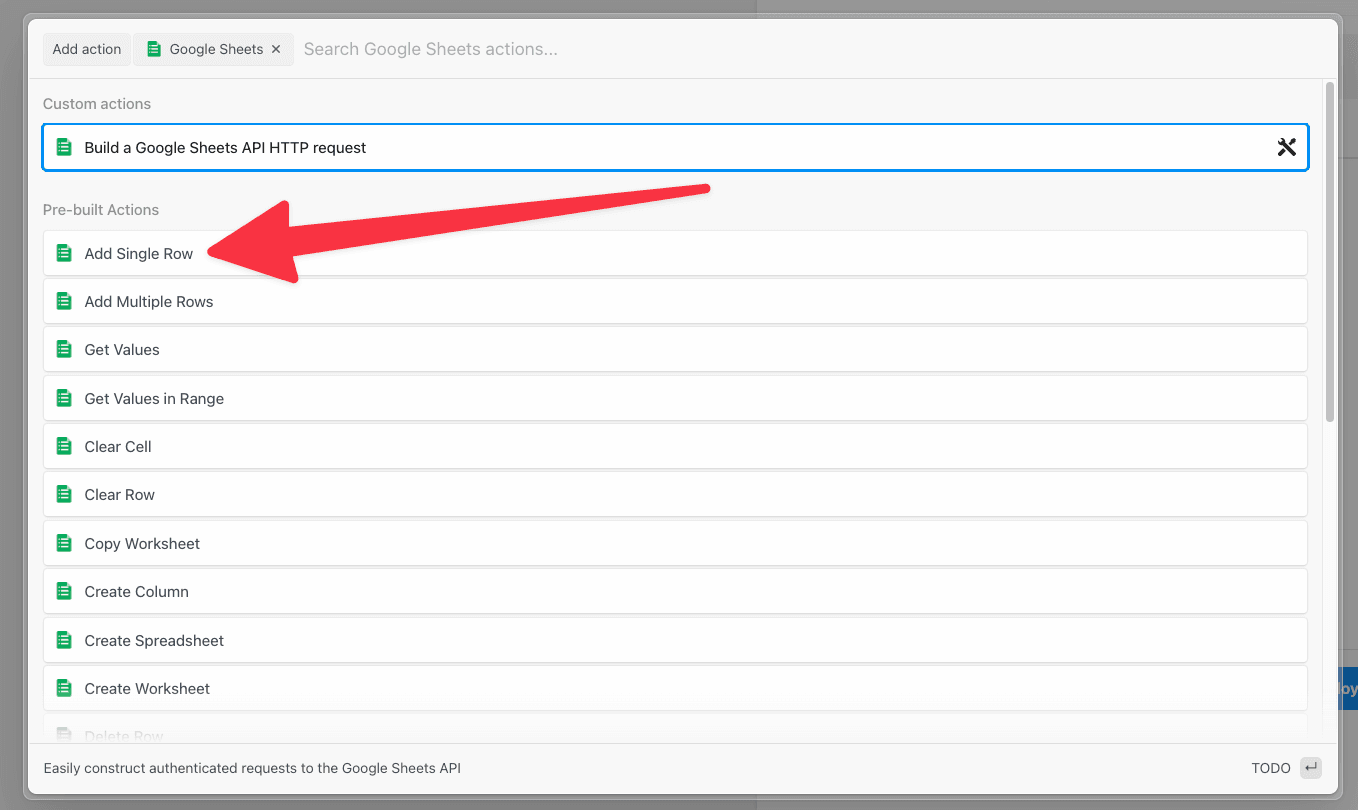
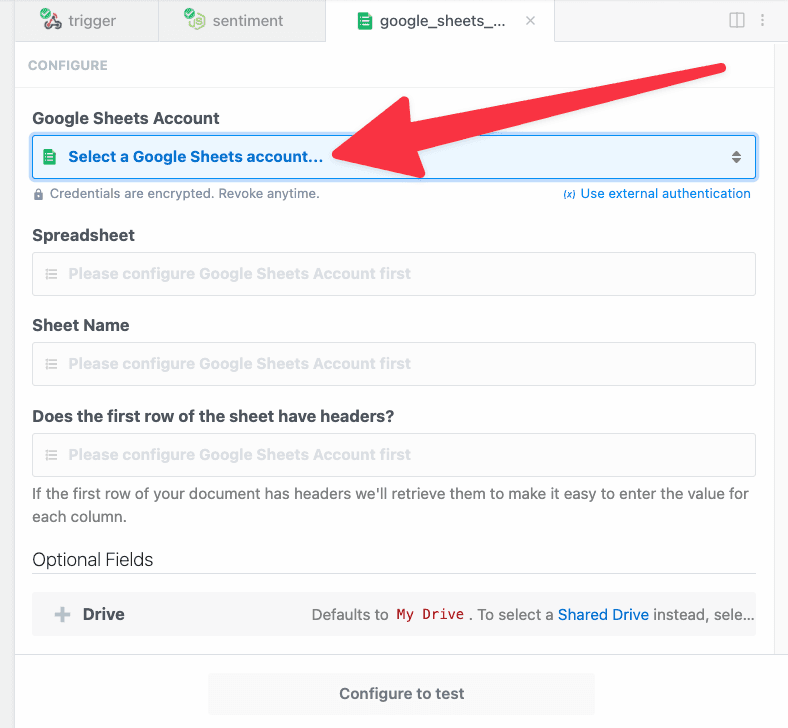
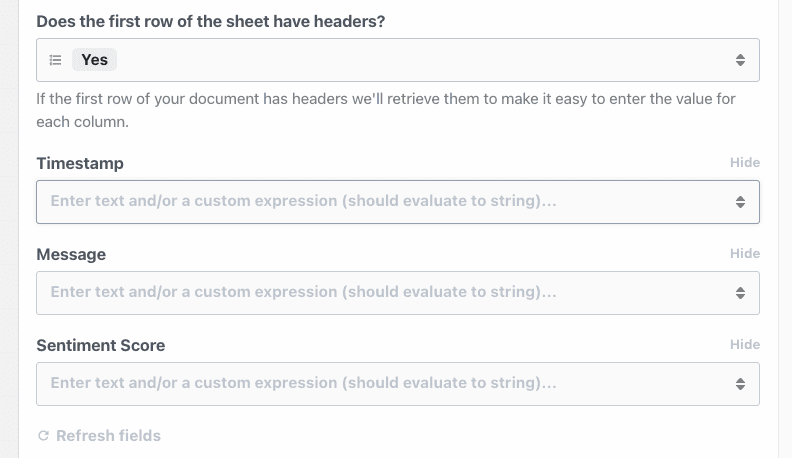
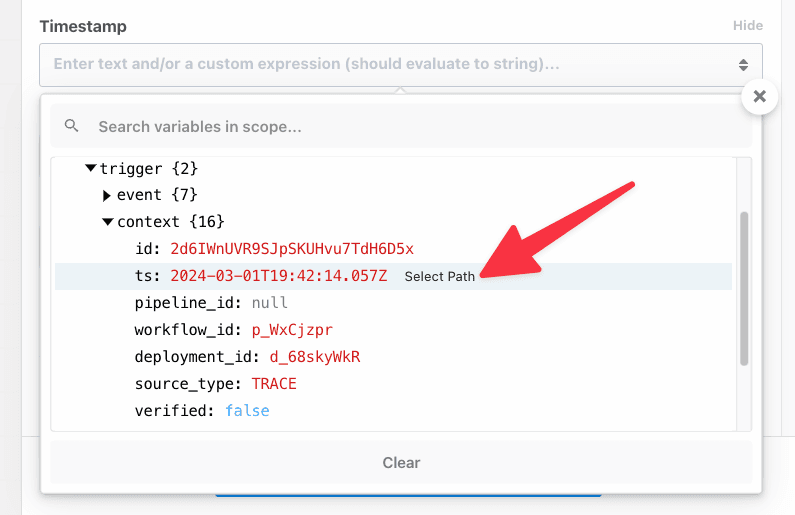
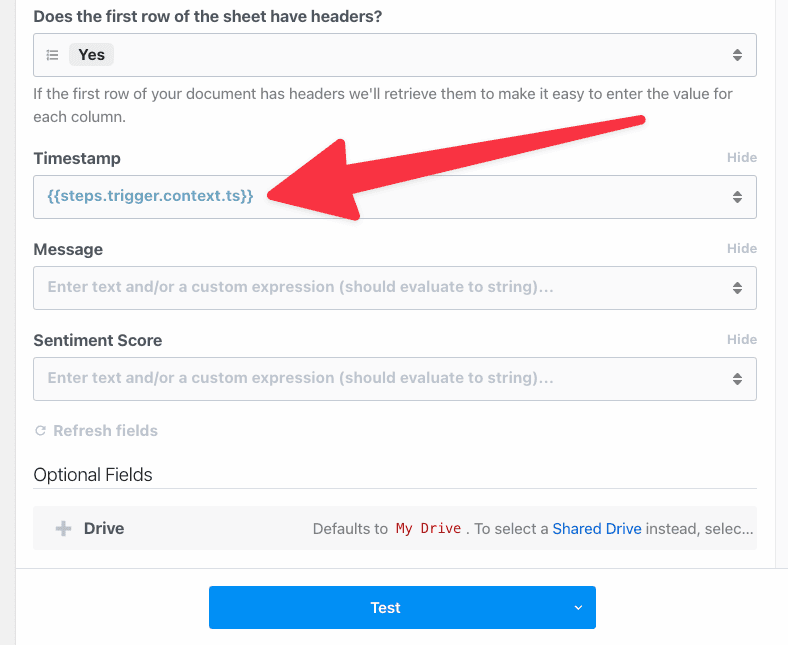
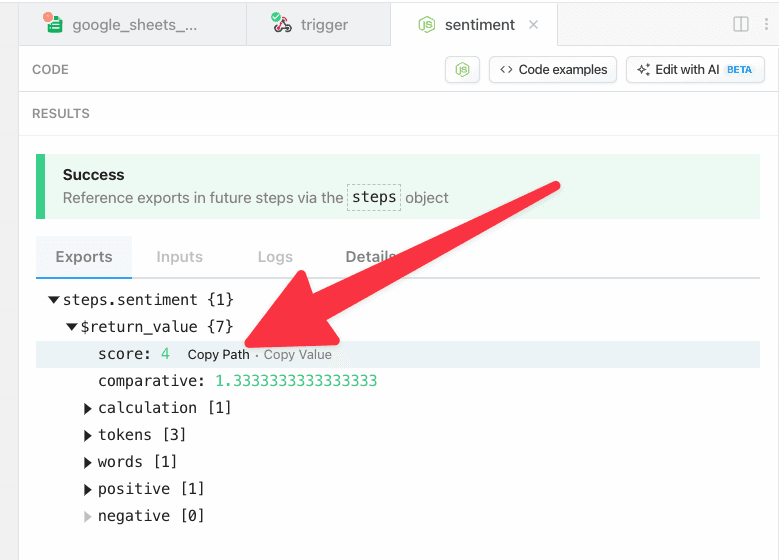
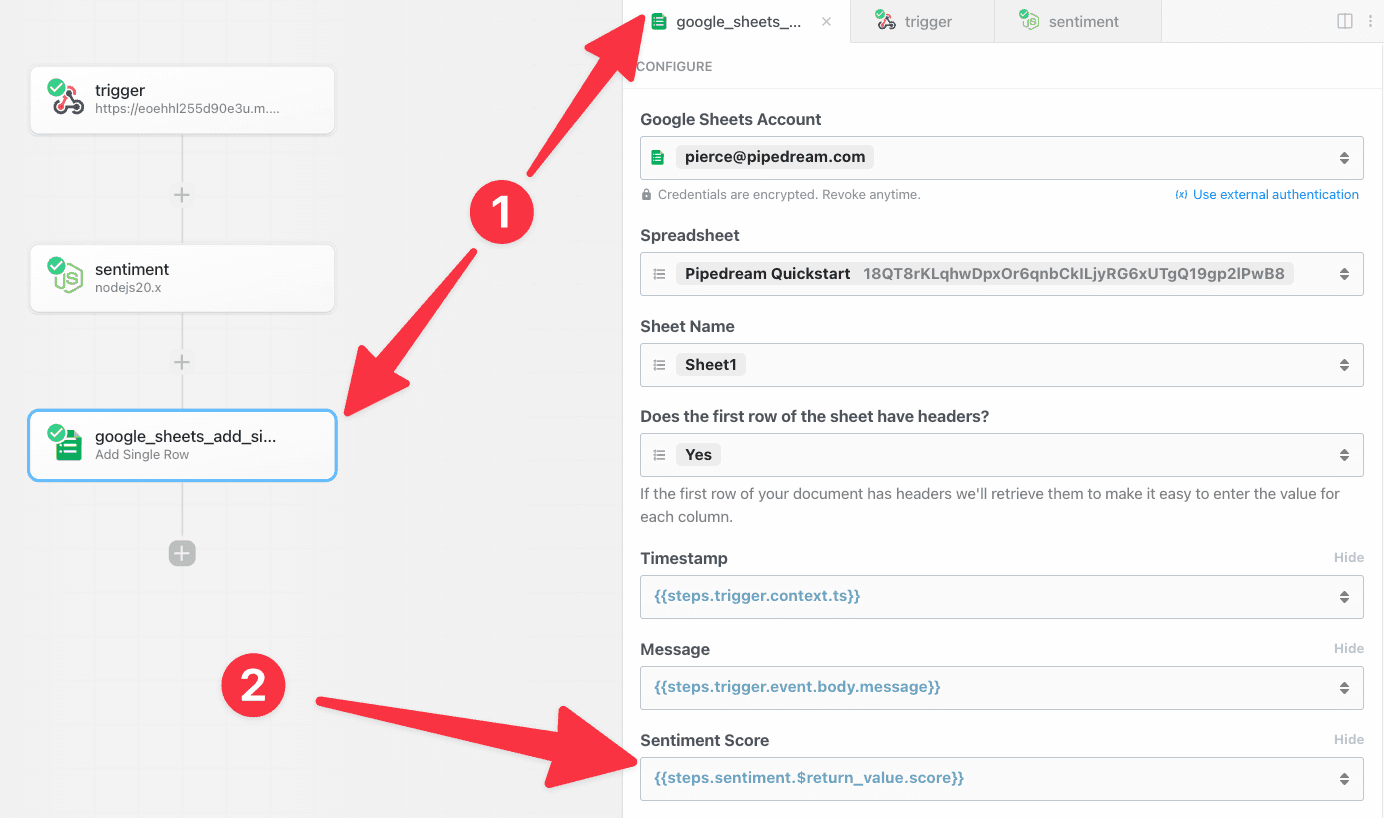
sentiment code step and select the Google Sheets app.

Step Selector - Google Sheets

Then select the Add Single Row action.

Select Add Single Row

Click to connect you Google Sheets account to Pipedream (or select it from the dropdown if you previously connected an account).

Connect Google Sheets

Pipedream will open Google's sign in flow in a new window. Sign in with the account you want to connect.

Google OAuth Window

⚠️

If prompted, you must check the box for Pipedream to See, edit, create and delete all of your Google Drive files. These permissions are required for configure and use the pre-built actions for Google Sheets.

Google Permissions

Learn more about Pipedream's privacy and security policy.

When you complete connecting your Google account, the window should close and you should return to Pipedream. Your connected account should automatically be selected. Next, select your spreadsheet from the dropdown menu:

Select Spreadsheet

Then select the sheet name (the default sheet name in Google Sheets is Sheet1):

Select Sheet Name

Next, select if the spreadsheet has headers in the first row. When a header row exists, Pipedream will automatically retrieve the header labels to make it easy to enter data (if not, you can manually construct an array of values). Since the sheet for this example contains headers, select Yes.

Has headers

Pipedream will retrieve the headers and generate a form to enter data in your sheet:

Additional props

First, let's use the object explorer to pass the timestamp for the workflow event as the value for the first column. This data can be found in the context object on the trigger.

When you click into the Timestamp field, Pipedream will display an object explorer to make it easy to find data. Scroll or search to find the ts key under steps.trigger.context.

Add reference to timestamp

Click select path to insert a reference to steps.trigger.context.ts:

Timestamp added

Next, let's use autocomplete to enter a value for the Message column. First, add double braces {{ — Pipedream will automatically add the closing braces }}.

Then, type steps.trigger.event.body.message between the pairs of braces. Pipedream will provide autocomplete suggestions as you type. Press Tab to use a suggestion and then click . to get suggestions for the next key. The final value in the Message field should be steps.trigger.event.body.message.

Add reference to message

Finally, let's copy a reference from a previous step. Scroll up to the sentiment step and expand the results:

Expand sentiment results

Next, click the Copy Path link next to the score.

Copy path to sentiment score

Paste the value into the Sentiment Score field — Pipedream will automatically wrap the reference in double braces {{ }}.

Paste reference to sentiment score

Now that the configuration is complete, click Test to validate the configuration for this step. When the test is complete, you will see a success message and a summary of the action performed:

Action results

If you load your spreadsheet, you should see the data Pipedream inserted.

Data inserted into sheets

Next, return to your workflow and click Deploy to run your workflow on every trigger event.

Deploy Workflow

When your workflow deploys, you will be redirected to the Inspector. Your workflow is now live.

Deployed workflow

To validate your workflow is working as expected, send a new request to your workflow: You can edit and run the following cURL command:

curl -d '{ "message": "Pipedream is awesome!" }' \
  -H "Content-Type: application/json" \
  YOUR-TRIGGER-URL

The event will instantly appear in the event list. Select it to inspect the workflow execution.

Inspect executions

Finally, you can return to Google Sheets to validate that the new data was automatically inserted.

Live data inserted into sheets

Next Steps

Congratulations! You completed the quickstart and should now understand the basic patterns for workflow development. Next, try creating your own workflows, explore the quickstart for GitHub Sync and check out the rest of the docs!