addevent

AddEvent is the number #1 "Add to calendar" service on the Internet. We handle millions of events every year for businesses around the world

Integrate the addevent API with the HTTP / Webhook API

Setup the addevent API trigger to run a workflow which integrates with the HTTP / Webhook API. Pipedream's integration platform allows you to integrate addevent and HTTP / Webhook remarkably fast. Free for developers.

Create Event with addevent API on New Requests from HTTP / Webhook API
HTTP / Webhook + addevent
 
Try it
Create RSVP For Attendee with addevent API on New Requests from HTTP / Webhook API
HTTP / Webhook + addevent
 
Try it
Create Event with addevent API on New Requests (Payload Only) from HTTP / Webhook API
HTTP / Webhook + addevent
 
Try it
Create RSVP For Attendee with addevent API on New Requests (Payload Only) from HTTP / Webhook API
HTTP / Webhook + addevent
 
Try it
Send any HTTP Request with HTTP / Webhook API on New Calendar Subscriber from addevent API
addevent + HTTP / Webhook
 
Try it
New Requests from the HTTP / Webhook API

Get a URL and emit the full HTTP event on every request (including headers and query parameters). You can also configure the HTTP response code, body, and more.

 
Try it
New Requests (Payload Only) from the HTTP / Webhook API

Get a URL and emit the HTTP body as an event on every request

 
Try it
New Calendar Subscriber from the addevent API

Emit new event when a new subscriber is added to a calendar.

 
Try it
New RSVP Attendee from the addevent API

Emit new event when a new attendee RSVPs to your event

 
Try it
New event when the content of the URL changes. from the HTTP / Webhook API

Emit new event when the content of the URL changes.

 
Try it
Create Event with the addevent API

Creates a new instance of an event. See the documentation

 
Try it
Create RSVP For Attendee with the addevent API

Creates an RSVP for an attendee for a specific event. See the documentation

 
Try it
Send any HTTP Request with the HTTP / Webhook API

Send an HTTP request using any method and URL. Optionally configure query string parameters, headers, and basic auth.

 
Try it
Send GET Request with the HTTP / Webhook API

Send an HTTP GET request to any URL. Optionally configure query string parameters, headers and basic auth.

 
Try it
Send POST Request with the HTTP / Webhook API

Send an HTTP POST request to any URL. Optionally configure query string parameters, headers and basic auth.

 
Try it

Overview of addevent

The AddEvent API enables automation of calendar event management. With it, you can create events, list upcoming events, and manage RSVPs. It’s useful for organizations that schedule multiple events and need to streamline their event-creation process, send out invitations, and track attendee responses. On Pipedream, you can build workflows that trigger on various events to connect AddEvent with other apps, creating a seamless event-management experience.

Connect addevent

1
2
3
4
5
6
7
8
9
10
11
12
13
14
15
16
17
18
import { axios } from "@pipedream/platform"
export default defineComponent({
  props: {
    addevent: {
      type: "app",
      app: "addevent",
    }
  },
  async run({steps, $}) {
    return await axios($, {
      url: `https://www.addevent.com/api/v1/me/calendars/list/`,
      params: {
        token: `${this.addevent.$auth.api_token}`,
      },
    })
  },
})

Overview of HTTP / Webhook

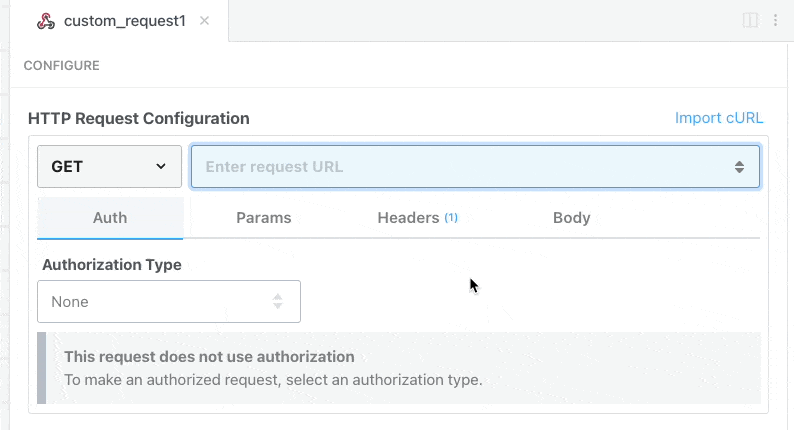
Build, test, and send HTTP requests without code using your Pipedream workflows. The HTTP / Webhook action is a tool to build HTTP requests with a Postman-like graphical interface.

An interface for configuring an HTTP request within Pipedream's workflow system. The current selection is a GET request with fields for the request URL, authorization type (set to 'None' with a note explaining "This request does not use authorization"), parameters, headers (with a count of 1, though the detail is not visible), and body. Below the main configuration area is an option to "Include Response Headers," and a button labeled "Configure to test." The overall layout suggests a user-friendly, no-code approach to setting up custom HTTP requests.

Point and click HTTP requests

Define the target URL, HTTP verb, headers, query parameters, and payload body without writing custom code.

A screenshot of Pipedream's HTTP Request Configuration interface with a GET request type selected. The request URL is set to 'https://api.openai.com/v1/models'. The 'Auth' tab is highlighted, indicating that authentication is required for this request. In the headers section, there are two headers configured: 'User-Agent' is set to 'pipedream/1', and 'Authorization' is set to 'Bearer {{openai_api_key}}', showing how the OpenAI account's API key is dynamically inserted into the headers to handle authentication automatically.

Here's an example workflow that uses the HTTP / Webhook action to send an authenticated API request to OpenAI.

Focus on integrating, not authenticating

This action can also use your connected accounts with third-party APIs. Selecting an integrated app will automatically update the request’s headers to authenticate with the app properly, and even inject your token dynamically.

This GIF depicts the process of selecting an application within Pipedream's HTTP Request Builder. A user hovers the cursor over the 'Auth' tab and clicks on a dropdown menu labeled 'Authorization Type', then scrolls through a list of applications to choose from for authorization purposes. The interface provides a streamlined and intuitive method for users to authenticate their HTTP requests by selecting the relevant app in the configuration settings.

Pipedream integrates with thousands of APIs, but if you can’t find a Pipedream integration simply use Environment Variables in your request headers to authenticate with.

Compatible with no code actions or Node.js and Python

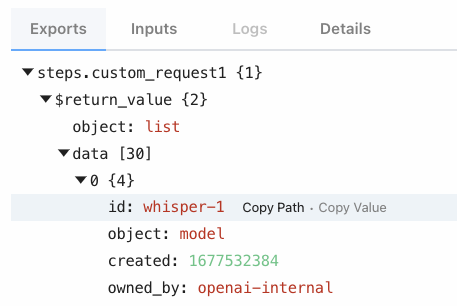
The HTTP/Webhook action exports HTTP response data for use in subsequent workflow steps, enabling easy data transformation, further API calls, database storage, and more.

Response data is available for both coded (Node.js, Python) and no-code steps within your workflow.

An image showing the Pipedream interface where the HTTP Webhook action has returned response data as a step export. The interface highlights a structured view of the returned data with collapsible sections. We can see 'steps.custom_request1' expanded to show 'return_value' which is an object containing a 'list'. Inside the list, an item 'data' is expanded to reveal an element with an 'id' of 'whisper-1', indicating a model created by and owned by 'openai-internal'. Options to 'Copy Path' and 'Copy Value' are available for easy access to the data points.

Connect HTTP / Webhook

1
2
3
4
5
6
7
8
9
10
11
12
13
// To use any npm package on Pipedream, just import it
import axios from "axios"

export default defineComponent({
  async run({ steps, $ }) {
    const { data } = await axios({
      method: "GET",
      url: "https://pokeapi.co/api/v2/pokemon/charizard",
    })
    return data.species
  },
})

Community Posts

A Look at Pipedream
A Look at Pipedream
I'm going to build a workflow that will search Twitter every hour for a keyword. It will take the results, format them nicely, and then email it.
Building a Traffic-Based Workflow in Pipedream
Normally I don't like to blog about stuff that isn't generally available to all, but as it will be available sometime soon, I decided to go ahead anyway. And I built something really cool I want to share so that's another reason to talk about this now!